
Today is the very first day since school started three weeks ago that I get to spend the entire day at home. No urgent errands to run, no doctor or dentist appointments, no city soccer obligations. No one needing me. It feels fabulous!!
I am finally going to tackle some of the projects that have been lying around incomplete for at least two months. It should be a glorious day! I’m thinking it might be a good idea not to answer the phone. 😉
I am actually sharing a tutorial today. I know, it’s been ages. I enjoy making tutorials, but they really are a ton of work. Hopefully this one makes sense, because I forgot to take pictures of a couple of the steps. Feel free to contact me if you have any questions.
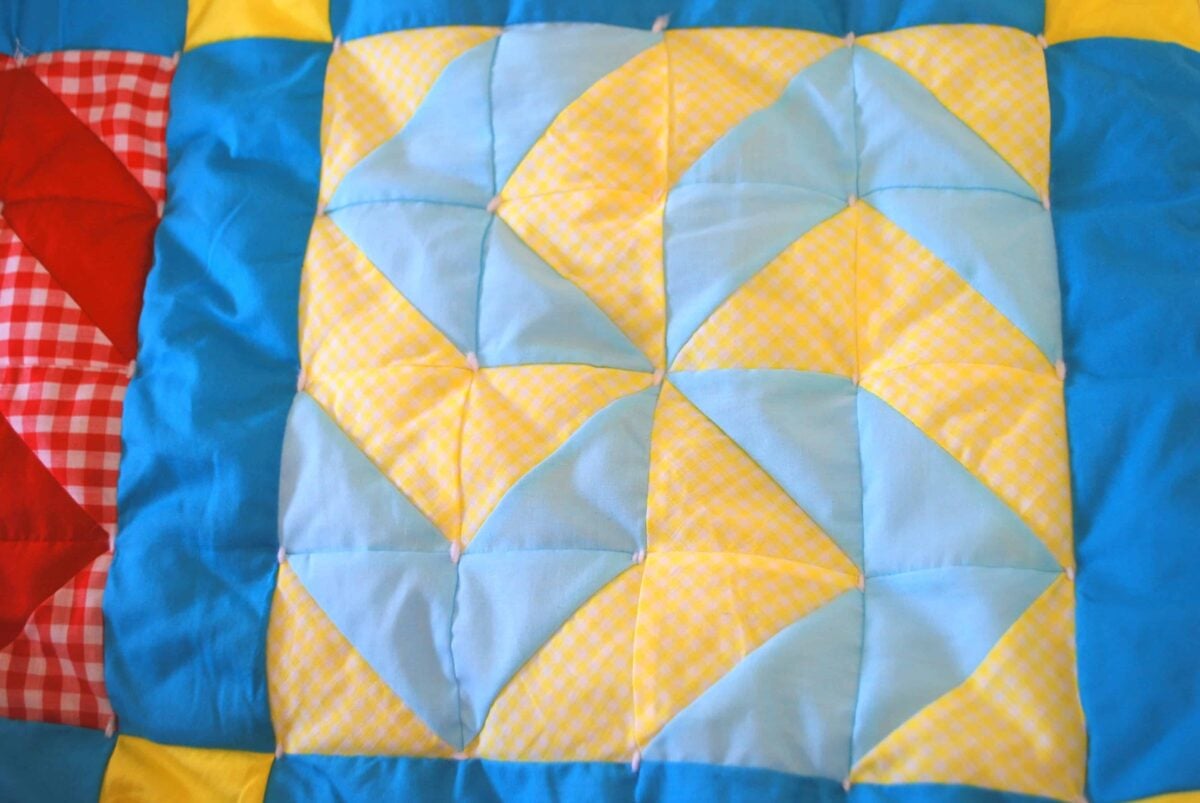
I am going to show you how to tie a quilt without the annoying strings of yarn on the outside. My mom taught me this method when I was a teenager, and I have tied all my quilts this way since then. And I’ve tied a lot of quilts. I had a grandma that loved piecing quilts, so every year for Christmas, she gave us a new quilt top. I still have a box full that I need to tie. This is one of the quilt tops she pieced. Some of the fabrics are a little crazy, but I love the pattern. She was an amazing seamstress!!
Yarn Inside Quilting Tutorial
OK, here we go. First off, you will need a really long needle. Mine are doll needles and they are about 5″ long. You can usually find them at fabric or craft stores.
1-Attach your fabric and batting to the quilt stand like you normally would. But instead of poking your needle from top to bottom, you are going to come in from the side. I come in right between the top layer and the batting. MAKE SURE YOUR PIECE OF YARN IS LONG ENOUGH TO REACH FROM ONE SIDE OF THE QUILT TO THE OTHER, WITH AN EXTRA 18″ OR SO!!
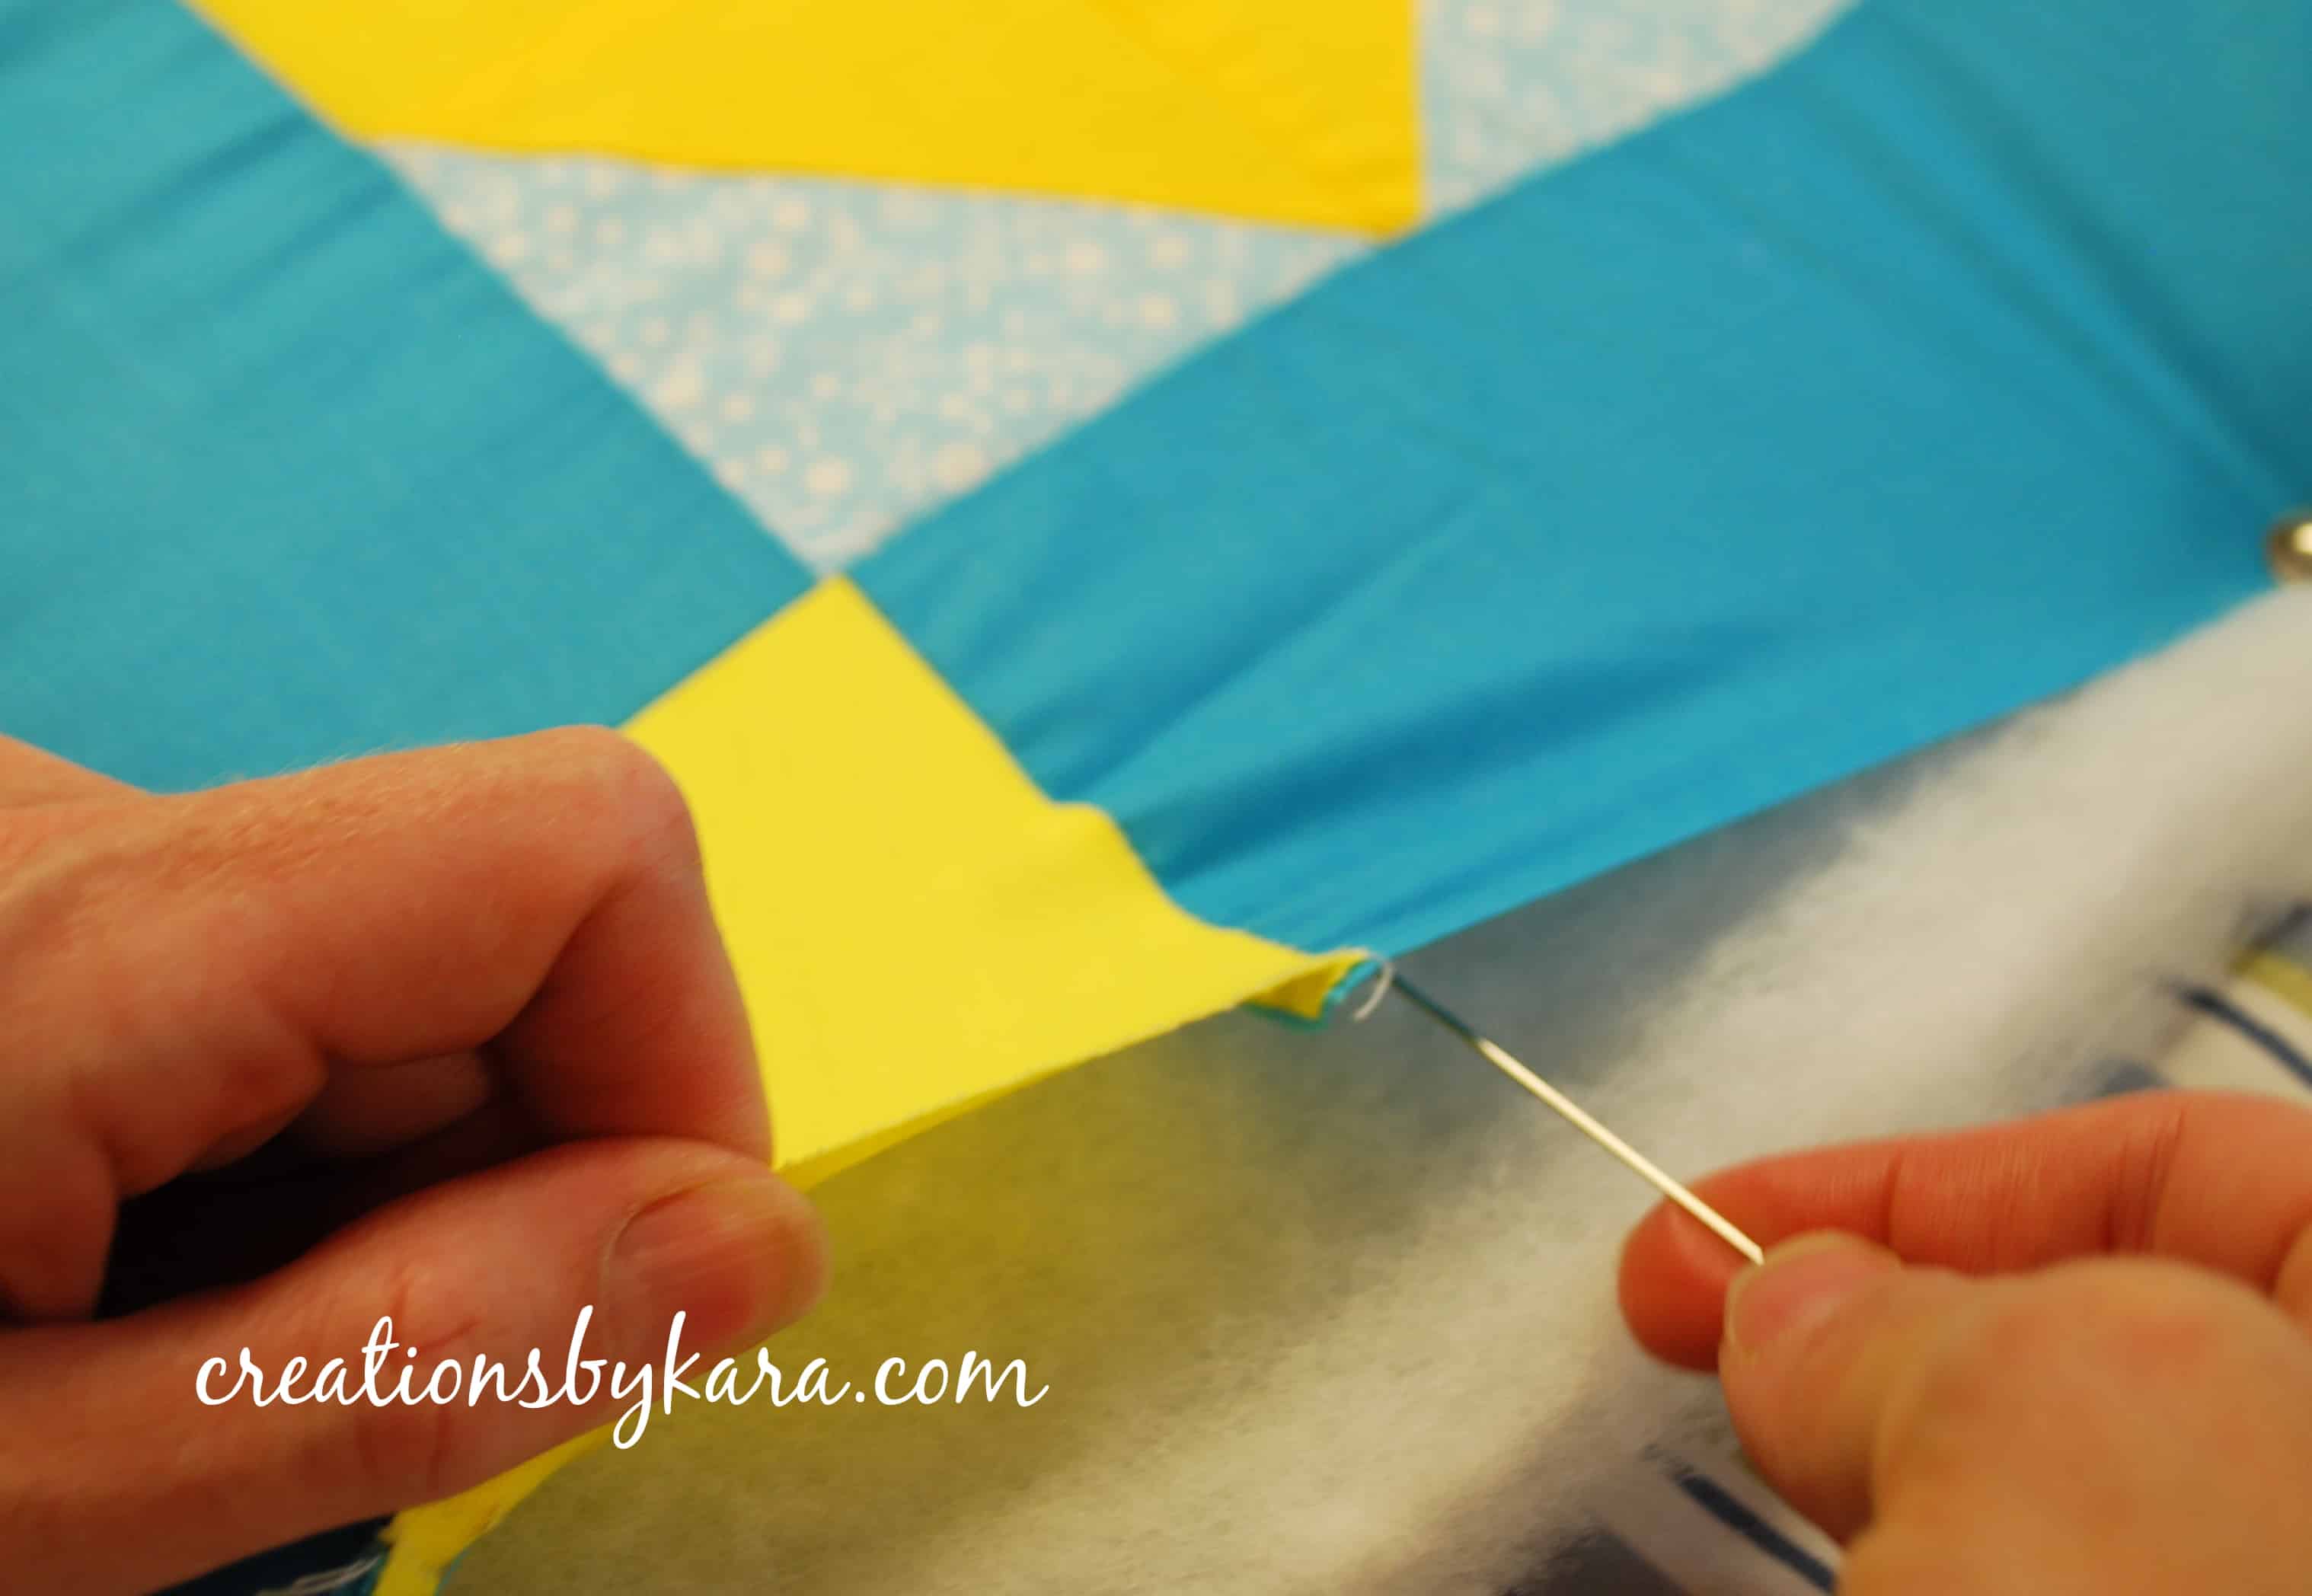 2-Now you push the needle up through the fabric in the place you want your stitch to be. This makes hole #1.
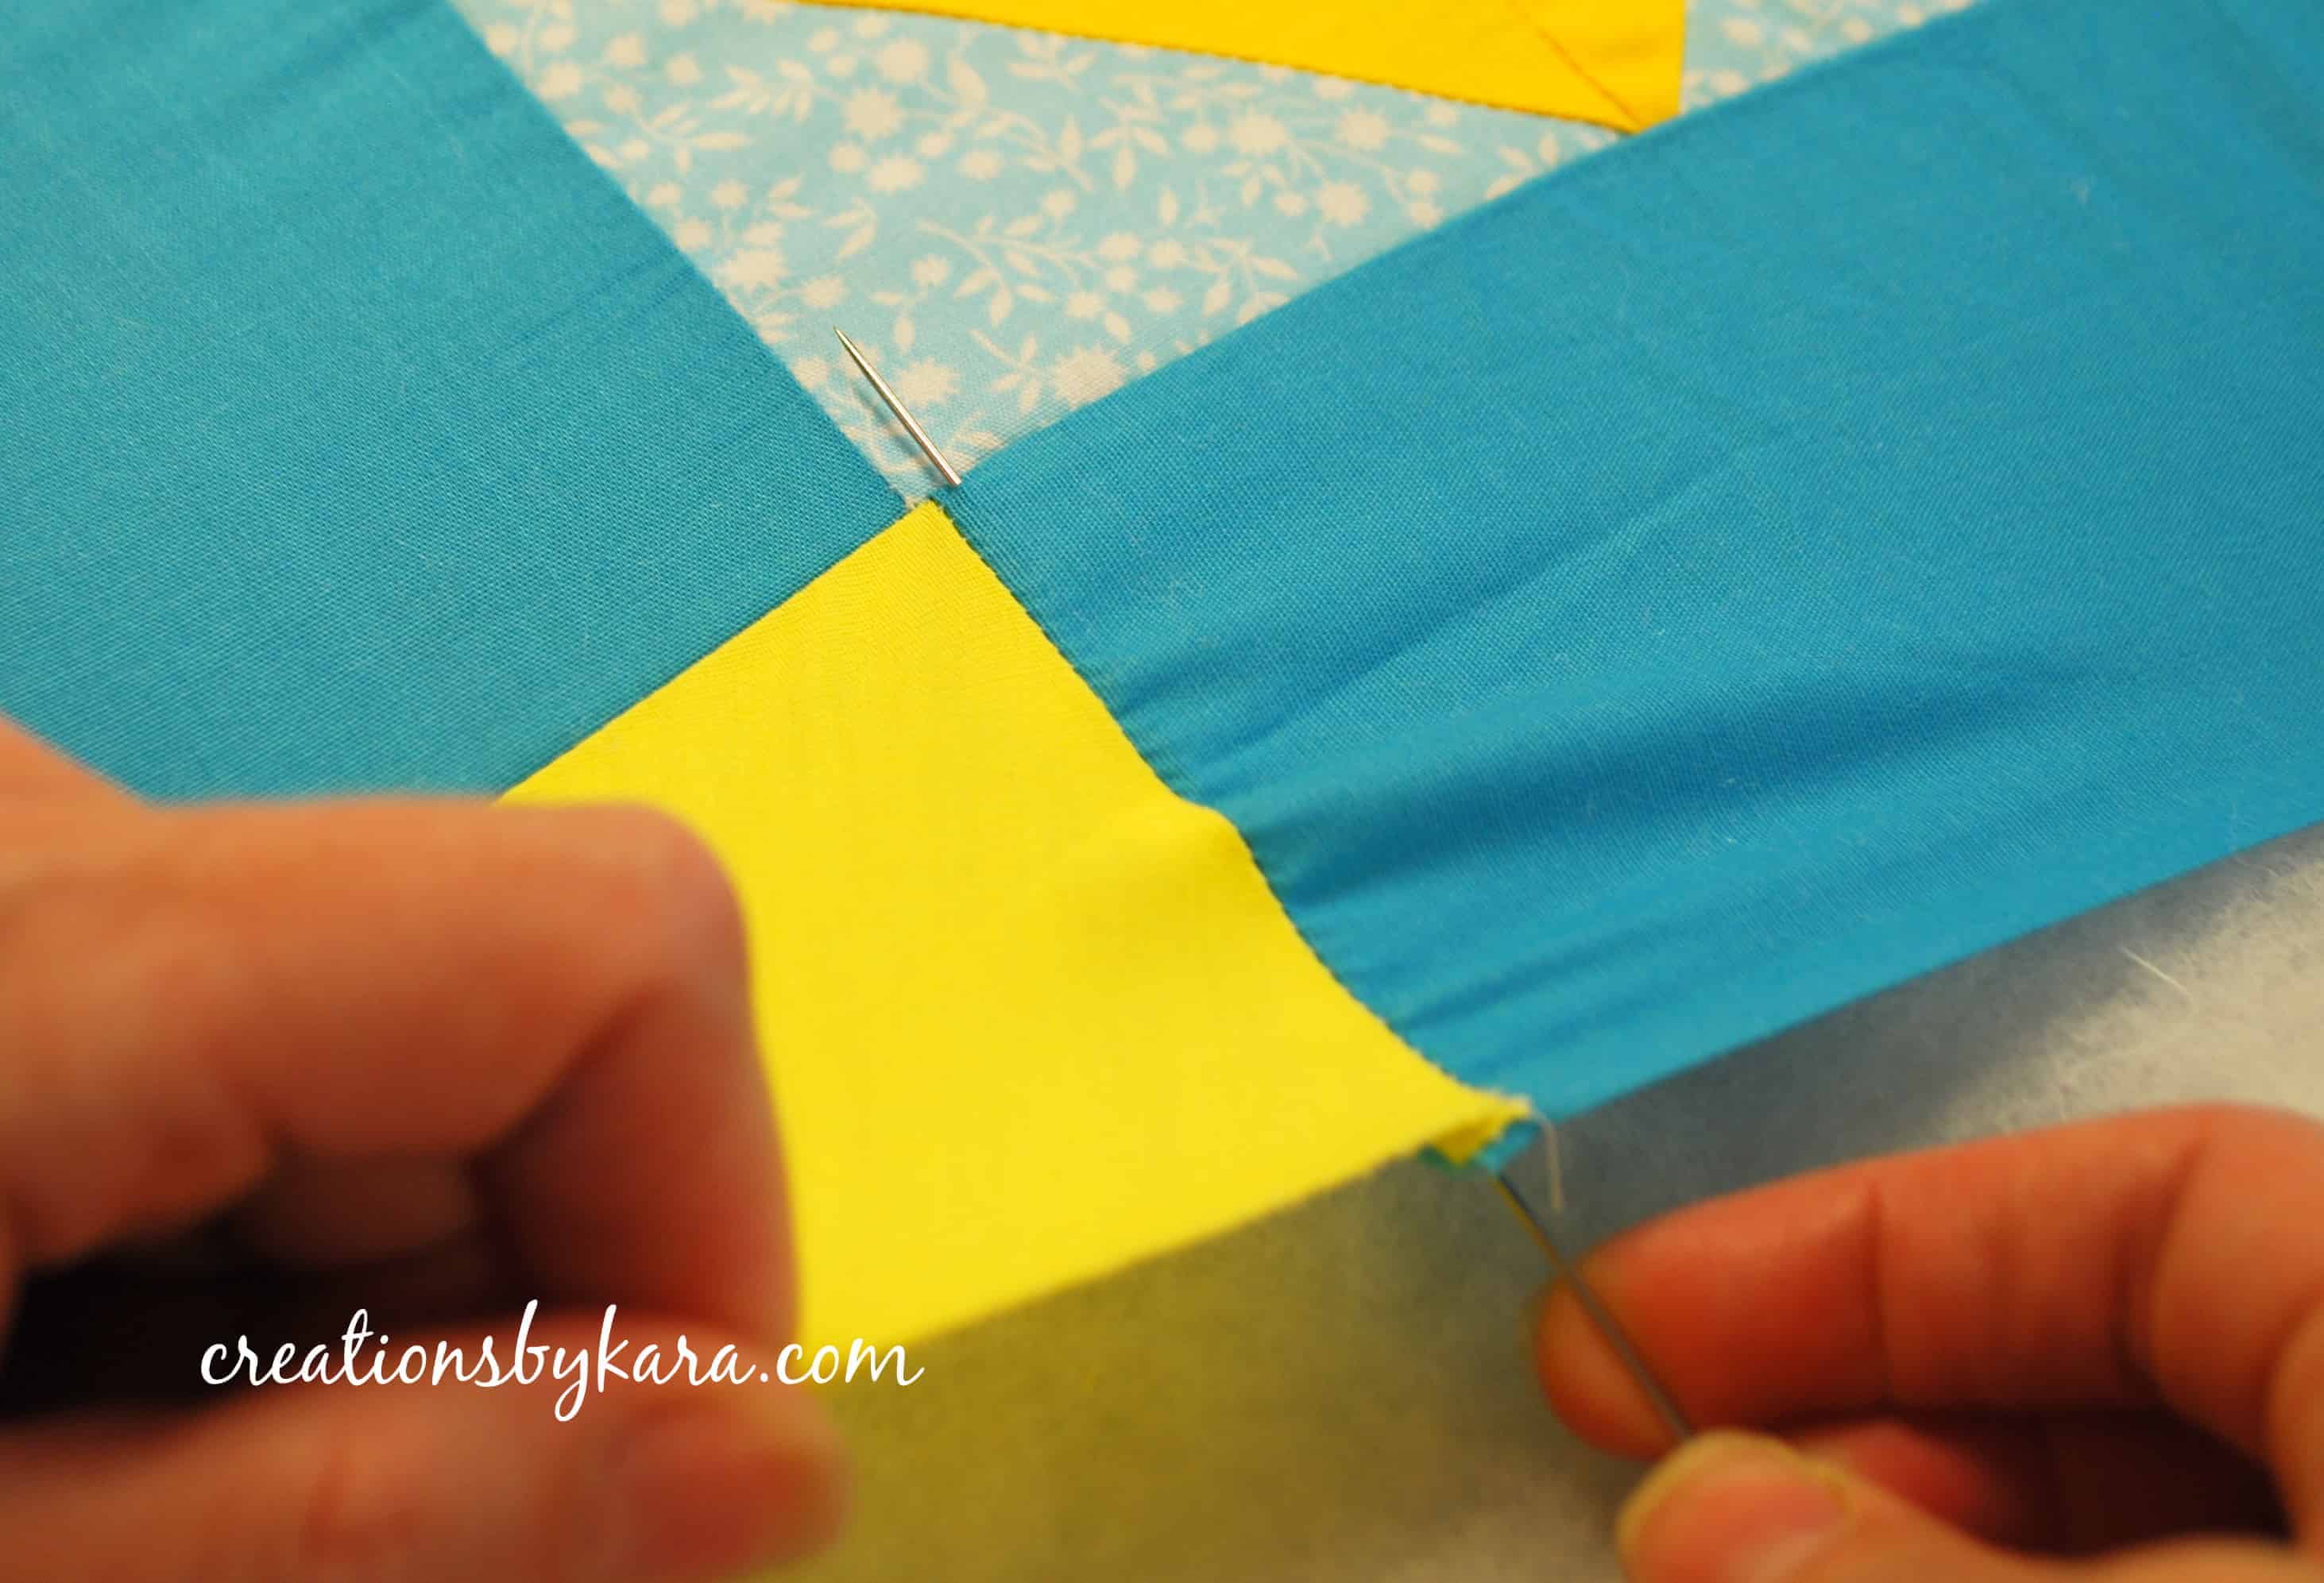 3-Now pull the yarn through, making sure to leave a tail at the side.
 It should look like this when you are done:
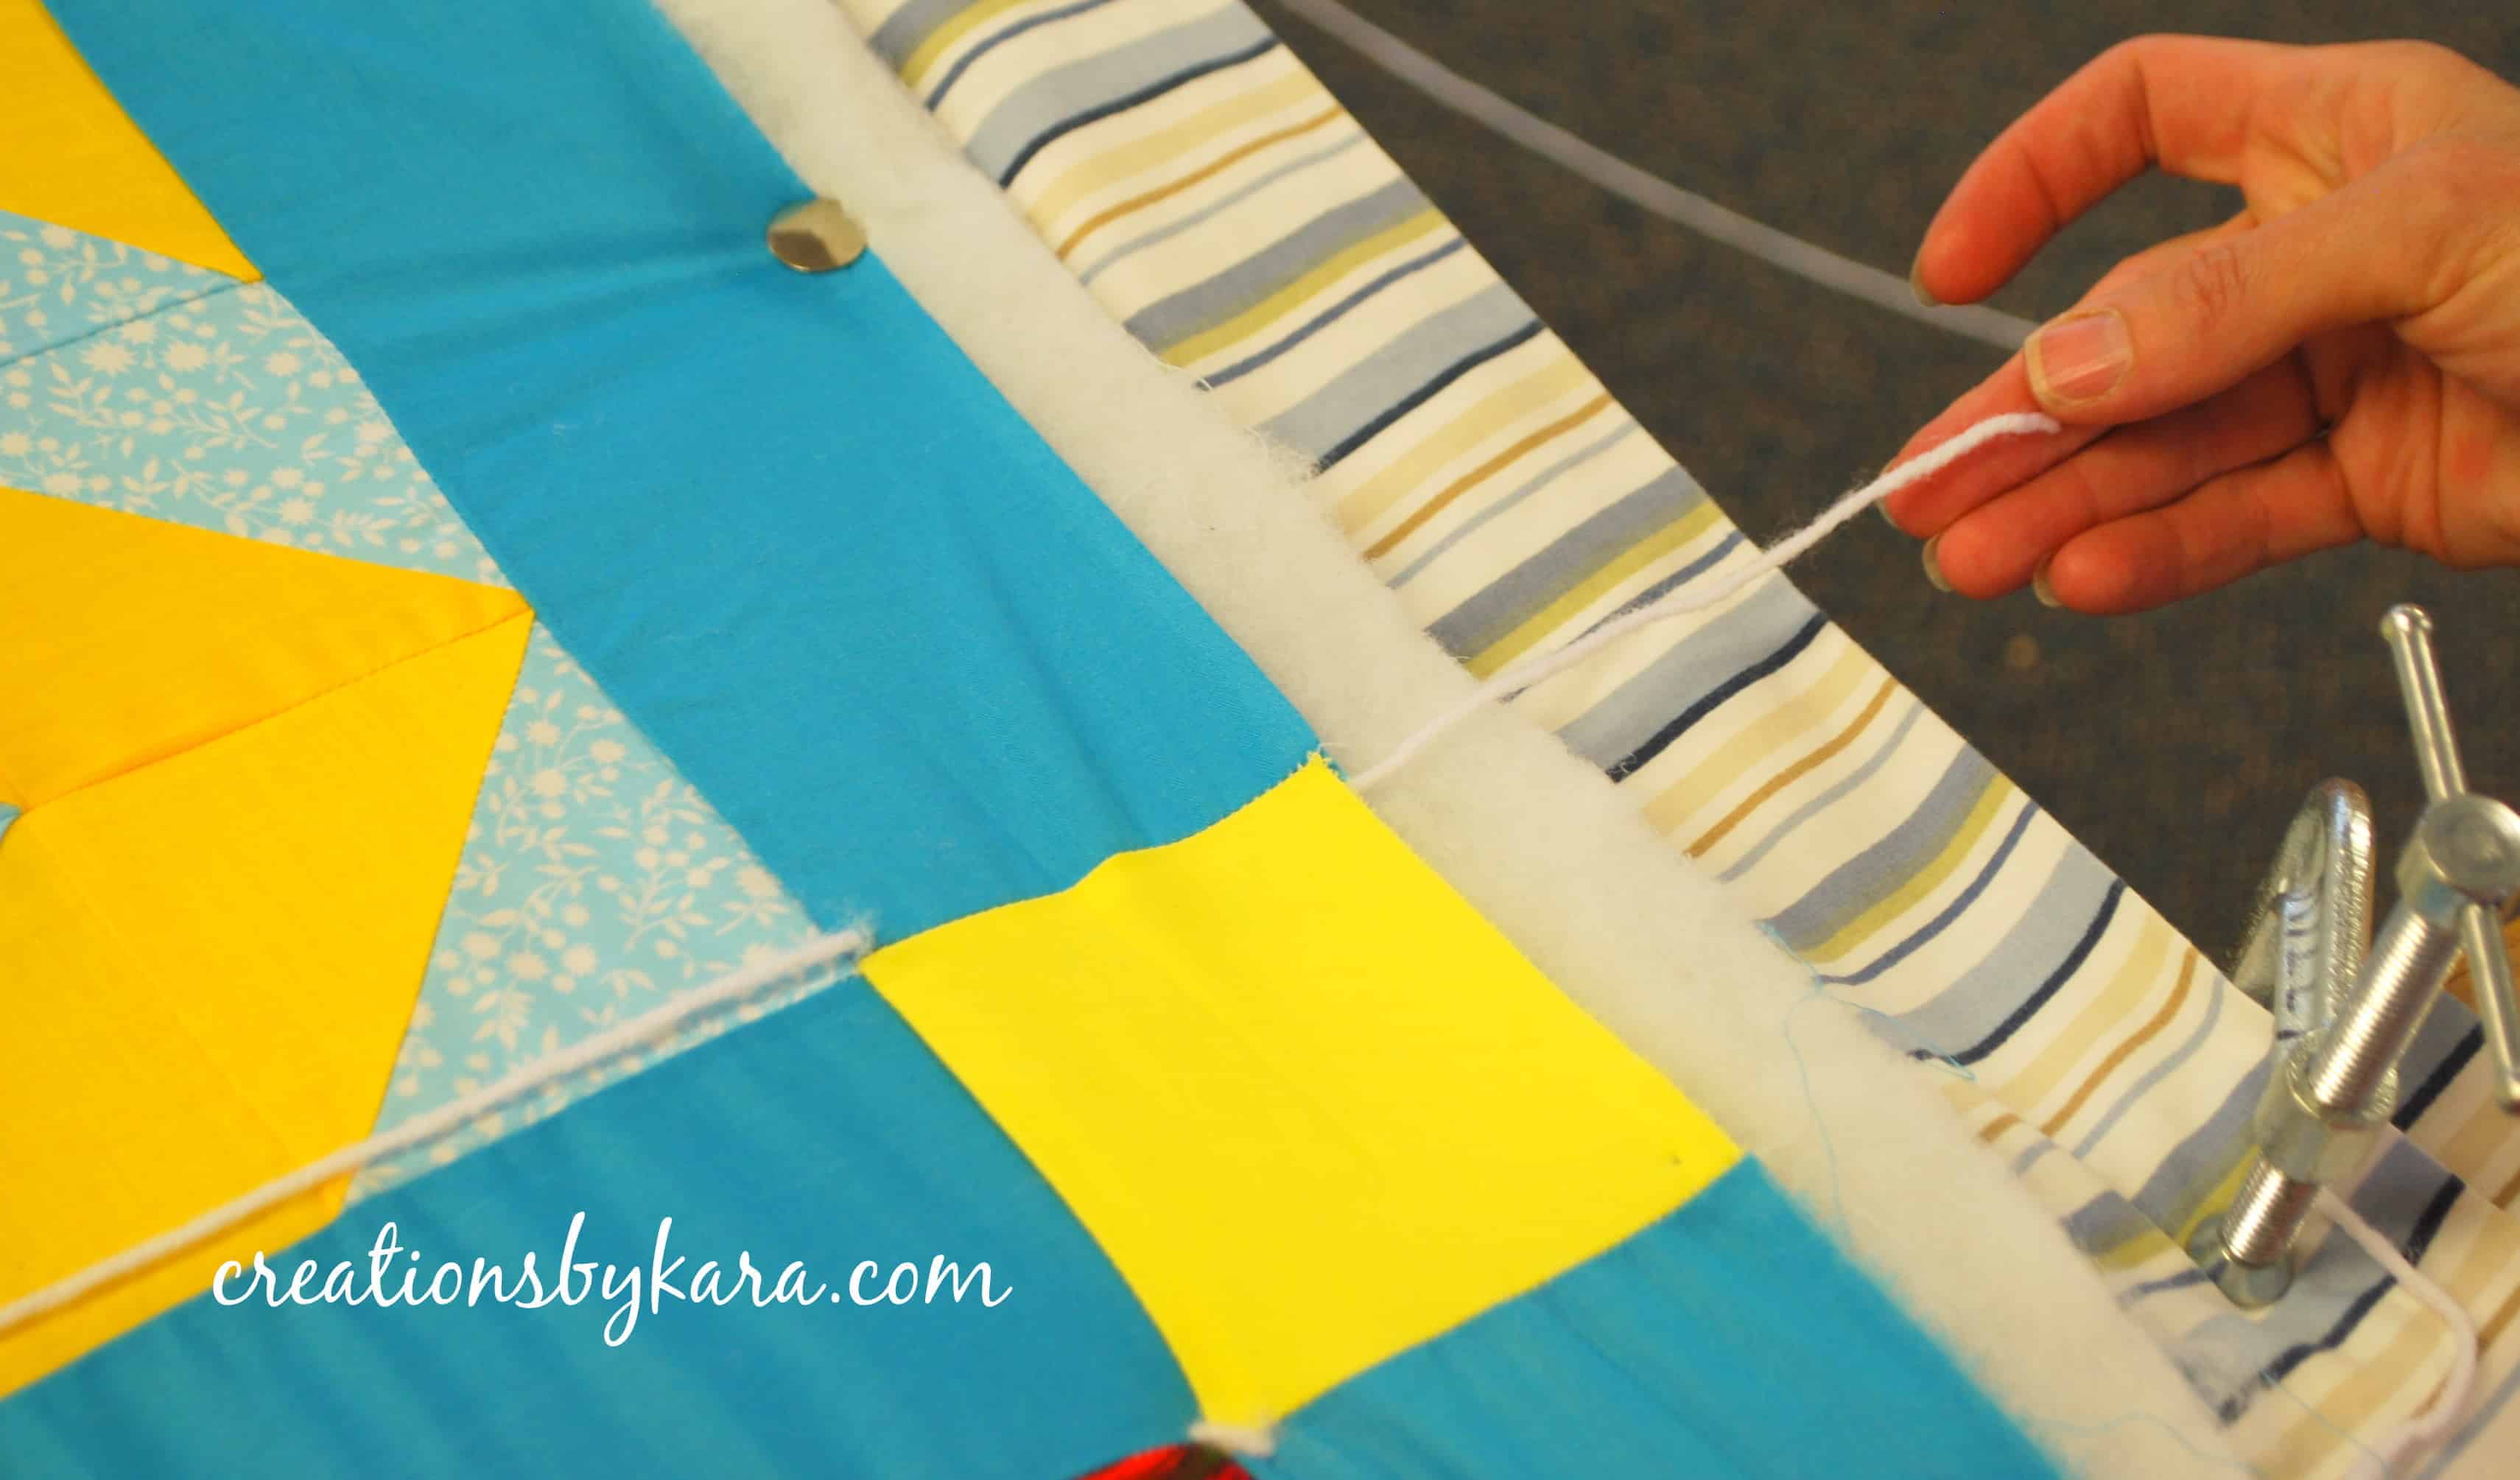 4-Now make your stitch by poking the needle back down about 1/4″ away from where you came up. This makes hole #2. Pull the yarn all the way through to the bottom.
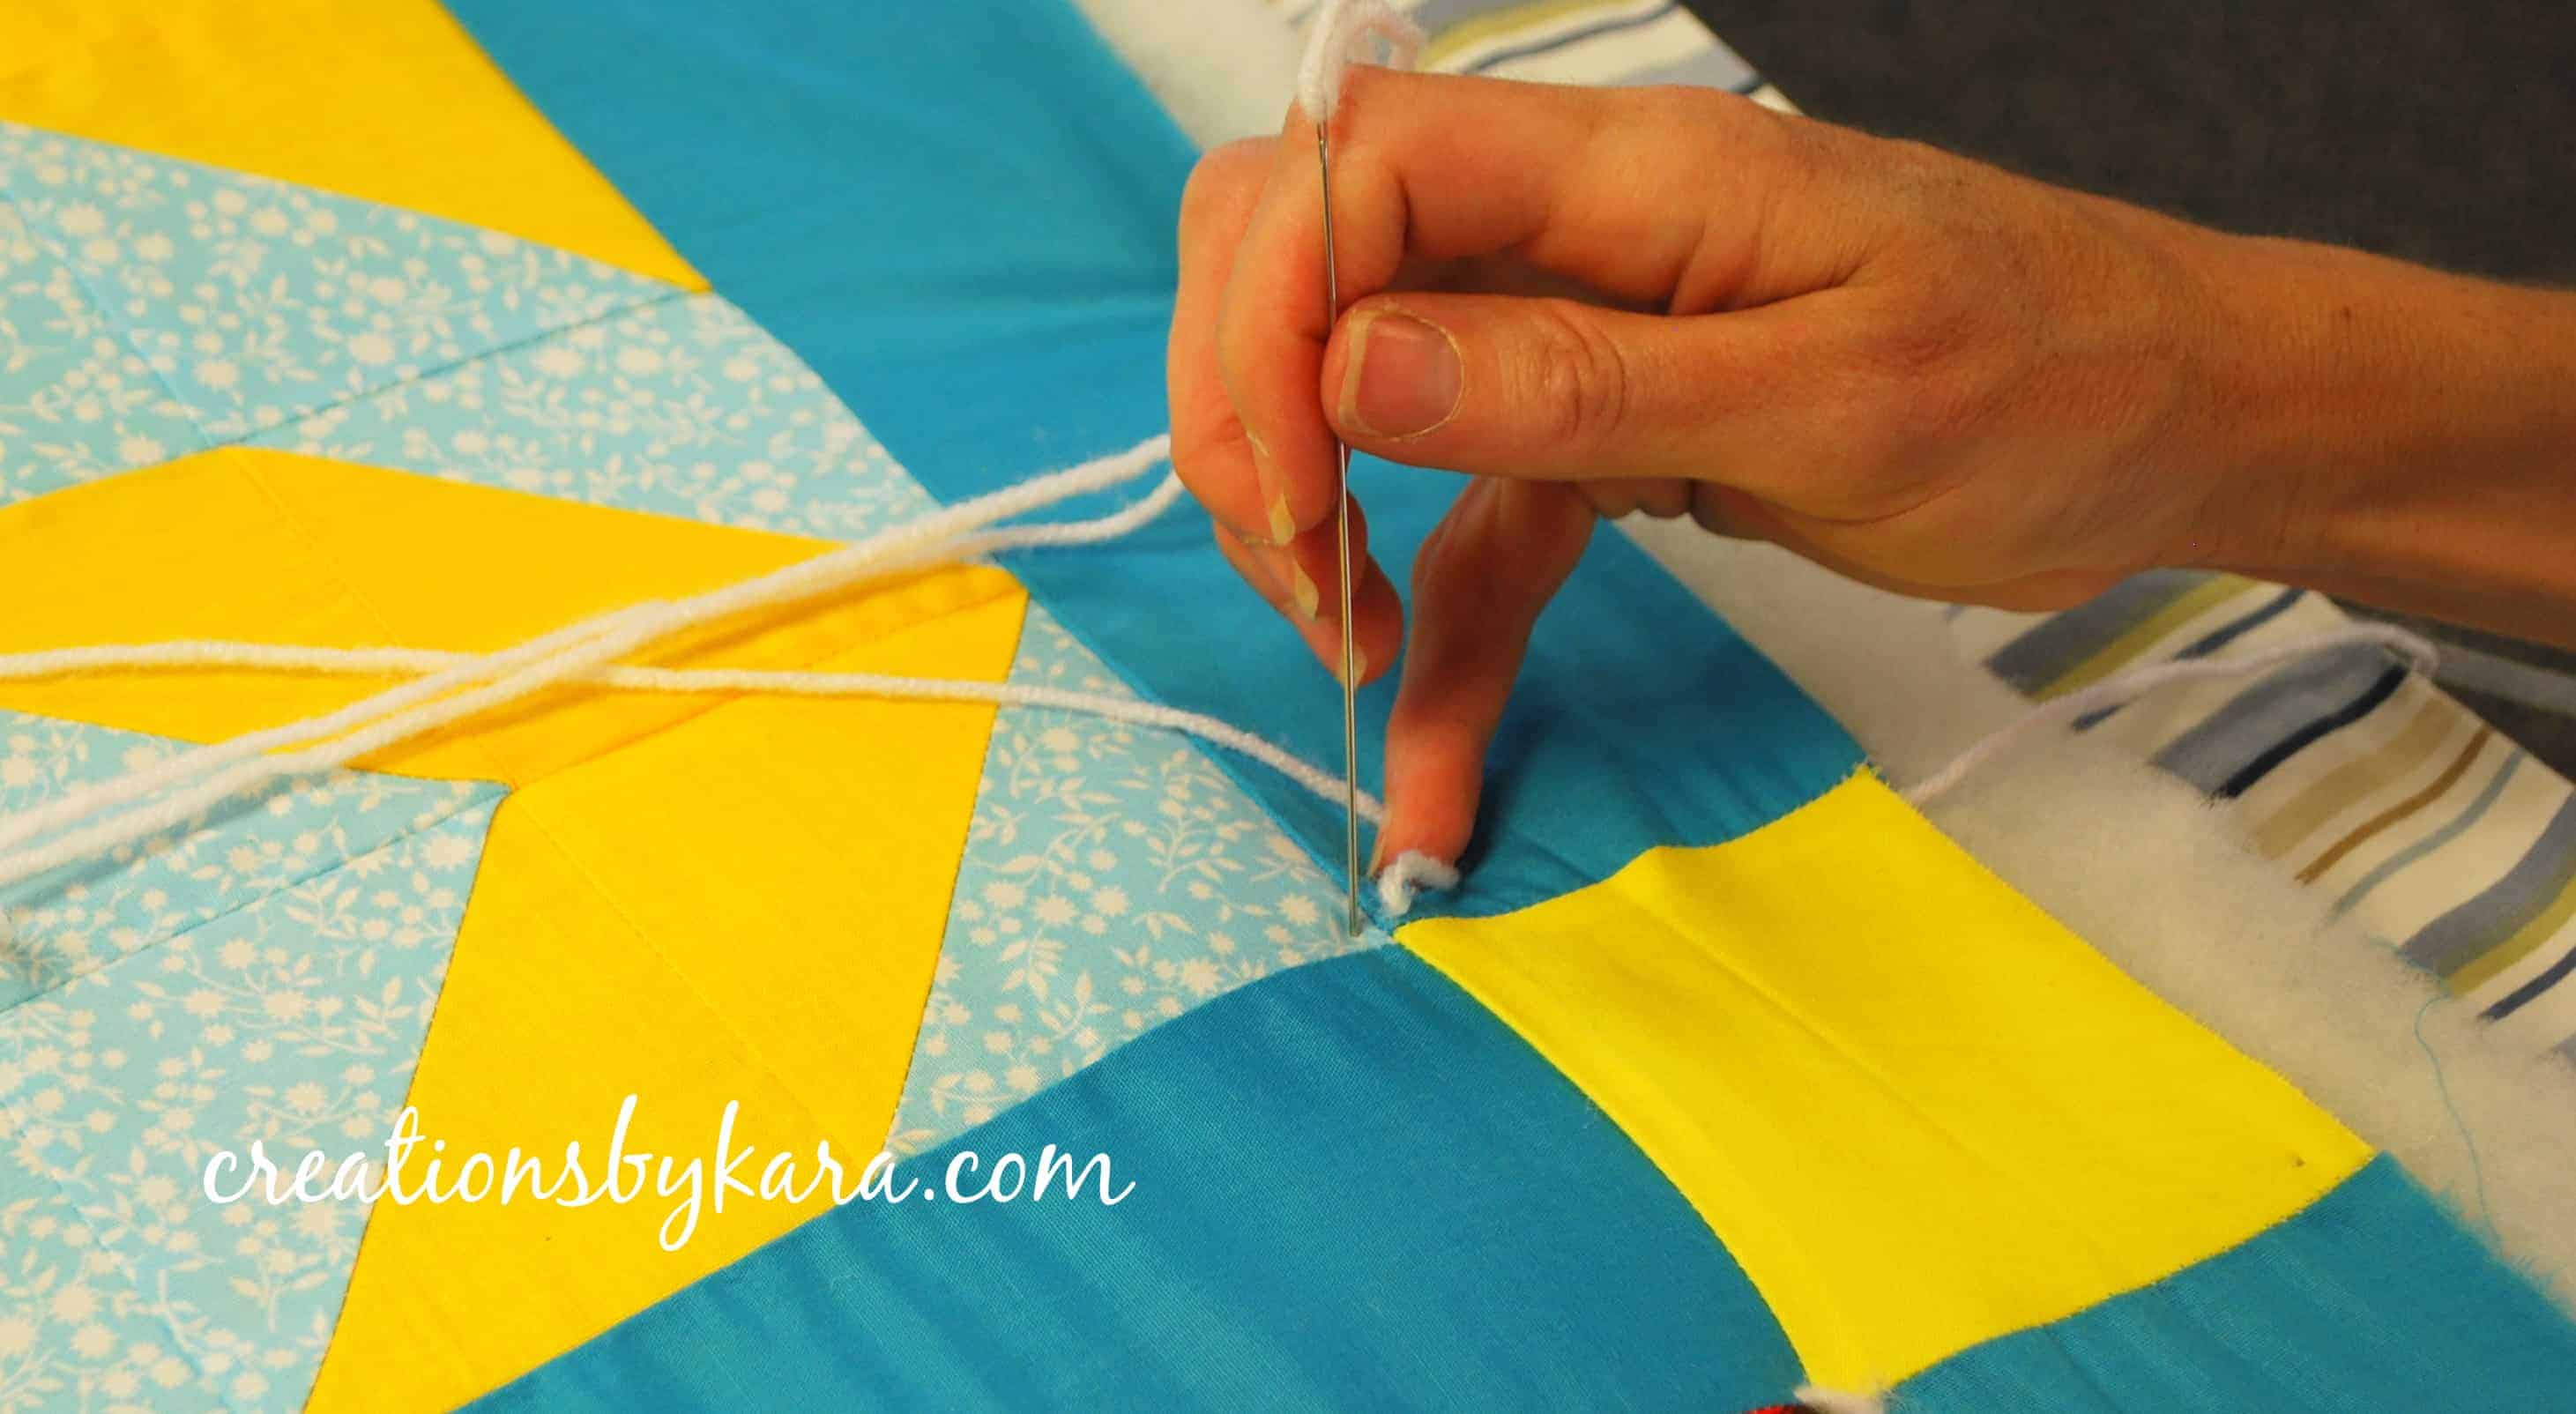 5-Now bring the needle back up in hole #1.
 6-Pull the yarn all the way up. Insert your needle sideways into hole #2. Do not poke it through to the back!! You want to slip it just underneath the top layer of fabric, and come up where you want your next stitch.
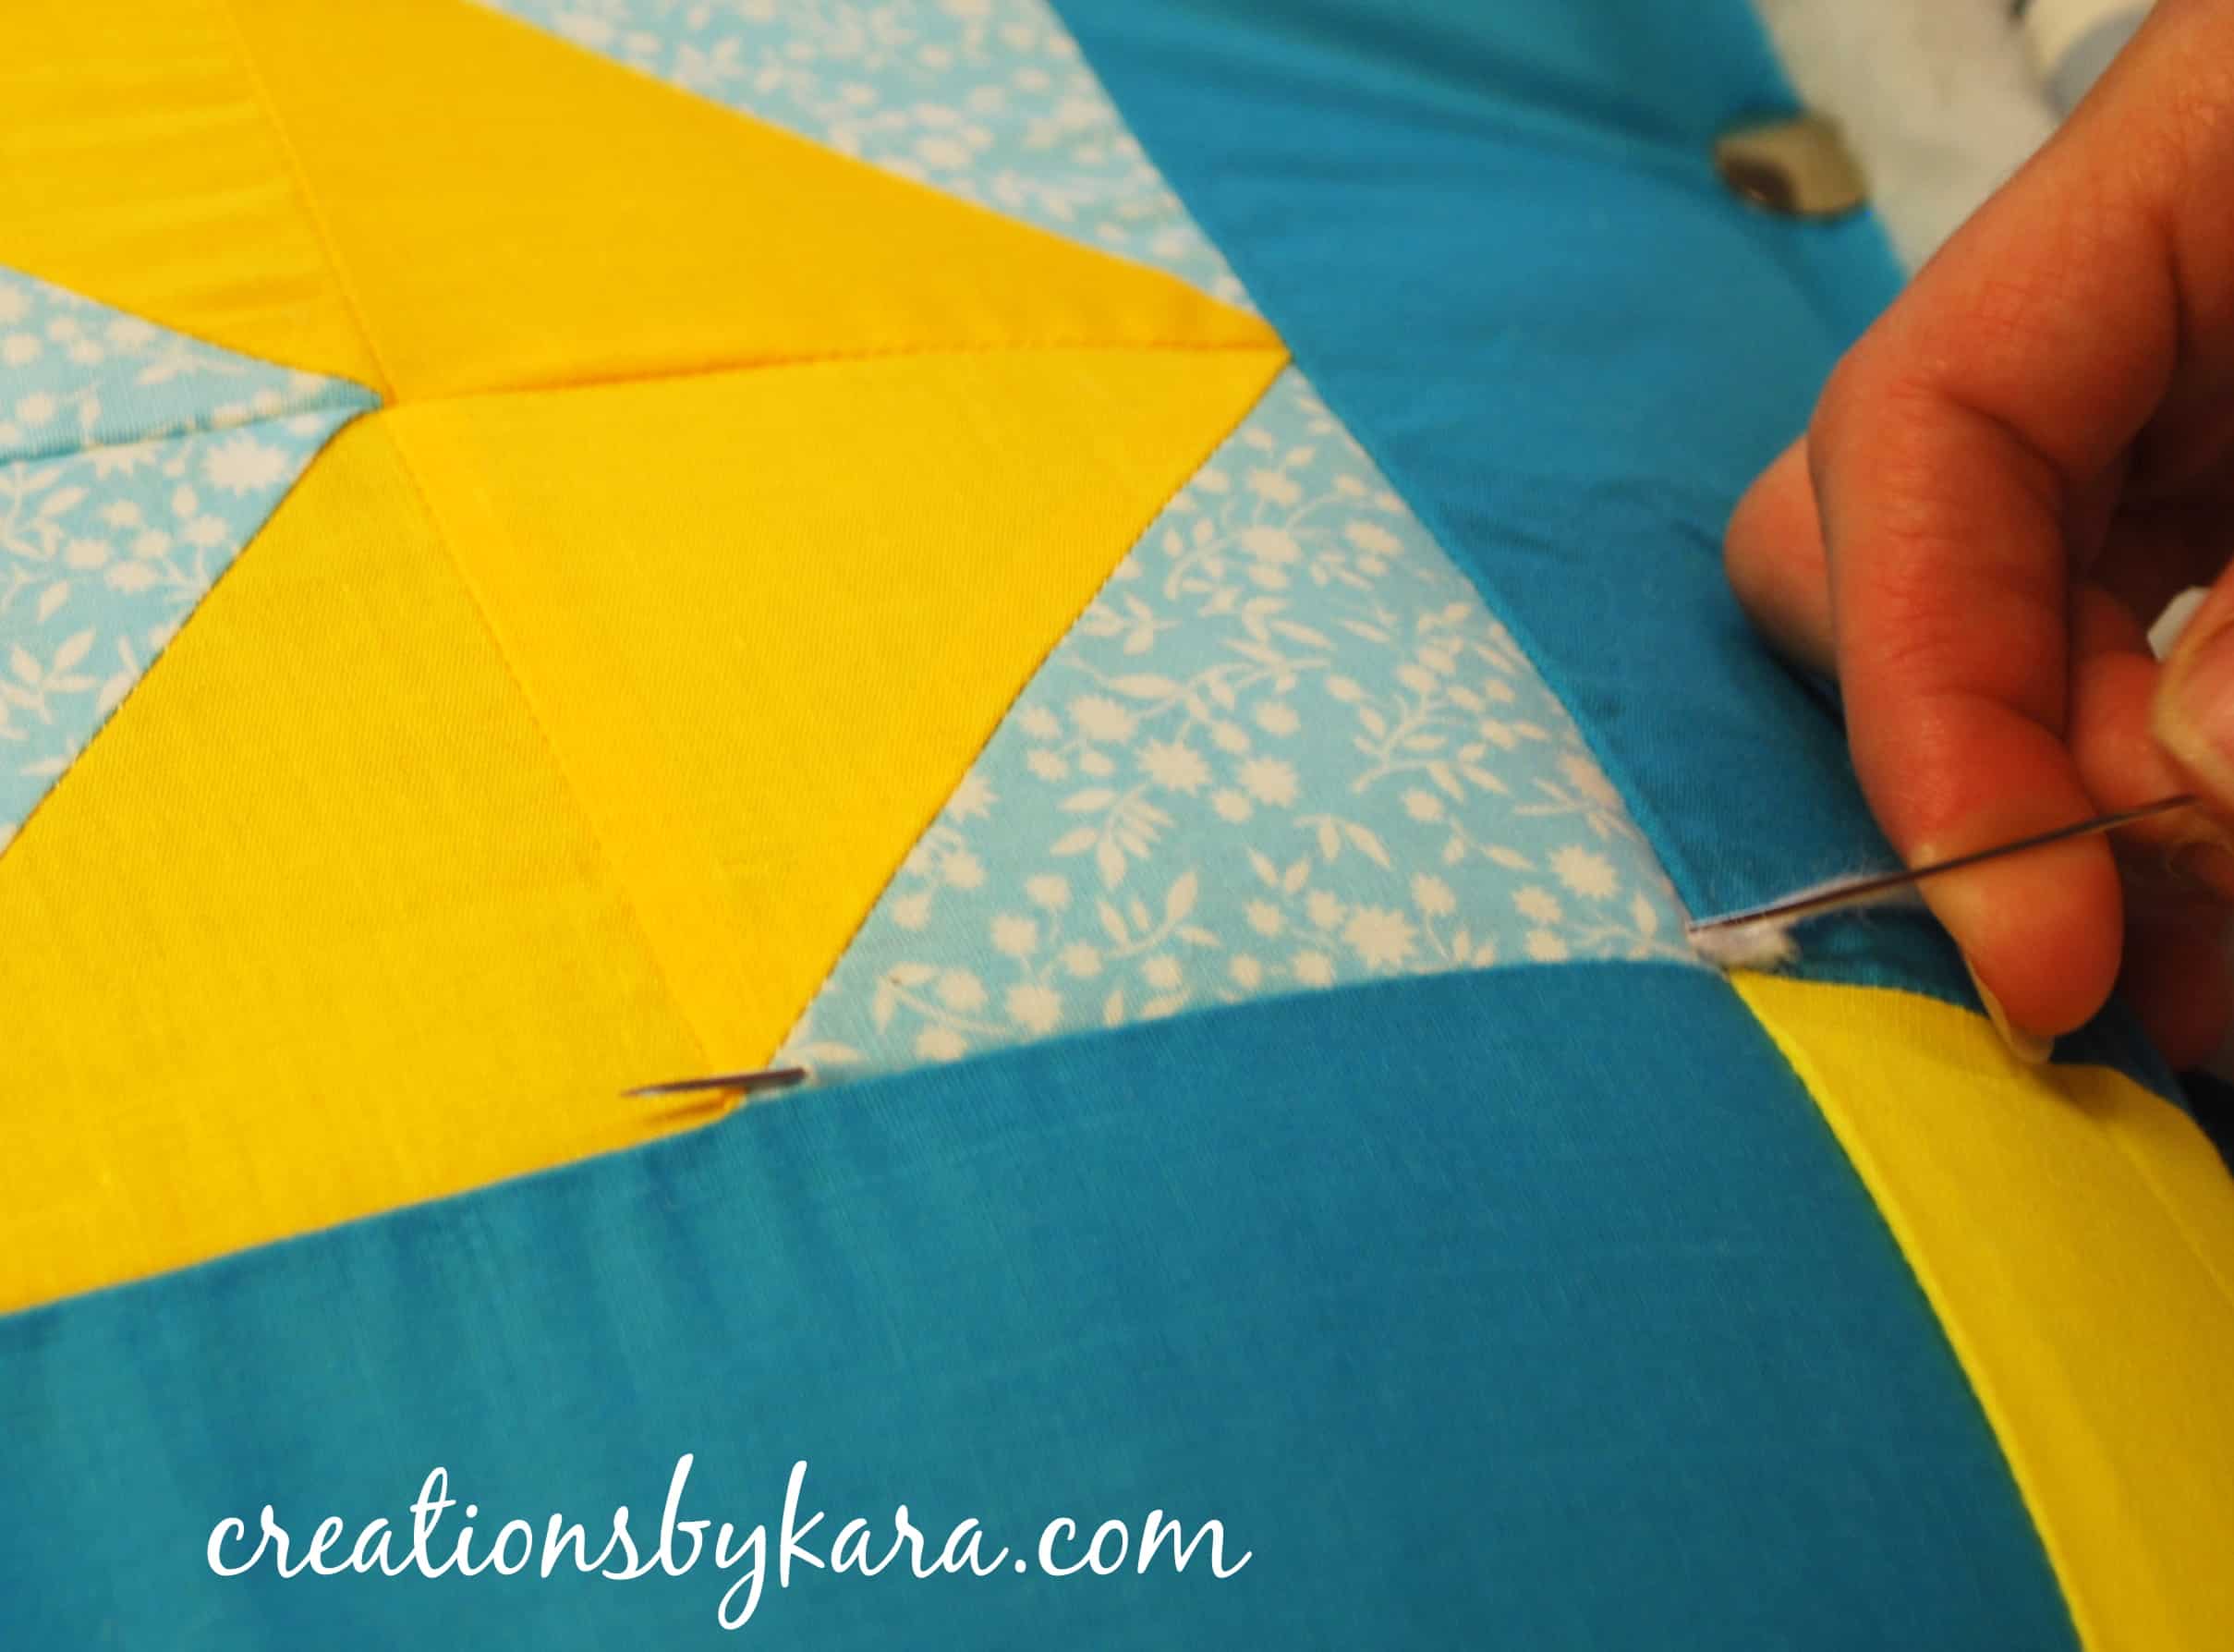 7-Pull the yarn through and repeat the process. Up through hole #1, down through hole #2:
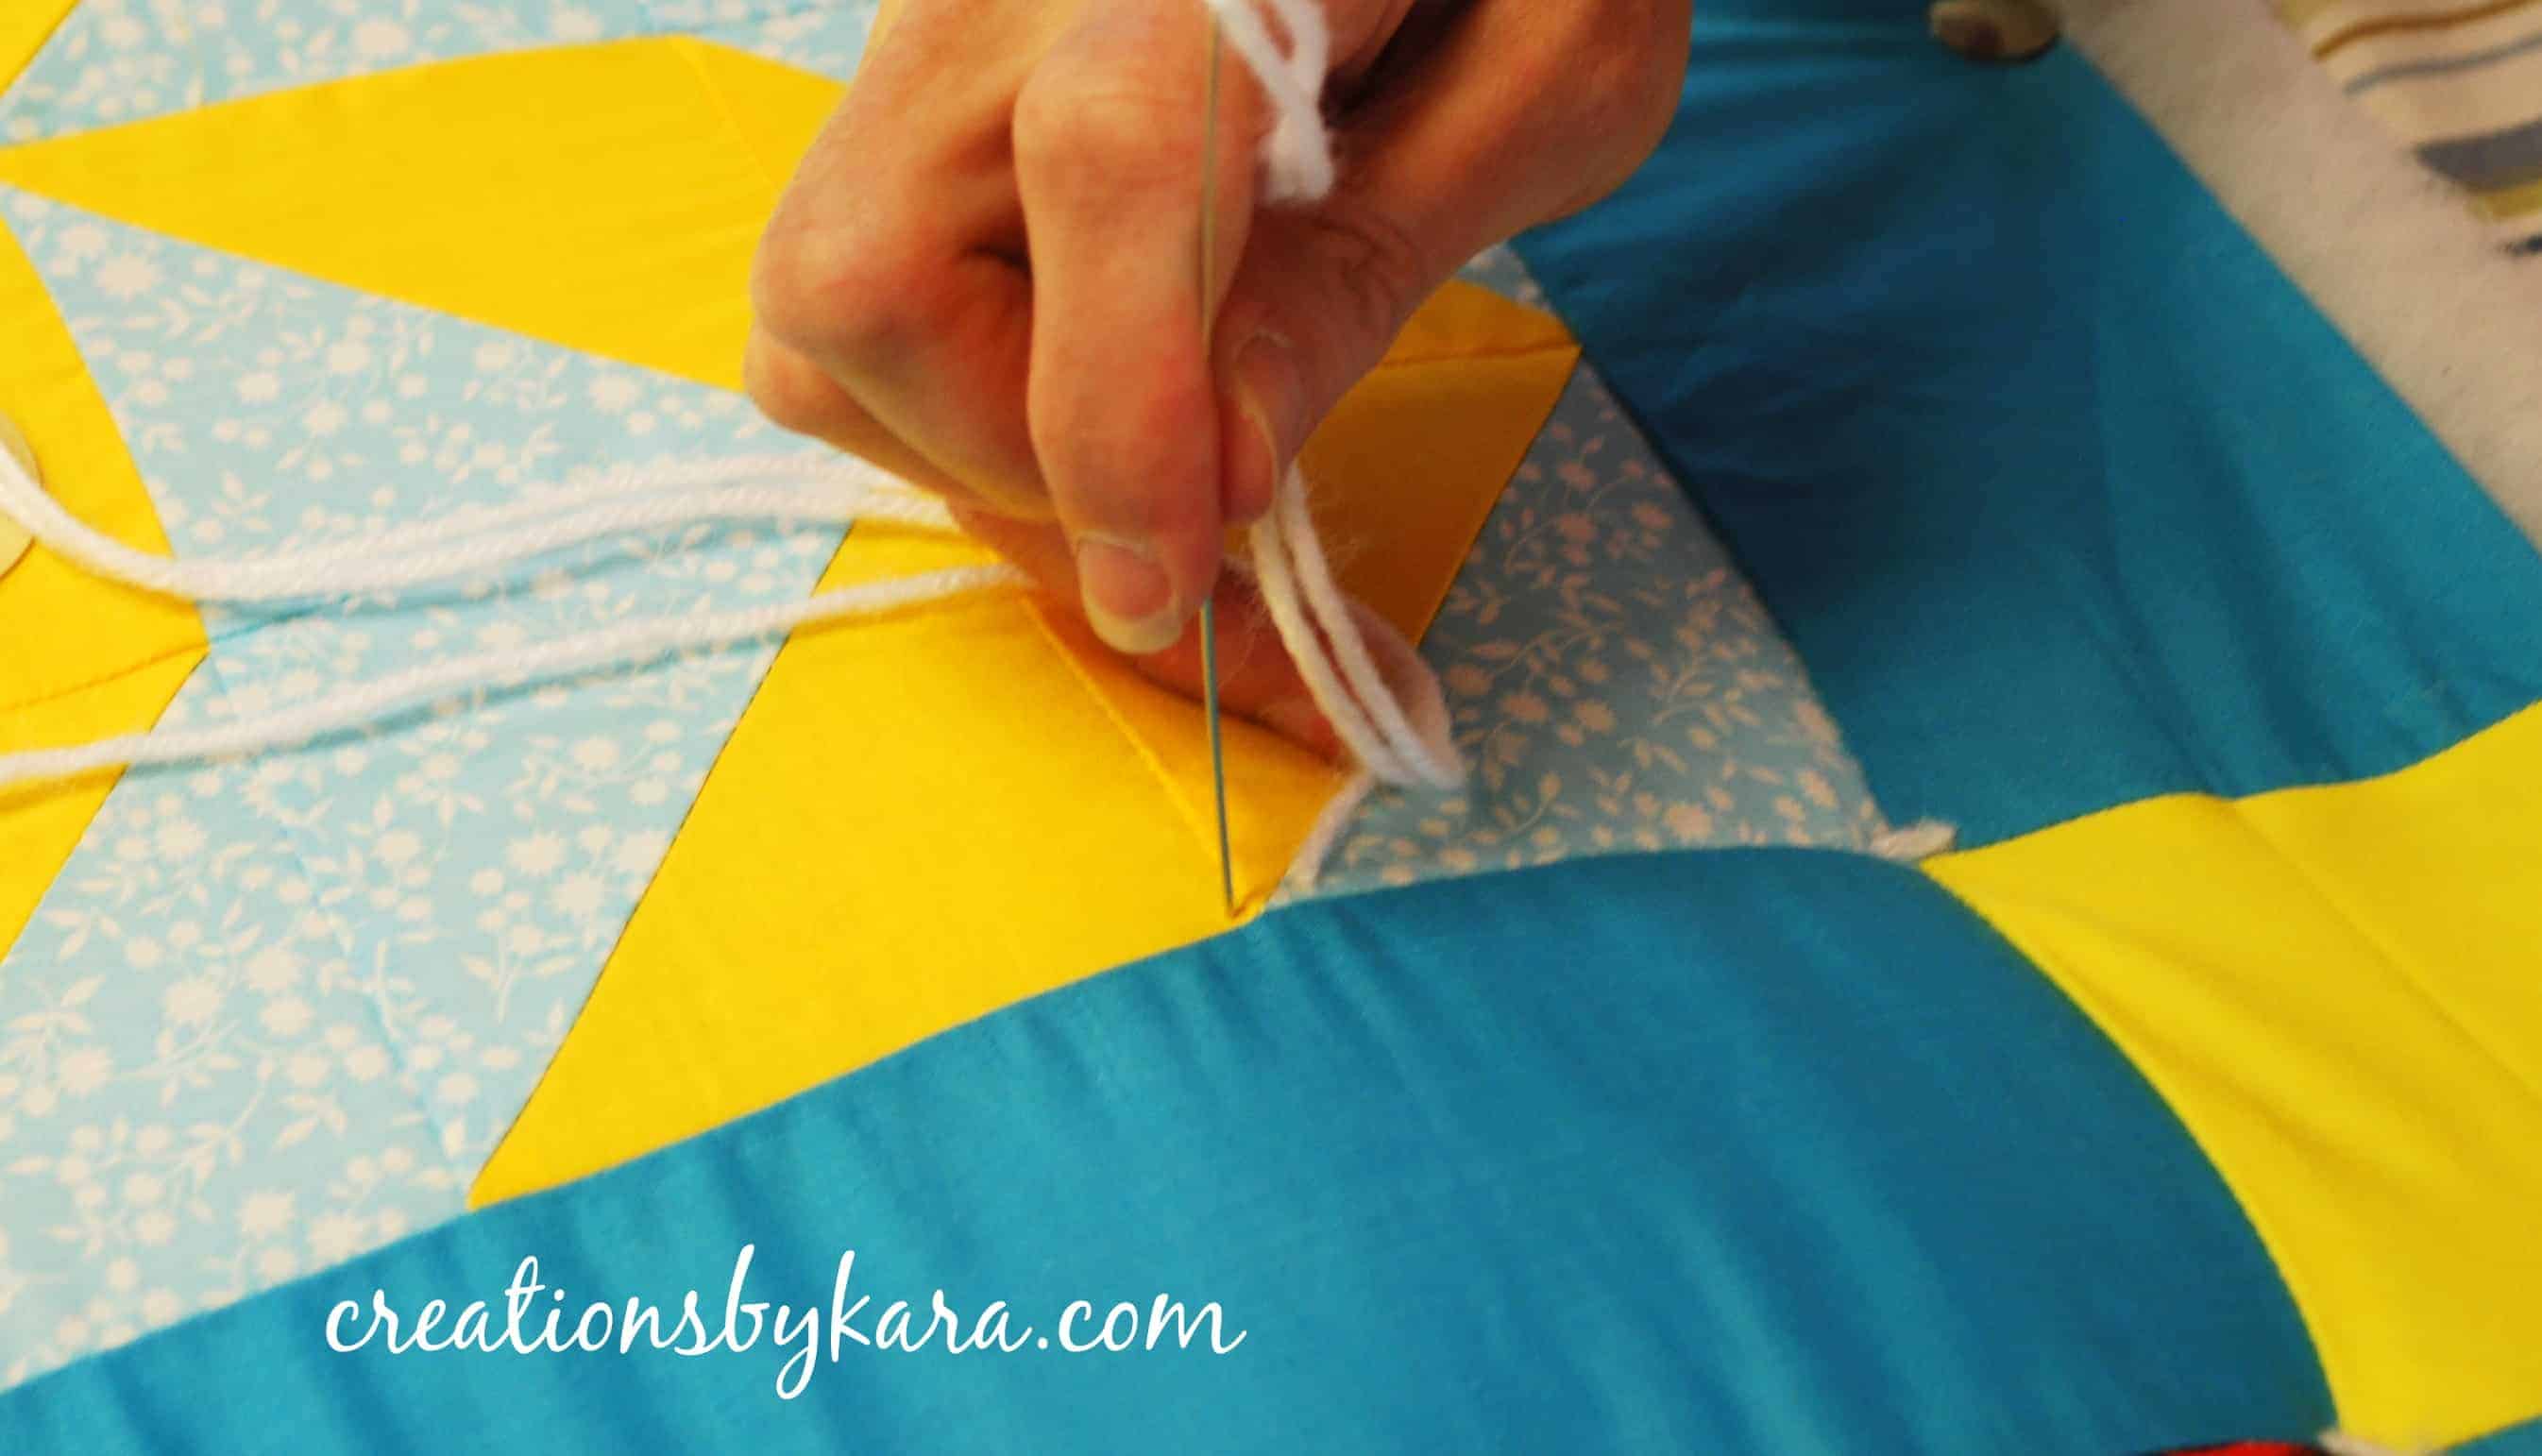 8-Back up through hole #1, then sideways over to the next stitch.
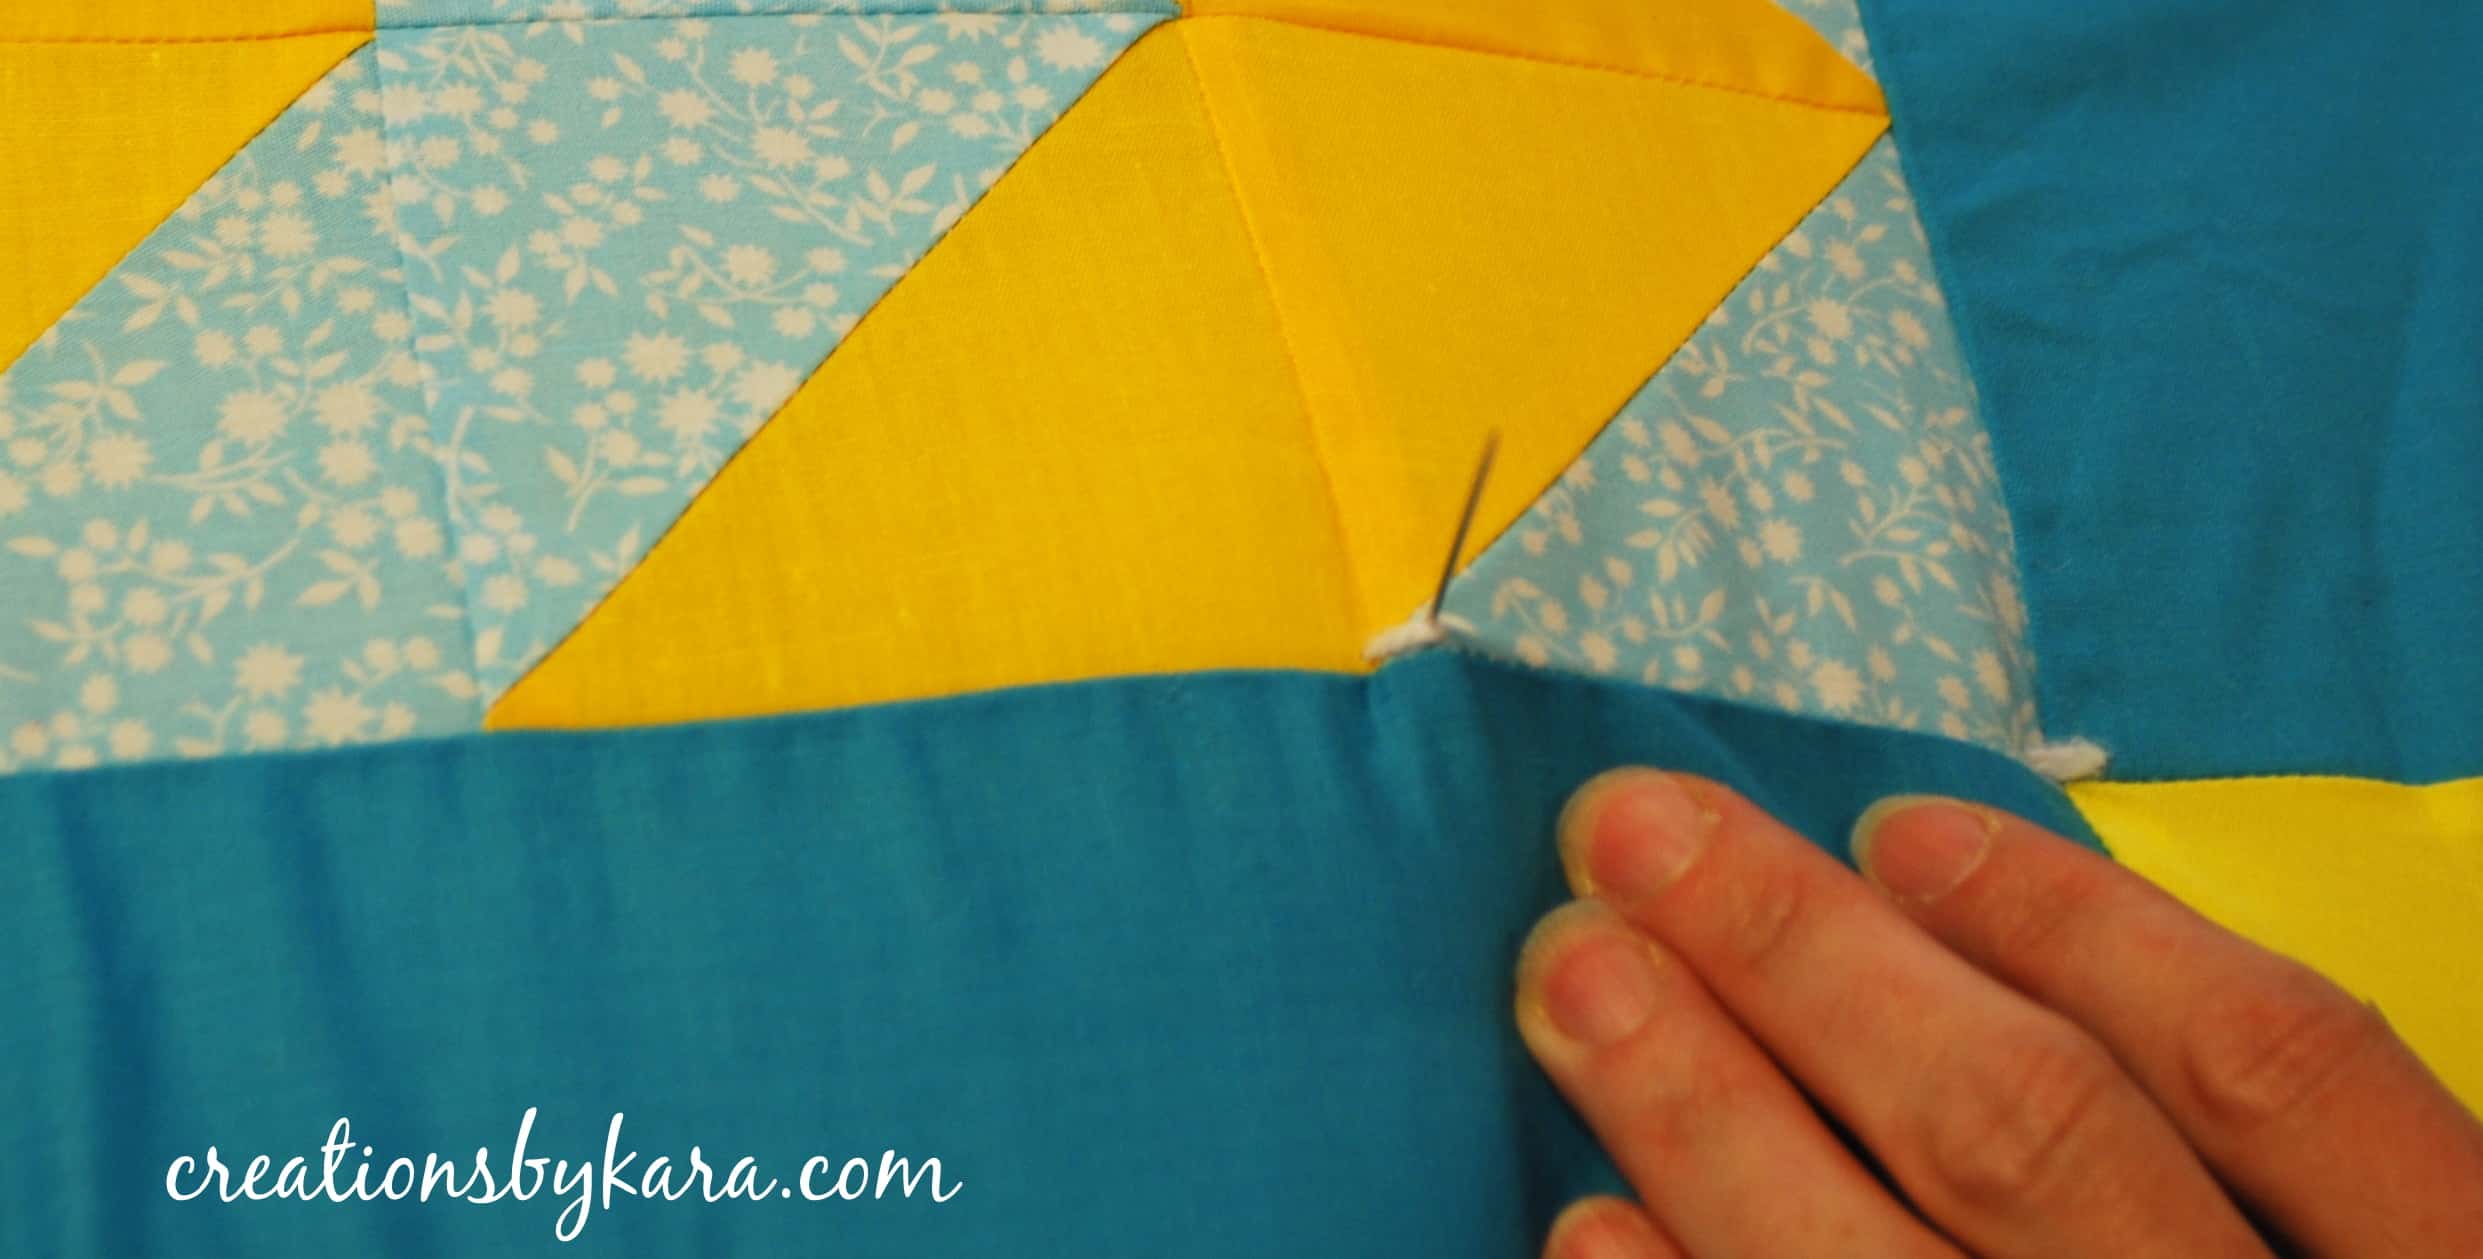 Repeat until you reach the edge of the quilt. Then clip the end of the yarn so it meets the edge of the fabric.
Keep working row by row till you have finished your quilt. One thing that is different with this method is that you can only work from both ends. You can work right to left or left to right, but you cannot work up and down. Each piece of yarn must come in from the side, so you can’t sew the side shut or it doesn’t work. Make sense?
When you are all finished, just bind your quilt like you normally do, just stitching over the ends of the yarn to enclose them. This is a close up of what your quilt will look like.
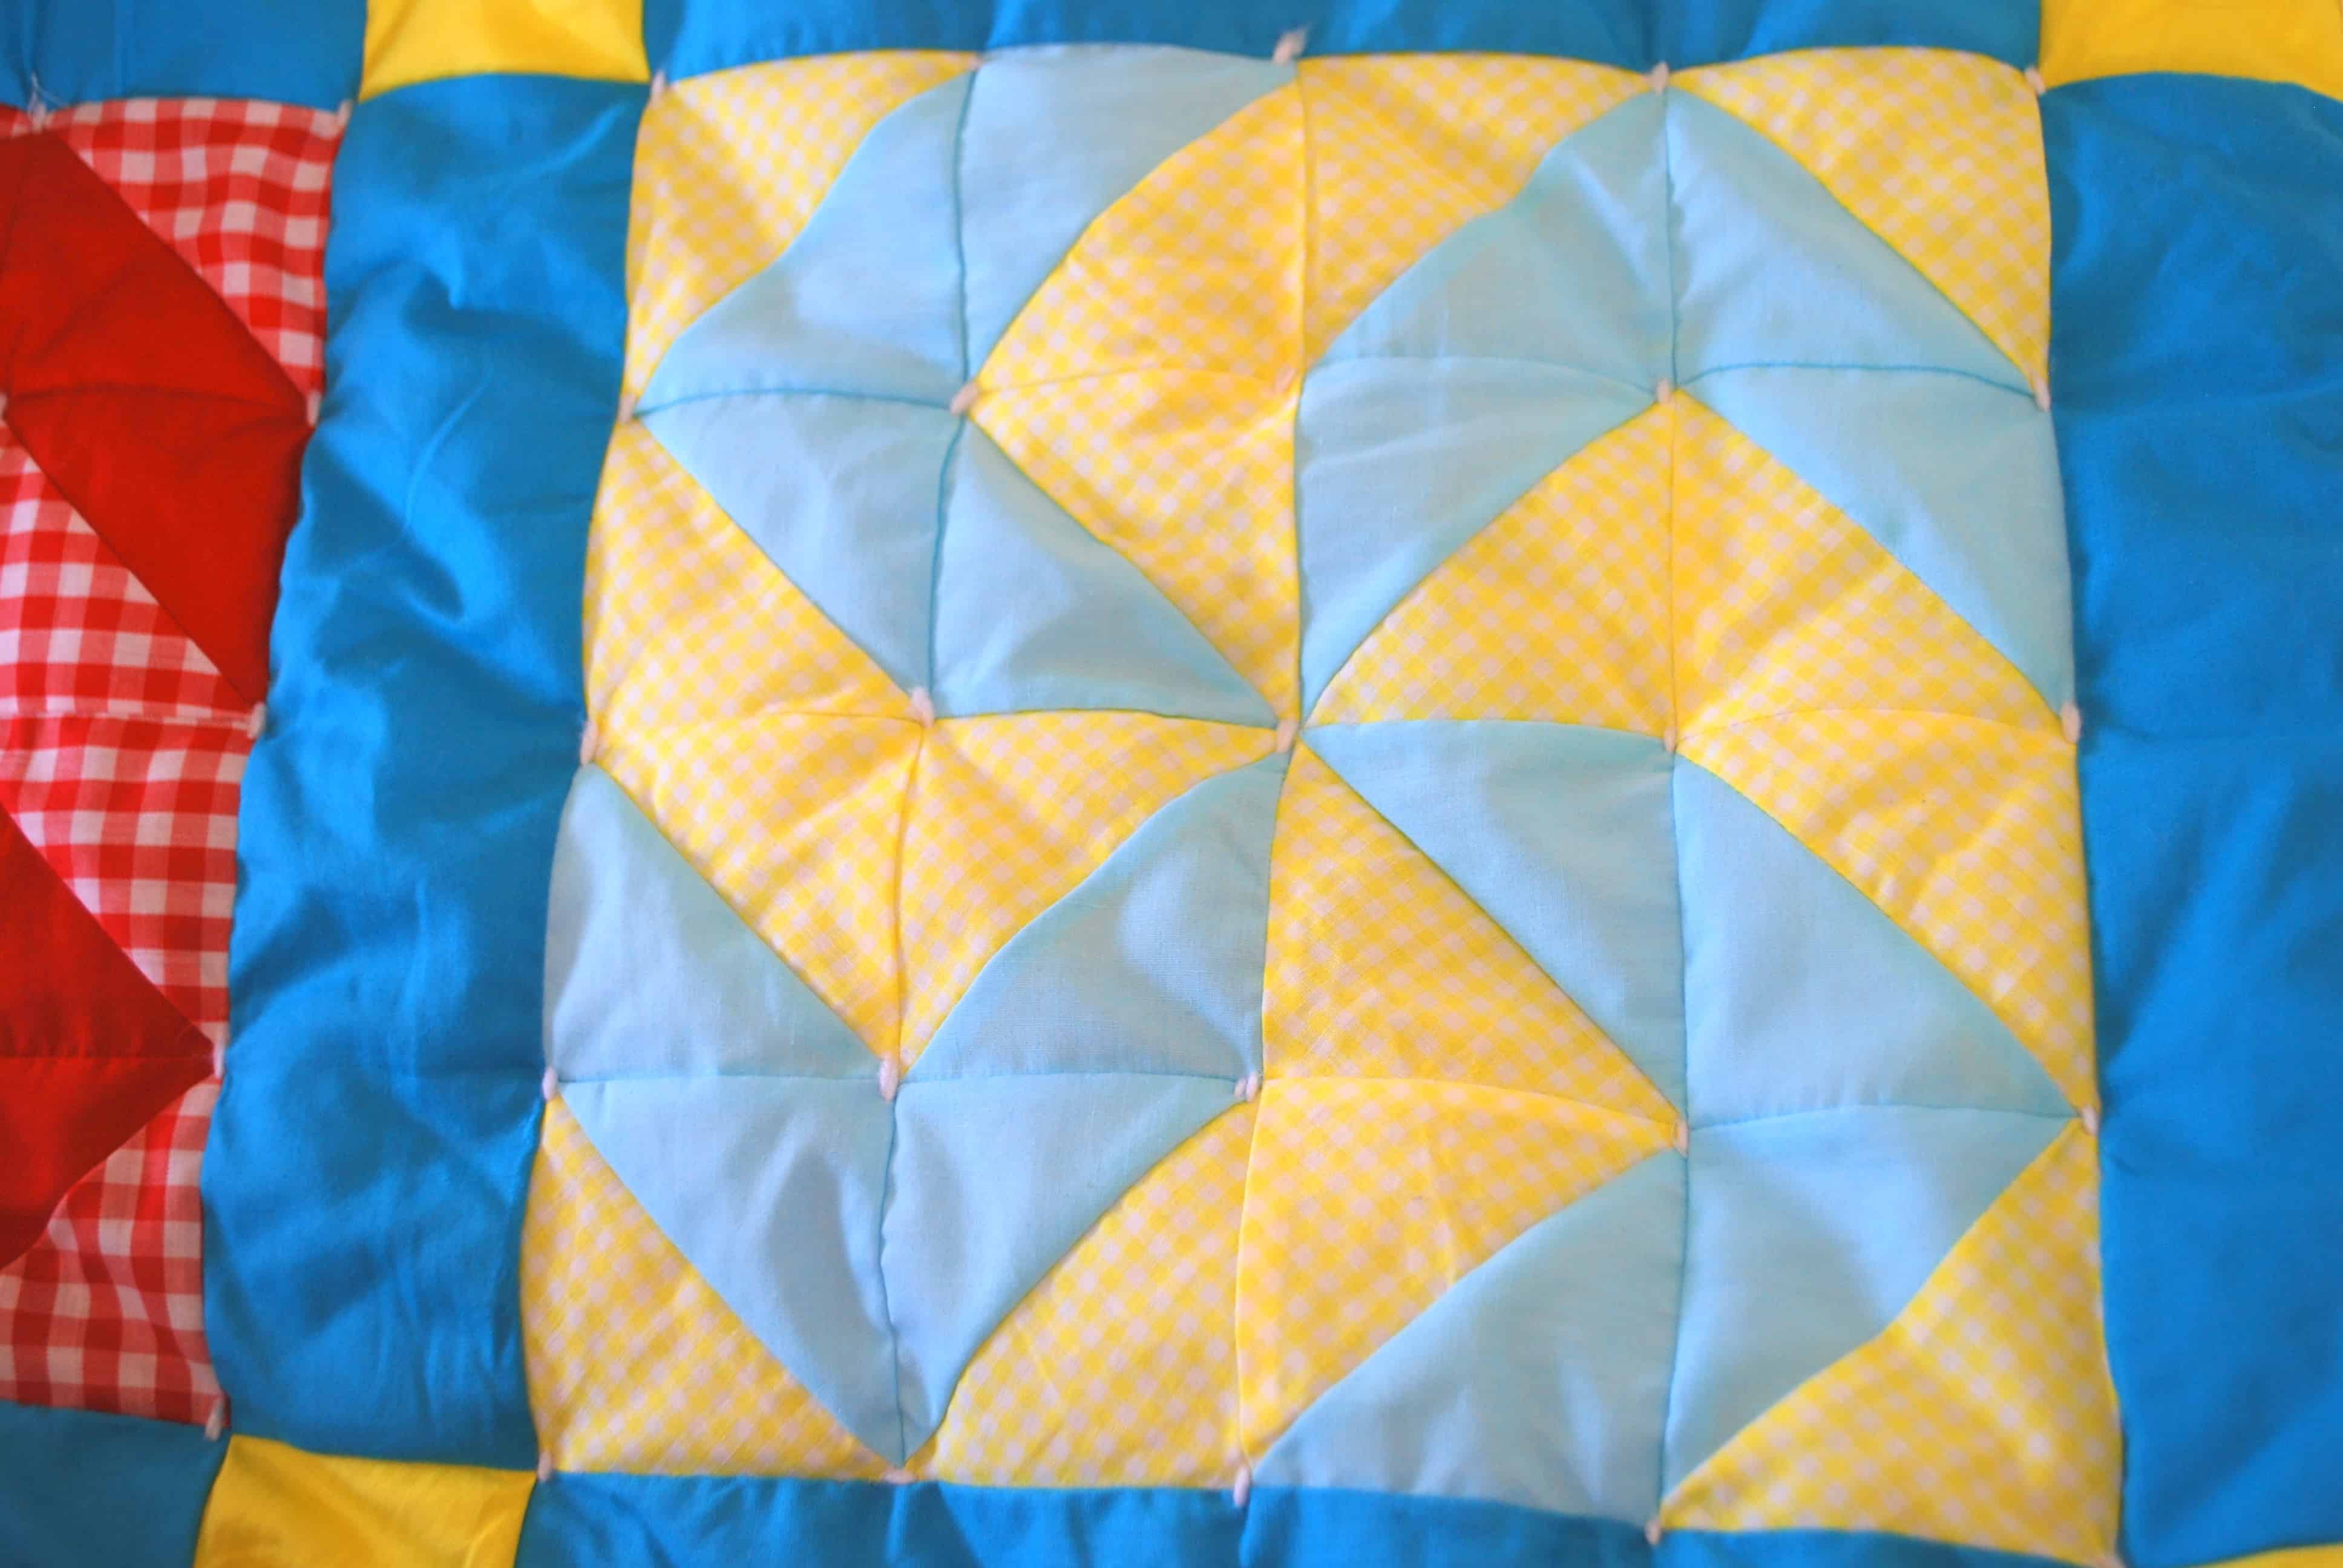 All the yarn is on the inside. No loose pieces of yarn that can come untied. Hooray!!
Hi Kara,
Do you have a live video tutorial on inside out tied quilt
Reply
Hi Kara – I’ve used this technique once before, and had to re-find this so I can do another quilt. The first quilt I did was a gift and the person hasn’t washed it yet. I’m curious if you have any that have been washed and loved for several years and how the ties are holding up? Any strings that have pulled out from the edges that you’ve noticed?
Thanks!
Reply
I have a few quilts tied this way, and I have never had the strings pull from the edges. But even if they did, they would just be loose inside the quilt, because the stitches keep the yarn in place. Hope that helps, and good luck with your second quilt! 🙂
Reply
Thank our for sharing this, a method I have fallen in love with
Reply
I’ve been trying to figure out how to quilt a top I just finished and I started looking into tying and then came across your info for invisible tying. I’m intrigued, but wondering if this is doable with a quilt that is almost queen-size. Seems like it would be difficult to keep such a long length of thread from tangling. Thoughts? And, if using embroidery thread, will it be long enough to reach all the way across?
Reply
I have so been looking for a way to tie a quilt without the little tails. I’m making a table topper for a special cousin and want it to be nice and flat and somehow the little knots and ties detract from the design. I found only one tutorial other than yours but the other one didn’t talk about what to do with the ends. I’m pretty new at quilting and I’m so glad to have found such a great way to finish off projects.
Reply
Glad you found my tutorial helpful Kathy! What a great idea to use this method for a table topper. You definitely wouldn’t want loose pieces of yarn on one of those. 🙂
Reply
Thanks so much for this tutorial! I am fairly new to quilting and I love this look and hadn’t seen it before. I was going to tie a quilt for my mother in law, but this is so much nicer!! My mom is in a nursing home, and can’t have the ties, so this will be perfect for hers as well!
Thanks soooooo much!
Mary
Reply
Thanks so much Kara; this tutorial with it’s very handy photos was just what I was looking for.
I am coming to the end of making my first – very basic, quilt and because it is reversible I needed a way on anchoring the batting in a way that wouldn’t detract from the lovely fabric’s I used, so this method is prefect. I am always so impressed by the generosity of folks like yourself who take the time and trouble to share their knowledge and experience.
Thanks again, and keep us inspired!
Reply
Aw, thanks so much for your kind words. They just made my day!
Reply
I’m doing this TODAY! I’ve never hand tied, but I just feel like my current project will pucker less and look better…I just don’t prefer the look of little yarn tails everywhere. So thank you!!!
Reply
I’m with you Dawn, I think a quilt looks so much prettier without yarn tails!
Reply
This is absolutely brilliant and your tutorial is excellent. 40 years of quilting and this is the first time I have even seen this technique. Thank you SO MUCH for sharing it. Arthritis doesn’t let me machine quilt anymore and I never was a proficient hand quilter. I definitely prefer the look of this to the tails left by traditional hand tying. Your clear instructions are much appreciated.
Reply
How r u tacking this? Do u need a quilt stand or can u sew this on a table? I’m getting ready to tackle this project!
Reply
You definitely need to tack it to a quilt stand, just like you would if you were going to tie a quilt using the traditional method.
Reply
And if u don’t have a quilt stand, how would u do this?
Reply
Sorry Sandy, I don’t know of any way to successfully tie a quilt without using some type of quilt stand.
Reply
Hi Sandy,
Maybe this will help.
http://www.maryquilts.com/how-to-tie-a-heartstrings-quilt/
They tie their quilts without a quilting stand.
Reply
What a great tutorial. I have the perfect quilt to use this on. Much easier than all those little knots.
Reply
Thanks Monica! And good luck with your quilt!
Reply
Here’s a tutorial on how to secure a quilt with invisible ties. ww.creationsbykara.com/2010/09/knot-less-tied-quilt.html/
Reply
I just love this idea! I have been looking for a way to finish my first quilt, and this is IT! I had become discouraged because I knew I would never get around to hand quilting the whole thing, and though I think the loose tie ends look great on some quilts, it’s not for me. I have been trying your technique out on a very small practice quilt I made, and it works great. I have also tried your technique using French knots on top, which look good, but not sure if I want to take the time for that step. I also tried it with a diagonal stitch, then returning back across the entire quilt with the opposite diagonal stitch, to make an “x” pattern where four pieces of material come together. Also a nice look, but doubles the time. But nice to have 3 options I like! Now I am off to the store because I had bought a quilt hoop but I guess I will return it and look for a quilt stand. Also I may get yarn to compare to the embroidery thread I’d been trying out. Anyway, thanks so much for the tutorial. You really made my day.
Reply
This tutorial helped sooo much!! I love this!! I am new to quilting. How much yarn would you say I would need to tie a 120′ x 120′ quilt & does 4″ apart sound good?
Thank you so much!!
Reply
I just re-read your tutorial and I understand it. Disregard my last comment.
Thanks,
Reply
I just found your site and I have a quilt that needs to be tied. So I was so happy to find your tutorial. I have a question though.
You wrote “Repeat until you reach the edge of the quilt. Then clip the end of the yarn so it meets the edge of the fabric.”
Clip the yarn where you pulled through the last hole? And do you knot it inside? I’m not understanding how the yarn stays inside with no knots.
Reply
Yes, I have been doing it the slow way for years. in the past my family would get together to help each other with the tacking, till our backs ached. thanks for your advice, a quilt stand sounds so much better. love your site, you are very talented.
Reply
Hi Kara,Have just looked at your pictures again to see how you joined the fabric to batting. Have you just pinned the edges to a board to hold in place? Would love to know if there is a way to do it without having to tack the whole quilt . thanks
Reply
I’m not a quilting pro by any means, but this is my opinion. Unless you have a special quilt stand that will stretch small sections at a time, you have to tack the whole quilt down. Otherwise the fabric shifts around and you will have ripples, wrinkles, and pleats in your finished quilt. So it’s worth it to spend the time tacking it down.
Reply
I just found your website yesterday. The idea really interested me. At my Quilt Group today one of my friends was going to tie her quilt. I convinced her to try your technique. We used my roll-n-pin layering tool to sandwich her quilt layers.
We “tied as we went” so we did not have to pin or baste the layers together. She finished the whole quilt today and it looks great. Thank you so much for this new way to tie our quilts.
Reply
Yay! So glad to hear that you used it. It’s the method my mom taught me, and I really do love not having all those ties on the outside! 🙂
Reply
I love this idea. Thanks so much for sharing it Kara.I am so over hand quilting,and not keen on the other way to tie, this has inspired me to finish a quilt I began years ago.
Reply
I like how fluffy the quilt looks. What type of batting are you using?
Reply
It’s been awhile so I can’t remember exactly, but I know I used the thick white quilt batting at Joann’s, not the warm & natural batting. Hope that helps!
Reply
I think during the process it does go through the back of the quilt but when you are going on to the next section is where she is saying not to go all the way through the back. If I’m correct. 🙂 Love this idea! Cute and quick!
Reply
the last photo of the quilt looks like a swastika
Reply
I thought you had to tie all three layers what about the backing would it not become frayed or look weird after warshing
Reply
Step 4 and 5 actually make a stitch on the back of the quilt. I’ve had several quilts like this for years, and they wash up just great.
Reply
This is great! Thank you!!
Thank you!
Marci
Reply
thanks so much for sharing this! i’m just about to attempt my first quilt with the help of my mother in law and when she mentioned that i’ll have to have those little ties all over to bind the layers together i couldn’t help but frown inside… i just think they look so country. anyway- i’ve been searching online for some alternative and this is the only cute and acceptable idea i’ve found. thanks so much for giving my theoretical quilt some hope for a happy ending 🙂
Reply
Kara,
My grandmother was also an avid quilter (she even had her own quilt shop). I have several of her quilts in which some have this stitch, as well as a variation of it. I have always wondered how she did it. Thanks for sharing. I’m going to have to try it sometime. My grandma also used embroidery floss for this technique – which I really like.
Reply
Embroidery floss is a great idea. I think I’ll have to try that next time. Thanks Liz!
Reply
do you clip the yarn inside does it pull if you wash it? I REALLY like this look
thanks Crystal
Reply
Hello there – I’ve been a long time lurker and I love your blog – thanks for sharing this tutorial – I’ve tied many a quilt between church projects and family projects! Not only are there no loose ends of yarn, I think this is a more modern look for a tied quilt – those tied ends tend to look a little dated! Thanks for everything you post – I appreciate the effort you put into your blog!
Reply
Thanks so much Erin! It always makes my day to hear that someone enjoys my posts. 🙂
Reply
I’m new to tying quilts, but this looks like a neat way to do it. Although, I kind of like the cute little ties on quilts 🙂 Cute quilt, by the way!
Reply
I’ve been wanting to know how to do this for years. Thanks for posting such a detailed tutorial.
Reply
That looks really cool. Great technique to know. YEAH for your first sponsor~
Reply