
I have been meaning to finish this little home decor project for a long time. An embarrasingly LONG time. Last year when I attended the SNAP! Conference, Poppyseed Projects offered a hands on class with some seriously cute wood signs and frames. I was helping a friend clean up from a previous class and I was a little late. By the time I got there, all the table space was gone. So I just stayed to hang out and chat with my blogging buddies, figuring I would do the project once I got home.
That was last spring. Yikes! Procrastinate much?
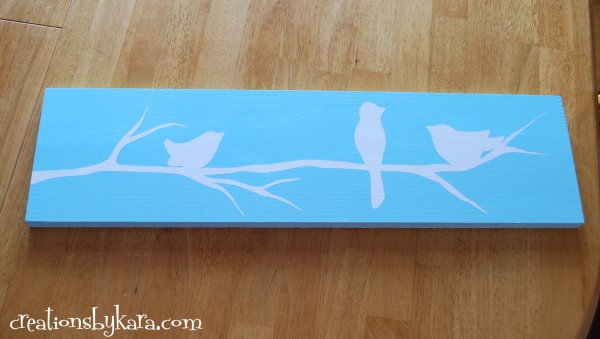
The original project had a really cool texture painted onto the board. But when I opened mine up, that side had a huge groove going down the middle. So I flipped mine over and decided to use the back. That explains why you see drips appearing to come from the back of my board. LOL!
This is the first time I have ever used a reverse stencil technique on a wood sign, and I was surprised at how easy it was. And I love the look of it! Mine is using a vinyl decal with birds, but I’ve seen some amazing ones with text or simple shapes as well.
Here’s how you can make your own sign. . .

Reverse Stencil Wood Sign Tutorial
Supplies:
-piece of wood for your board, cut to size
-vinyl decal or vinyl lettering
-paint (any type of paint, you need at least two colors)
-paintbrush
-sandpaper
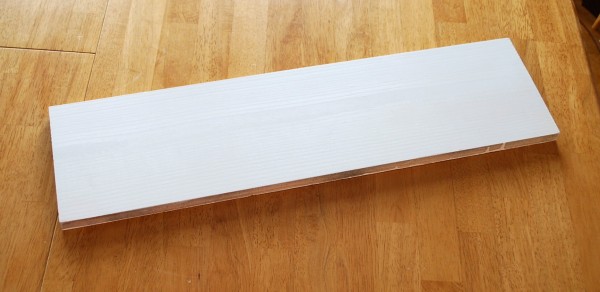
Paint your board the color you want your stencil to be. It’s the color that will show up after you peel off your vinyl design. I used white latex paint, but craft or spray paint would work too. Pretty much anything you can cut with vinyl will work.
 After the paint is thoroughly dry, apply your vinyl design (or text) to the wood sign. I used this adorable branch with little birds, and I have to say that I just love it!
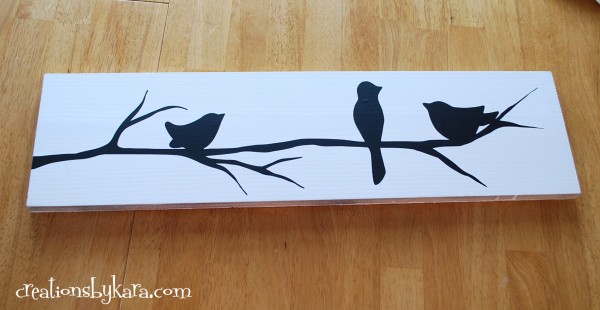 Rub your vinyl on really well to prevent the topcoat of paint from bleeding underneath. You can’t prevent all of it if your board has imperfections, but just do your best. Then add a layer of paint. Again, I used latex.
 After that layer of paint dries, carefully pull up your vinyl.
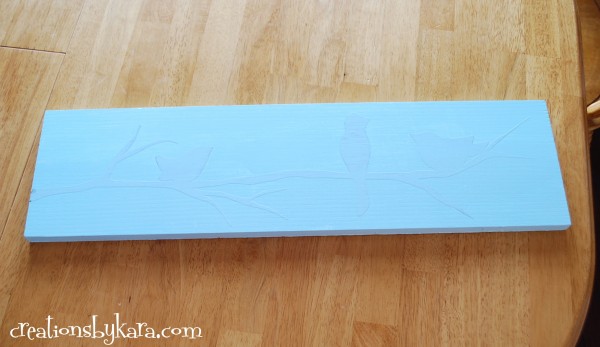
 Mine bled under the vinyl just a tad in a couple spots. See that little spot on the bird’s tail?
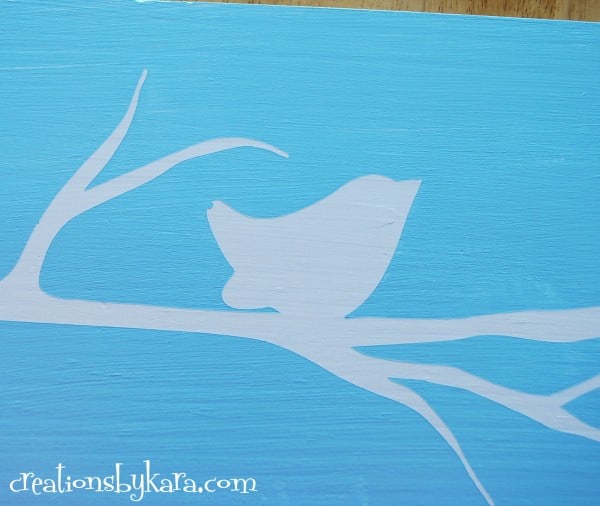 Being the insane perfectionist that I am, I had to fill it using a tiny paint brush and some white paint. If you are a normal person, you can skip this step. 😉
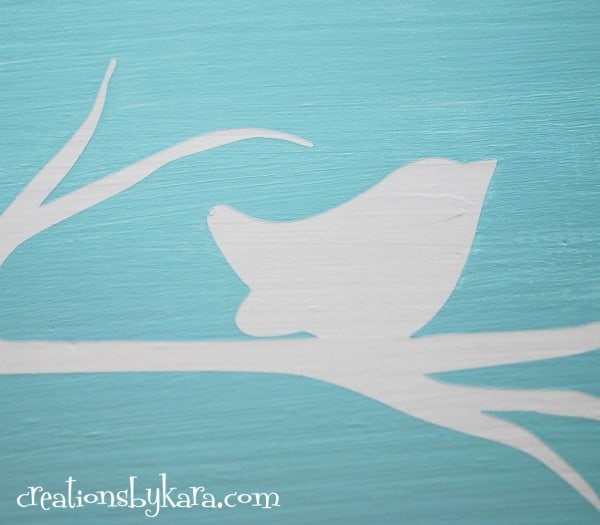
After that dried, I sanded the edges and did a light sanding over the top to soften up the lines and give it a slightly distressed look.
 See how just a little of the top layer rubbed off, revealing the white underneath. Nice and vintage-y. Love!
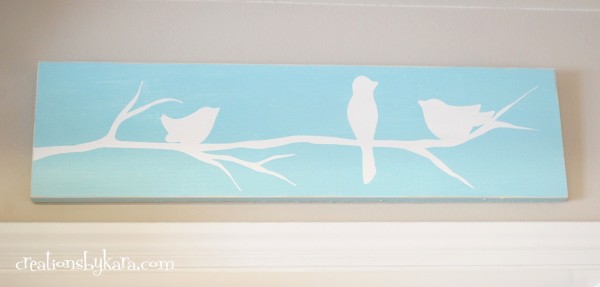
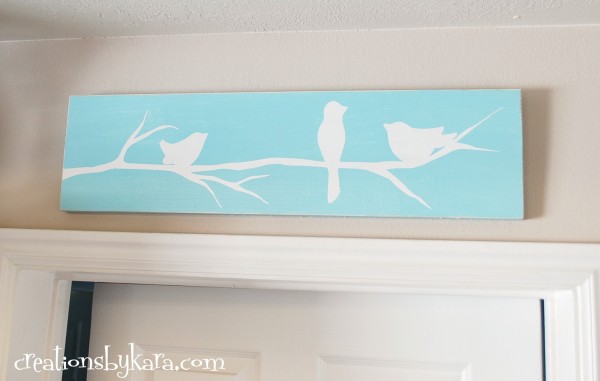
 I hung mine above the door between the kitchen and the laundry room. I love how it adds a pop of color up there!
 Oh, by the way, I really am making progress on my kitchen, and I should be sharing the reveal very soon!
I love this-I’m a bird fan and a blue fanatic-what color did you use?
bummed-not seeing the stencil at Poppyseed Projects 🙁
I used a color called Crystal Aqua from Valspar. But I actually had it color matched at Home Depot and got the Behr Ultra Premium Paint. I love the color and have used it on so many projects!
Bummer that they don’t have the stencil anymore. I’d look on Etsy, I’m sure you could find a similar one!
Thank you Kara-I’ll be grabbing some next time I go!!!!
Hi!
Can you reuse the vinyl stickers?
I want to make a bunch of these for gifts.
Thank you
No, unfortunately they are not re-usable.
This is super helpful! I’m wanting to do a reverse vinyl stencil on wood for my unity at my wedding in w few short weeks. Getting down to crunch time I thought that this would be too complicated to do, but knowing that I can paint the board and have everything prepped beforehand makes me feel better about my idea! 🙂
Yes, if you have all the prep work done it goes pretty fast. Congrats on your upcoming wedding!! 🙂
i just made a table top using gel stain and painters tape. it worked out great with very little bleeding. i will use frog painters tape next time. it is a little more expensive but creates a better seal to have less bleeding.
were did you get the vinyl sticker?
Glad to hear the gel stain worked for you. Frog tape is awesome! I got the vinyl from Poppyseed projects. This link is at the top of the post. Last time I checked they still had it for sale, but their inventory does change.
Just a follow-up question…did you condition the wood first when you tried it?
Hello! Would this work with stain instead of paint?
You could use stain as the first layer, but I haven’t had good results trying to use it on top of a vinyl stencil. It bleeds under. I even tried gel stain because it’s thicker, but it still bled under the vinyl.
Thank you so much. That saved me a lot of wondering and probably money…haha.
If you paint a layer of your base coat over your stencil, and then your top coat of paint over that, it shouldn’t bleed through! A handy trick 🙂
Thanks for the tip!
How did you cut the pattern for the birds?
Your sign is so sweet, I LOVE the color!
Cute sign….think I’ll make one like it for above the window in my daughter’s room