As part of my New Year’s purge fest, I have been going through my computer and cleaning things out. I discovered a few dozens of tutorials and recipes that I started, but never finished posting. So my goal for this year is to actually get them off my hard drive and into the blog world. Clever of me, no?
This first one is a shabby chic table runner that I’ve seen in several catalogs and all over Etsy. I already had the supplies on hand, so no way was I going to fork out the money for one when I knew I could make it myself. And oh my, it was much easier than I anticipated. Really. Even if you aren’t a big sewer, you should be able to pull this off. All it takes is a couple gathers, and like four straight stitches. Easy, peasy. And I just love it!

Not only does it look fabulous on my entry table, but it saves me some dusting. Who knew black furniture attracts every dust particle in the air and holds onto it for dear life. Yikes! Wanna make one of your own. Of course you do! Here’s how:
DIY Shabby Chic Ruffled Table Runner Tutorial
1-Choose your fabric. I wanted a neutral table runner for my entry table so that it would match any decor I place on it. So I went with canvas and muslin.
2-Next up decide on the size you want your table runner to be. Mine is for a small side table, so I needed it to be about 46″ long not including the ruffle, and 9 ” wide. You need to add 1 inch to each side for a seam allowance. So for a 9×46″ table runner, I cut my fabric 11×48″. Hope that makes sense.
(Ignore the hem on the bottom of the photo. I was using a canvas drop cloth and thought I would be able to save some time by using the side that was already hemmed. Didn’t work, so I ended up cutting it off.)
 3-Iron a 1/2″ hem along one of the long sides.
 4-Fold it under another 1/2″ and iron it again.
 5-Now sew a straight stitch down the entire length, stitching close to the inside fold.
Note: I left the ends of my table runner raw, because I knew they wouldn’t show, but you can hem them the same way if you prefer.
 6-Repeat steps 3-5 on the other side of the table runner.
7-Now it’s time to make the ruffles for the ends. Yipee! Who loves ruffles? I made my ruffles 7 inches long, but the length is totally up to you. You want the width to be at least twice the length of the end you are sewing it on. My ends are about 9″, so I needed my muslin is about 20 inches long. I wanted a shabby look, so I tore the muslin instead of cutting it. Makes a much nicer edge. Of course you can always do a hem if you prefer. My muslin pieces ended up about 7″x20″.
 8-To ruffle the muslin, sew a basting stitch down the 20″ side of the muslin. I used the longest length on my machine, but you can sew by hand if you prefer. Then pull the thread to gather the fabric. If you use the machine, only pull one of the threads. Keep pulling and arranging till the ruffle is the same length as the end of your table runner. Then pin it in place so that the gathering stitch is about 1/2″ from the end of the table runner.
 9-Stitch it in place, following the gathering stitch as closely as possible. Make sure you backstitch on both ends!
 10- Repeat steps 7-9 for the other end of your table runner.
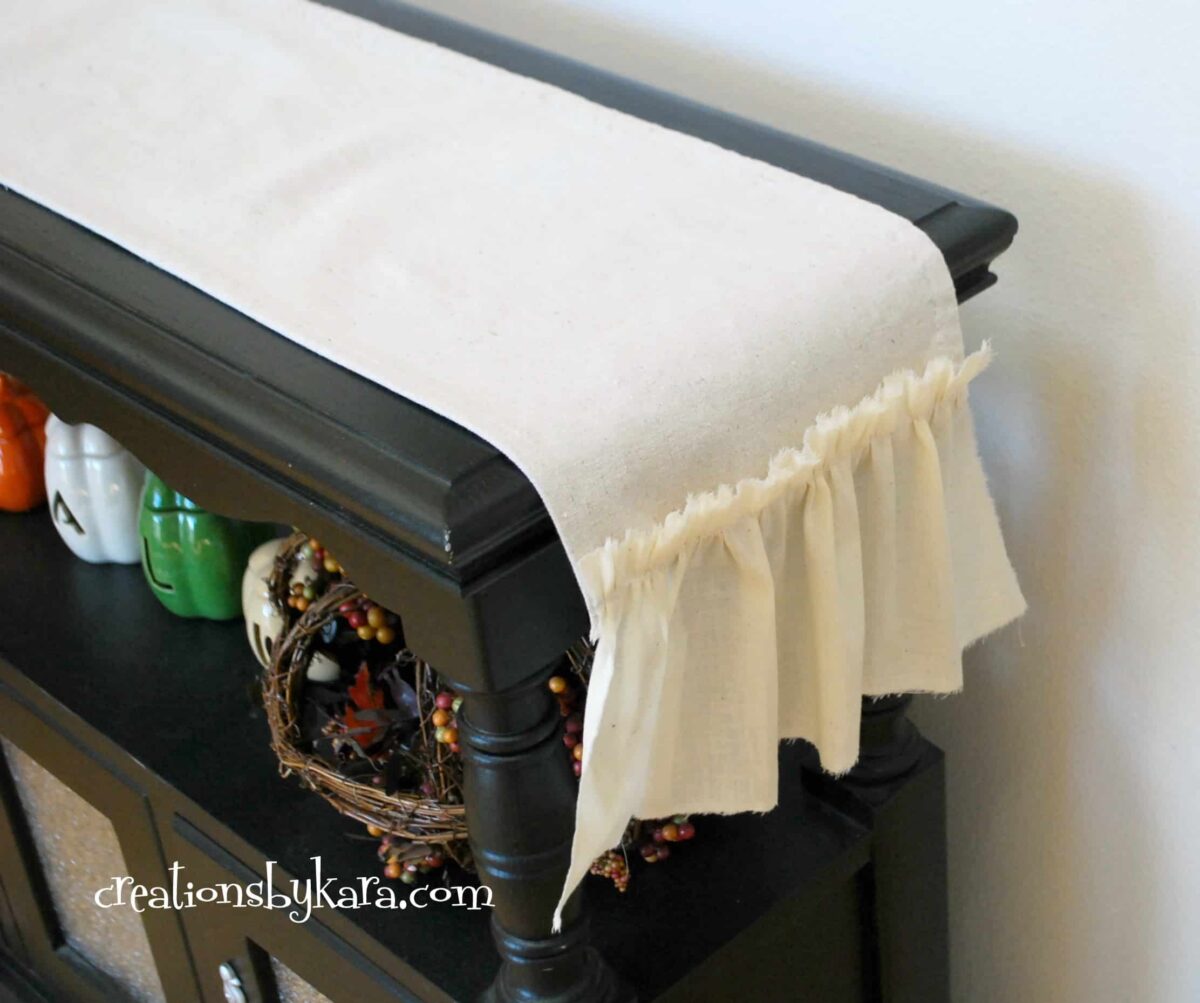
Voila! A perfectly lovely, shabby chic table runner!
Yes, that is my fall decor you see under there. It took me this long to get the tutorial written up. Don’t judge.
 From the side:

Love!
Reply
So pretty, Kara! Love it for year-round 🙂
Featuring this at tonight’s party! Yay!
xoxo
Reply
What a great project! Won’t you consider sharing it with my readers at sassafrassalvation.blogspot.com/2012/01/architectural-salvage-jewelry.html. Thanks! Happy New Year!
Reply
This is so cute, I will have to try this. I am sure I have some material in my stash to make this.
Reply
I’d love to see it if you end up making one!
Reply
That’s so cute! Maybe even I could do it even though I am not a big sewer. Although I may be insulted if you called me a big sewer… cuz I don’t think that’s a word, at least not the word you are trying to say. I read that as the word it actually is at first, as in: a place for human waste, not a seamstress. LOL! 🙂
Reply
Haha! I guess I should have worded it differently. But at least I’m glad I made you laugh! 🙂
Reply
This is so sweet…I absolutely love it! I have muslin in my fabric stash too. 🙂 🙂 Thanks Kara, for the inspiration. 🙂
Reply