• Skip to primary navigation
  • Skip to main content
  • Skip to primary sidebar
  • Skip to footer

Creations by Kara

  • RECIPE INDEX
    • Appetizers and Snacks
    • All Bread Recipes
      • Bread- Muffins and Scones
      • Bread: Quick Breads
      • Bread: Yeast Bread
    • Breakfast
    • Crock Pot
    • All Dessert Recipes
      • Dessert: Brownies and Bars
      • Dessert: Cakes and Cupcakes
      • Dessert: Candy
      • Dessert: Cheesecake
      • Dessert: Cookies
      • Dessert: Frozen
      • Dessert: Misc.
      • Dessert: Pies and Crisps
    • Drinks
    • All Holiday Recipes
      • Christmas Recipes
      • Easter Recipes
      • Halloween Recipes
      • St. Patrick’s Day Recipes
      • Valentine’s Day Recipes
      • 4th of July Recipes
    • Instant Pot Recipes
    • All Main Dish Recipes
      • Main Dish- Beef
      • Main Dish: Chicken
      • Main Dish: Fish
      • Main Dish: Pork
      • Main Dish: Vegetarian
    • Low Carb Recipes
    • Restaurant Recipes
    • Salads
    • Side Dishes
    • Soups
    • Non-Food
  • TUTORIALS
    • Craft Tutorials
    • DIY Project Tutorials
    • Holiday Tutorials
    • Home Decor Ideas
    • Sewing Tutorials
  • FREEBIES
    • Free Patterns
    • Printable Gifts
    • Holiday Printables
    • LDS Printables
    • Printable Home Decor
  • HOLIDAYS
    • 4th of July
    • Christmas
    • Easter
    • Halloween
    • St. Patrick’s Day
    • Thanksgiving
    • Valentine’s Day
  • TIPS & TRICKS
  • Navigation Menu: Social Icons

    • Email
    • Facebook
    • Instagram
    • Pinterest
    • YouTube
This post may contain affiliate links, which gives me a small percentage of the sale, at no cost to you.
Home Ā» DIY & Tutorials Ā» Craft Tutorials Ā» Paper Roses from Coffee Filters

Paper Roses from Coffee Filters

April 19, 2011 by Kara Cook 19 Comments

  • Share
  • Tweet

We have another adoption home study this Friday. In addition to the cleaning of the house that I do every year in preparation, I set a goal to have the living room makeover completed. It’s been almost six months since I started. Six months! Man what a slacker I am! I figured it was about time I wrapped things up. My mom is coming over Wednesday to help me recover my chairs. In the meantime I have been working on all the little details like picture frames and accessories.

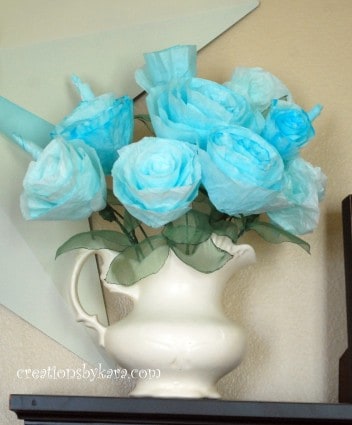
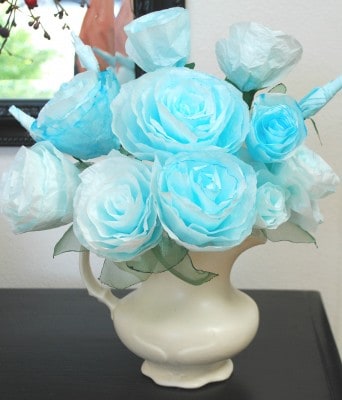
I needed some flowers to add a pop of color to my shelf. When I went out looking a couple months ago, I couldn’t find the right color of blue. So I decided to make my own paper roses.  Of course after I got them all finished, the stores started carrying all kinds of blue flowers for spring. But hey, mine are totally unique, and they were CHEAP! I made them out of coffee filters, and I love how they turned out.  I’m going to teach you how to make your own. 🙂

paper rose-tutorial
How to Make Paper Roses from Coffee Filters

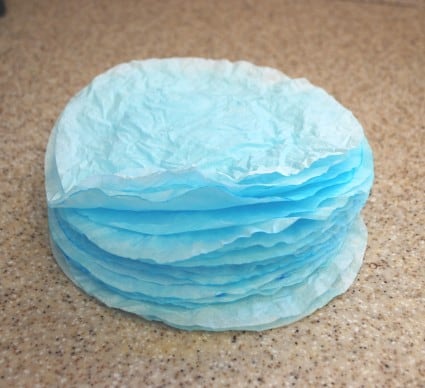
Take your set of coffee filters and soak them in a bowl of water. If you want to add color to them, add a few drops of food coloring to the water. You can make them any color you want by experimenting with different combinations of colors. Just remember that they will dry much lighter than the color of the water.
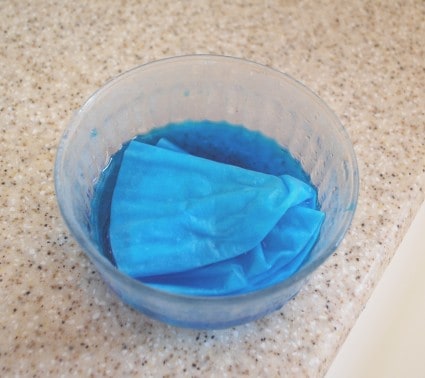
tutorial-paper roseWring them out and then lay them flat to dry. They will look like this when they are done:
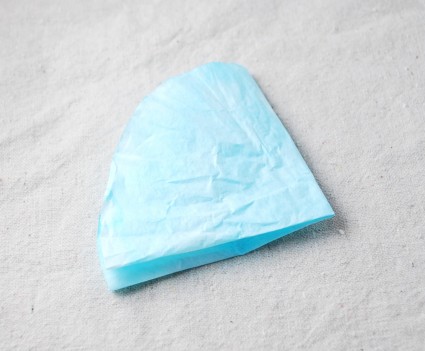
tutorial-paper roseNow fold them in half, then in half again.
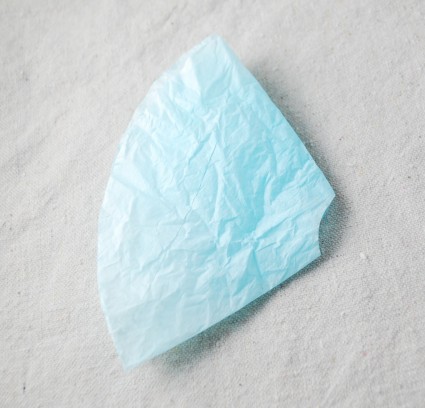
tutorial-paper roseCut a small rounded notch out of the bottom corner.
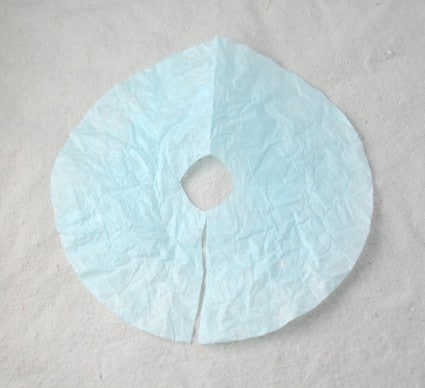
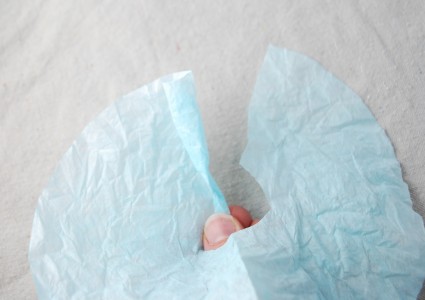
tutorial-paper roseThen open it up and cut a slit in the side.
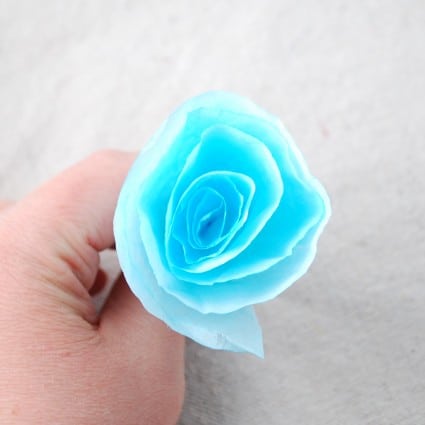
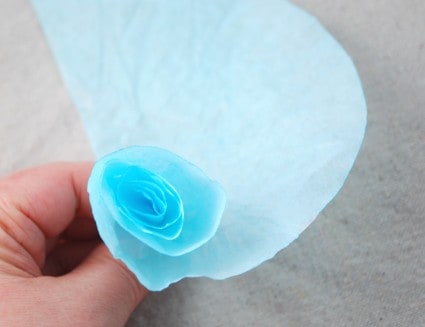
tutorial-paper roseNow you just start rolling it up.
tutorial-paper roseRoll tightly at first, but roll more loosely as you get to the outside. It takes a little bit of practice. My first rose looked like crud, so I just unrolled it and started over. No worries!
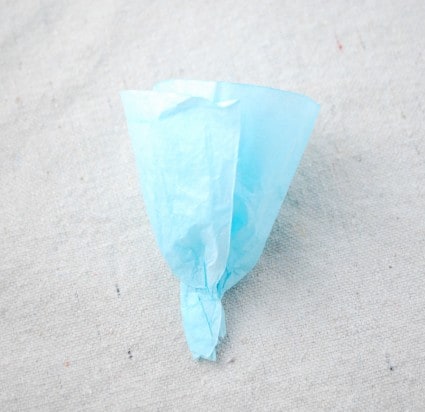
tutorial-paper roseIf your rose is the size you like, squish it together at the bottom.
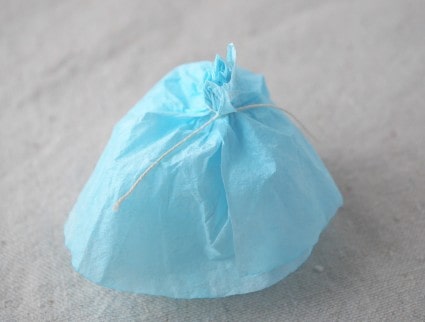
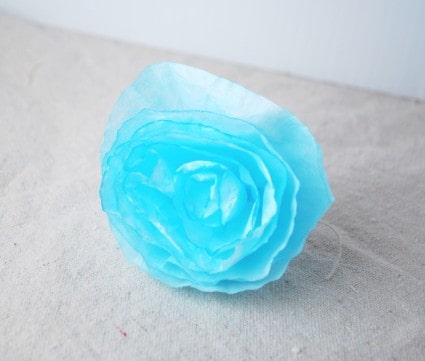
If you would like it bigger, just add another coffee filter ring, starting at the place you ended. When your rose is done, tie it off at the bottom.
Isn’t it pretty?
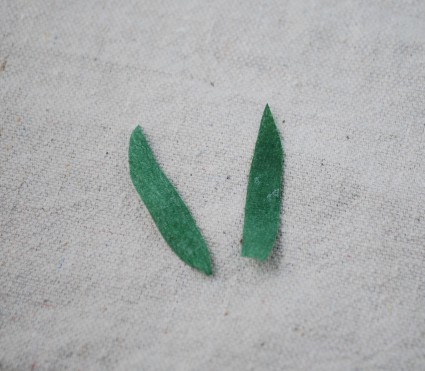
Now it’s time to add the stem. Cut two leaves out of floral tape. Mine aren’t perfect, and yours don’t need to be either. 🙂
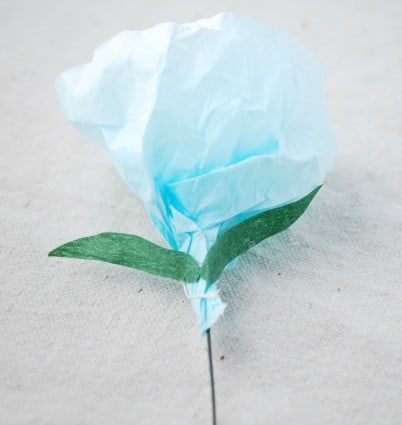
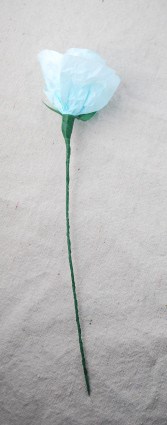
Push a piece of wire up through the bottom of the rose. You can use a dab of hot glue to secure it if you need to. Then stick the leaves to  the sides of the rose, right at the bottom.
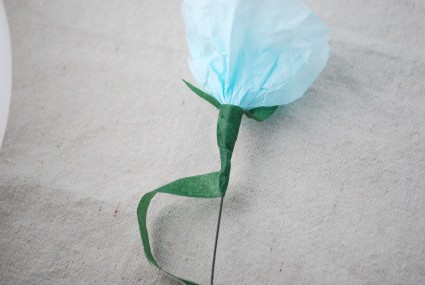
Take your floral tape and start wrapping the rose, making sure you wrap the leaves securely inside.
Then continue wrapping till your wire is covered:
If you want, you can add leaves. I just made some out of organza and hot glued them to the stems. Now they are ready to display any way you want!
I think they would also make a beautiful wreath; you could just leave off the stems and use the paper roses. So many possibilities!

Filed Under: Craft Tutorials, DIY & Tutorials, Dollar store projects, Home Decor, Home Decor Ideas Tagged With: food coloring, paper

Previous Post: « Oriental Salad Recipe
Next Post: We Interrupt This Post for a Pink Announcement! »

Reader Interactions

Comments

  1. Brandi

    October 5, 2012 at 7:56 pm

    Love it! Never thought of dying them! I’m going to use for some decoration for a Fall Pageant

    Reply
  2. aliya

    July 30, 2012 at 6:48 pm

    cant roll it up ugggggh šŸ™

    Reply
    • Kara

      July 31, 2012 at 11:30 am

      Ah danggit! Don’t get discouraged. I felt the same way when I first started. It just takes a bit of practice. My first roses looked like crud, but eventually I got better. I bet you will too! šŸ™‚

      Reply
  3. karen

    June 15, 2012 at 12:47 pm

    Those are gorgeous. I didn’t have food coloring so I used an alcohol-based ink in a plastic cup of water. Salmon color. They turned out so light and airy like yours. Thanks for posting!

    Reply
    • Kara

      June 18, 2012 at 10:52 pm

      I love that color. I bet they were totally gorgeous!

      Reply
  4. fedra salinas

    January 27, 2012 at 10:11 pm

    i love making flowers i bet my teacher is ganna love it. u better belive it i am 8 years old can’t u belive it it is weaird right.

    Reply
  5. Lucy

    May 6, 2011 at 7:20 pm

    So pretty…that’s how I make mine…I loooove them…

    Reply
  6. Timjanoakleja

    April 23, 2011 at 1:13 am

    They’re adorable! Thanks for sharing the making!

    Happy Easter!

    Love Birgit from Sweden

    Reply
  7. Lee

    April 22, 2011 at 1:56 pm

    I just love the roses from coffee filters, and I have them all over my kitchen drying right now. I am going to arrange them in $store vases and take them to the shut ins in our area, thought it would brighten their days. Thank you for sharing, I think I am addicted, they are so much fun to make and easy, can’t wait to teach my grandgirls how to do them.

    Thanks again,
    Lee

    Reply
  8. Michelle @Thrifty 101

    April 20, 2011 at 9:31 pm

    We made white roses like this at an “Alice in Wonderland” party and used a spray bottle filled with red-dyed water and we “painted the roses red”. I LOVE LOVE LOVE Blue roses. They look beautiful. šŸ™‚
    I’d love for you to link up this and any other amazing ideas you have at DIY Thrifty Thursdays at http://www.thrifty101.blogspot.com šŸ™‚
    ~Michelle

    Reply
  9. Rossana

    April 20, 2011 at 11:27 am

    beautiful flowers!!!

    Reply
  10. Kirsten Giles

    April 20, 2011 at 11:22 am

    Hi again… I have been following you for a while now, I do a feature called “What’s up Wednesday” and I featured your roses. I hope that is Ok. Have a great day! Oh, I’m having a giveaway stop by if you’d like!

    Reply
  11. Christy, HOMEmomMADE

    April 20, 2011 at 10:25 am

    I can’t wait to try these. So dainty .)
    Make & Share this Friday-Saturday, I’m featuring you next week the 28th since I have this week filled.

    Reply
  12. Kirsten Giles

    April 20, 2011 at 9:31 am

    I am LOVING these! So pretty and easy!

    Reply
  13. Shawna

    April 20, 2011 at 8:40 am

    Love these! I think they would be adorable as an accessory as well! Wear it as a pin, or a hair accessory!

    Reply
  14. CraftyMummy

    April 20, 2011 at 5:54 am

    Love your flowers and the tutorial makes them look super easy.

    Do you mind if I feature them on my blog? I’d use one picture and link back to your tutorial so my readers could visit and check it out.

    Reply
  15. Amy

    April 19, 2011 at 10:19 am

    Love these Kara! Hope everything is going great!
    xoxo,
    Amy

    Reply
  16. Amanda

    April 19, 2011 at 9:26 am

    Very pretty flowers! Thanks for sharing the tutorial. Also, all the best for your adoption process, we’re pursuing adoption as well (domestic adoption in California).

    Reply

Leave a Reply Cancel reply

Your email address will not be published. Required fields are marked *

Primary Sidebar

Hi. I’m Kara, and I love to create! I share recipes, DIY tutorials, craft projects, and thrifty home decor. I hope that I can inspire you to create something!
MORE ABOUT ME

Categories

Footer

PRIVACY POLICY | ABOUT ME | DISCLOSURE

Copyright © 2023 Creations by Kara on the Foodie Pro Theme

352 shares