• Skip to primary navigation
  • Skip to main content
  • Skip to primary sidebar
  • Skip to footer

Creations by Kara

  • RECIPE INDEX
    • Appetizers and Snacks
    • All Bread Recipes
      • Bread- Muffins and Scones
      • Bread: Quick Breads
      • Bread: Yeast Bread
    • Breakfast
    • Crock Pot
    • All Dessert Recipes
      • Dessert: Brownies and Bars
      • Dessert: Cakes and Cupcakes
      • Dessert: Candy
      • Dessert: Cheesecake
      • Dessert: Cookies
      • Dessert: Frozen
      • Dessert: Misc.
      • Dessert: Pies and Crisps
    • Drinks
    • All Holiday Recipes
      • Christmas Recipes
      • Easter Recipes
      • Halloween Recipes
      • St. Patrick’s Day Recipes
      • Valentine’s Day Recipes
      • 4th of July Recipes
    • Instant Pot Recipes
    • All Main Dish Recipes
      • Main Dish- Beef
      • Main Dish: Chicken
      • Main Dish: Fish
      • Main Dish: Pork
      • Main Dish: Vegetarian
    • Low Carb Recipes
    • Restaurant Recipes
    • Salads
    • Side Dishes
    • Soups
    • Non-Food
  • TUTORIALS
    • Craft Tutorials
    • DIY Project Tutorials
    • Holiday Tutorials
    • Home Decor Ideas
    • Sewing Tutorials
  • FREEBIES
    • Free Patterns
    • Printable Gifts
    • Holiday Printables
    • LDS Printables
    • Printable Home Decor
  • HOLIDAYS
    • 4th of July
    • Christmas
    • Easter
    • Halloween
    • St. Patrick’s Day
    • Thanksgiving
    • Valentine’s Day
  • TIPS & TRICKS
  • Navigation Menu: Social Icons

    • Email
    • Facebook
    • Instagram
    • Pinterest
    • YouTube
This post may contain affiliate links, which gives me a small percentage of the sale, at no cost to you.
Home Ā» DIY & Tutorials Ā» DIY Ā» Flower Lampshade {Thrifty Decorating}

Flower Lampshade {Thrifty Decorating}

May 1, 2012 by Kara Cook 14 Comments

  • Share
  • Tweet

diy-flower-lampshade
I mentioned last week that none of the rooms in my house are 100% finished. I am trying to remedy that. My living room is almost completely decorated. I just need to put together some vignettes on my tables, and put actual pictures in the frames hanging on the wall. (Don’t laugh. Empty frames are all the rage right now anyway, right?)

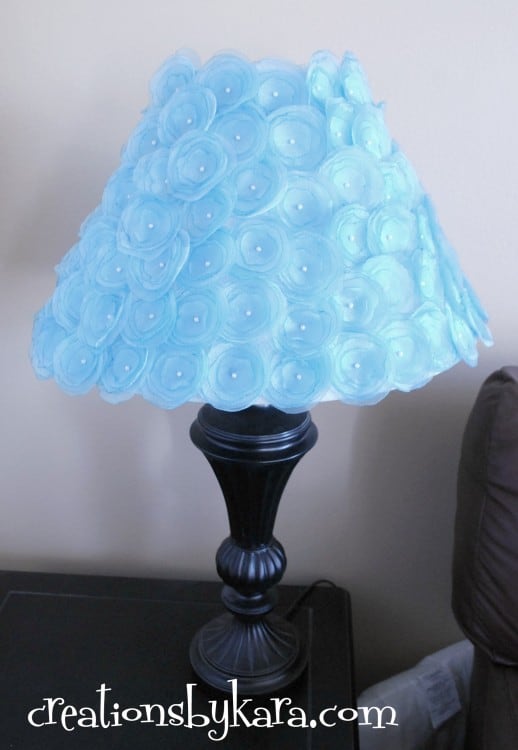
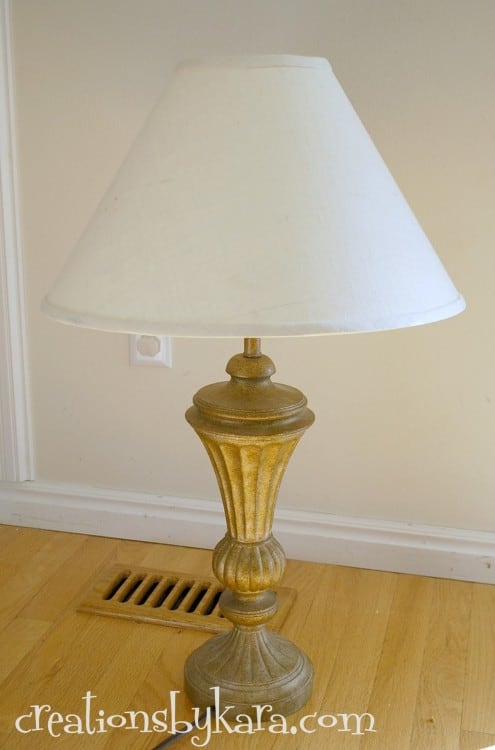
I’ve had a lamp on my side table for months that I bought at a yard sale last year for $5. I spray painted it, but it’s been needing a lampshade facelift for ages. I am happy to say that I finally got it finished. Woot woot!

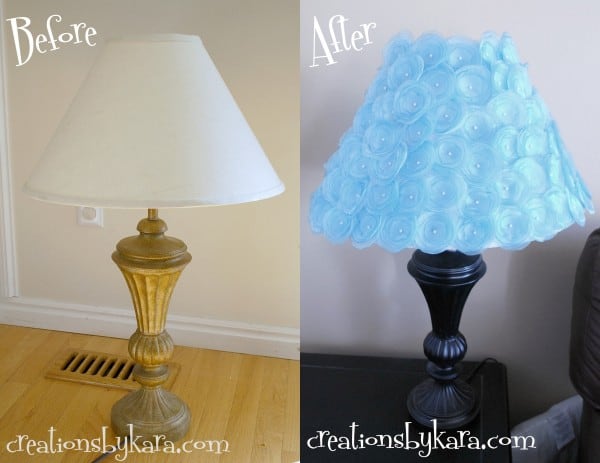
This is what it looked like before:
diy-lampshade-makeoverAnd now, after a few coats of spray paint and what seemed like a gazillion flowers, here she is now:
diy-project-lampshadeQuite an improvement, wouldn’t you say? (How did I not notice that pillow form stuck behind the couch when I snapped this photo? Sheesh.) Although I do have to admit that when I see it on the black table, I’m kinda thinking I might like it white. But I’m not sure. Any thoughts?

If any of you want to make a similar lampshade, I’m going to share a few tips with you. I’m not going to do a full tutorial for the singed flowers, because there’s already dozens out there and I don’t wanna re-invent the wheel. Basically you cut decreasing sizes of circles, singe the edges, and sew them together with a bead.
But when you are making them in mass amounts like you need for this lampshade, there are a few things you need to do differently to save yourself some time.

Before you decide to take this on, you might wanna know that my lampshade has about 200 flowers on it. All five layers. That’s 1,000 circles that you have to cut out and singe. So yes, it’s gonna take awhile. But on the plus side, you can sit and watch tv while doing it. 🙂

Flower Lampshade Tips

-Decide the size you want your flower, and cut 5 paper circles in decreasing size. Put each circle in a ziplock bag. When you cut your fabric, cut one size at a time, and put all the circles in the bag with the pattern. Singe one bag at a time and put them all back in the back when you are done. If you don’t keep the circles separated, you will have a ginormous mess of slippery fabric taking over your life. Trust me.

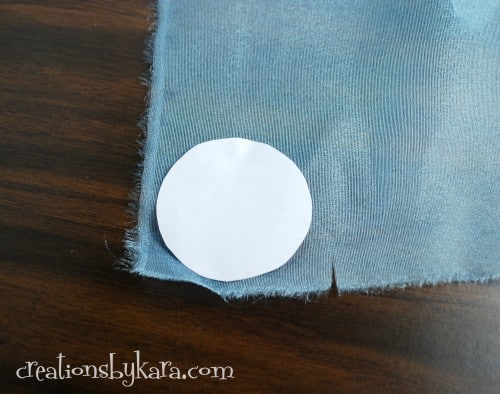
-Cutting multiple circles at once saves a bucketload of time! I discovered that the organza fabric rips just great, so I used that to my advantage. Just take one of your circles and lay it on the edge of your fabric. Use your scissors to make a snip in the edge of the fabric slightly wider than your circle.
diy project-flower lampshade
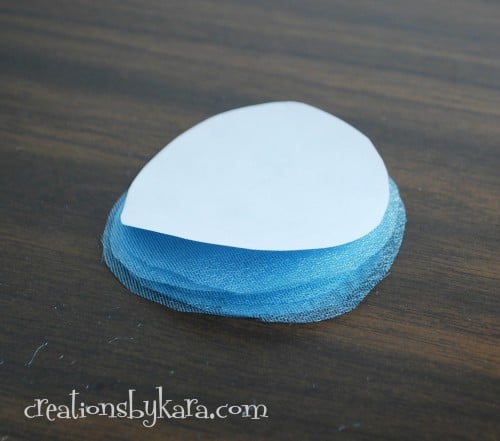
-Now pull the fabric apart at the snip and rip a strip of fabric. Fold it over and over on itself, making sure you make the folds spaced far enough apart to fit the circle. When you are all done, you can cut out a bunch of circles all at once.
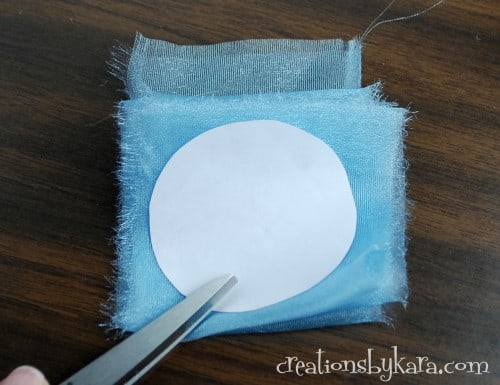
diy project-flower lampshade-When you get done, check the edges of the circles to make sure they all got cut. Sometimes you will end up with edges that are still folded and need to be snipped apart. No biggie. When you have the folded edges snipped, your stack  will lay nice and flat like the photo below. Stuff them into your ziplock bag.
diy project-flower lampshade-Some people use a lighter to singe the edge of their circles. I always use a candle, I think it is much easier. With this amount of flowers, your hand would totally cramp up holding a lighter. No good!

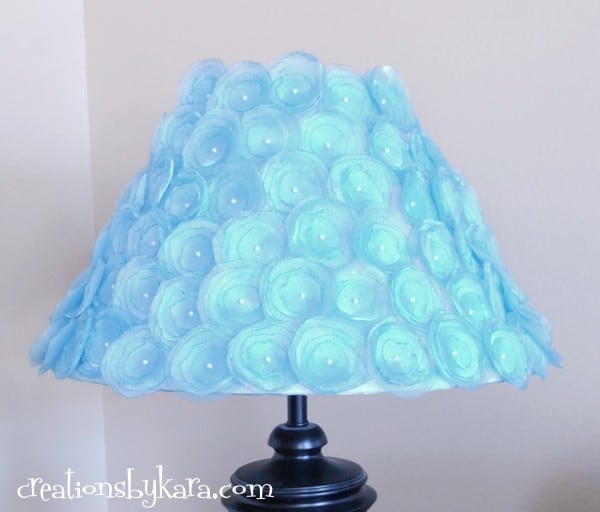
-I was originally going to glue my flowers on in straight rows, but that left little gaps in the corners where the dirty shade showed through. So if you want straight rows, you need to cover your lampshade with fabric first. I decided to just overlap my flowers to hide the gaps. This method does use more flowers though. So choose the option that you like the best, and just start hot gluing them on.
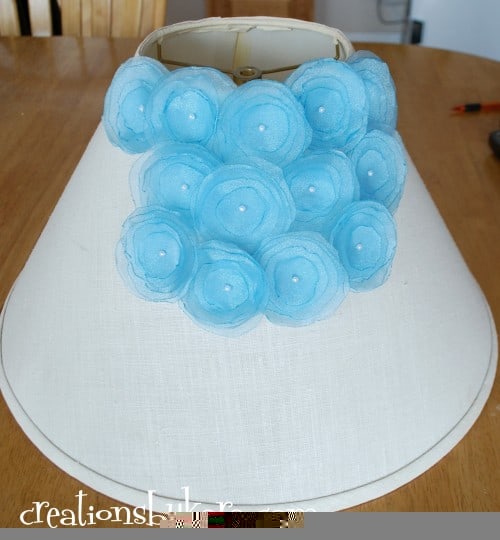
diy project-flower lampshadeAnd because I just can’t resist a good before and after shot, here ya go:
lamp before and afterI know some of you will ask how much fabric you need for this project. I’m not exactly sure how much because I started with a bunch of  scrap fabric, but ended up buying two more yards. So maybe three yards?

Linking up with the following:
Visit thecsiproject.com

Filed Under: DIY, Home Decor, Home Decor Ideas, Spray Paint, Thrifty Makeovers Tagged With: diy

Previous Post: « Interchangeable Book Page Wreath
Next Post: White Chocolate Cinnamon Roll Chex Mix »

Reader Interactions

Comments

  1. Lynn

    February 19, 2013 at 7:39 am

    Hi,
    I thought of doing a fabric lamp shape a while back but you have really done a beautiful job…..Lynn

    Reply
    • Kara

      February 20, 2013 at 8:24 pm

      Thanks so much Lynn!

      Reply
  2. Wanessa Carolina

    May 24, 2012 at 7:45 am

    Hi Kara, what a beautiful lamp! Love it!

    Hugs,

    Wanessa

    Reply
  3. Ashley

    May 6, 2012 at 10:27 pm

    soo cute! love your lamp! that was so creative!

    Reply
    • Kara

      May 8, 2012 at 9:38 am

      Thanks so much Ashley!

      Reply
  4. Kimberly R.

    May 3, 2012 at 10:25 am

    I have always loved your blog, but this lamp put that love over the top!!!! Absolutely so cute … and love the blue flowers with the black base.

    Reply
    • Kara

      May 3, 2012 at 11:21 am

      Aw, thanks so much Kimberly! You just made my day. šŸ™‚

      Reply
  5. Kara

    May 2, 2012 at 12:08 pm

    It was time consuming, but thankfully I love it! And I’m afraid I have to agree that it would look better white. Dang.

    Reply
  6. Shantalle

    May 2, 2012 at 10:42 am

    Wow! That’s alot of work, great job!

    Reply
  7. Maureen

    May 1, 2012 at 9:35 pm

    I love the transformation of this lamp! Thanks for explaining about the singed flowers because I didn’t know how to make em! Thanks also for the clear explanation of how to cut the circles and store them so they don’t take over your room – LOL! Really nice job and very straightforward tutorial!

    Reply
  8. Virginia

    May 1, 2012 at 8:58 pm

    It’s gorgeous, looks extremely time consuming and yes I would paint the lamp white. The black on the black doesn’t do it much justice.

    Reply
  9. amie

    May 1, 2012 at 3:31 pm

    such a beautiful fun accent! love it!

    Reply
  10. lisa

    May 1, 2012 at 12:09 pm

    Love! I would paint the base white though. I think it would look classy on the black table.

    Reply
  11. michelle@somedaycrafts

    May 1, 2012 at 9:00 am

    I love your new lamp! Very pretty. The color is beautiful. I am featuring this at somedaycrafts.blogspot.com.

    Reply

Leave a Reply Cancel reply

Your email address will not be published. Required fields are marked *

Primary Sidebar

Hi. I’m Kara, and I love to create! I share recipes, DIY tutorials, craft projects, and thrifty home decor. I hope that I can inspire you to create something!
MORE ABOUT ME

Categories

Footer

PRIVACY POLICY | ABOUT ME | DISCLOSURE

Copyright © 2023 Creations by Kara on the Foodie Pro Theme

23 shares