• Skip to primary navigation
  • Skip to main content
  • Skip to primary sidebar
  • Skip to footer

Creations by Kara

  • RECIPE INDEX
    • Appetizers and Snacks
    • All Bread Recipes
      • Bread- Muffins and Scones
      • Bread: Quick Breads
      • Bread: Yeast Bread
    • Breakfast
    • Crock Pot
    • All Dessert Recipes
      • Dessert: Brownies and Bars
      • Dessert: Cakes and Cupcakes
      • Dessert: Candy
      • Dessert: Cheesecake
      • Dessert: Cookies
      • Dessert: Frozen
      • Dessert: Misc.
      • Dessert: Pies and Crisps
    • Drinks
    • All Holiday Recipes
      • Christmas Recipes
      • Easter Recipes
      • Halloween Recipes
      • St. Patrick’s Day Recipes
      • Valentine’s Day Recipes
      • 4th of July Recipes
    • Instant Pot Recipes
    • All Main Dish Recipes
      • Main Dish- Beef
      • Main Dish: Chicken
      • Main Dish: Fish
      • Main Dish: Pork
      • Main Dish: Vegetarian
    • Low Carb Recipes
    • Restaurant Recipes
    • Salads
    • Side Dishes
    • Soups
    • Non-Food
  • TUTORIALS
    • Craft Tutorials
    • DIY Project Tutorials
    • Holiday Tutorials
    • Home Decor Ideas
    • Sewing Tutorials
  • FREEBIES
    • Free Patterns
    • Printable Gifts
    • Holiday Printables
    • LDS Printables
    • Printable Home Decor
  • HOLIDAYS
    • 4th of July
    • Christmas
    • Easter
    • Halloween
    • St. Patrick’s Day
    • Thanksgiving
    • Valentine’s Day
  • TIPS & TRICKS
  • Navigation Menu: Social Icons

    • Email
    • Facebook
    • Instagram
    • Pinterest
    • YouTube
This post may contain affiliate links, which gives me a small percentage of the sale, at no cost to you.
Home » DIY & Tutorials » Sewing Tutorials » How to Make a Onesie Dress {Tutorial}

How to Make a Onesie Dress {Tutorial}

May 10, 2011 by Kara Cook 4 Comments

  • Share
  • Tweet

It’s a good thing I had some projects archived. Because I am dang dog tired. And not just because I’m up at night with the world’s cutest newborn. I’m also taking meds to help be be able to breastfeed. They cause drowsiness. Lots of it. And I’ve come down with a nasty cough that’s keeping me up at night. Don’t want to take any medicine for it, because it might impede the whole milk coming in thing. So I’m pretty much a walking zombie. It’s a good thing I have lots of helpers!!

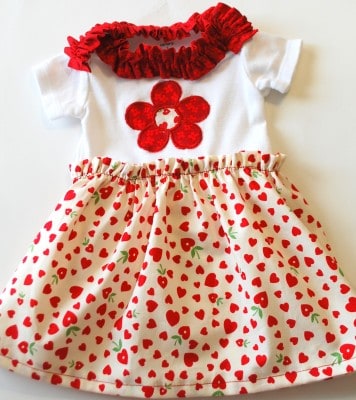
This tutorial is part two of making an embellished onesie. I already blogged the steps for  how to add the ruffle to the onesie a few weeks ago. Now I’m showing you how to make a onesie into a dress.
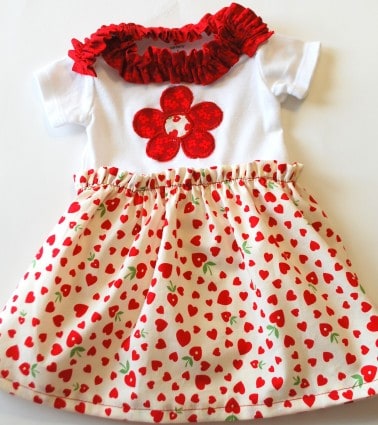
Learn how to make an adorable onesie dress with this step by step tutorial.
How to Make a Onesie Dress
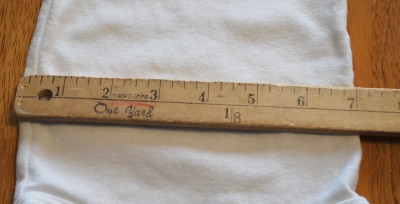
Measure across the waist of your onesie. Mine was 7″.
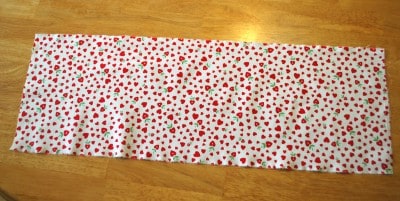
tutorial-onesie dressNext you need to cut the strip of fabric for your skirt. You want it four times the width of the waist, and however long you want it plus 2″.  I cut mine 28″ wide (4 x 7″), and 9 1/2″ long (I wanted it 7 1/2′ long, so I added 2″.
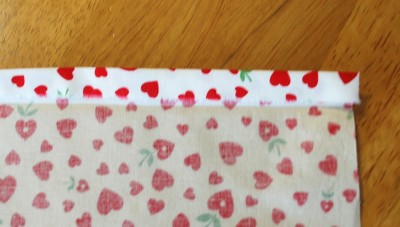
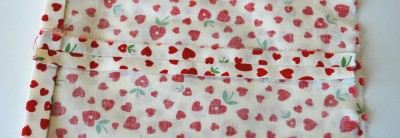
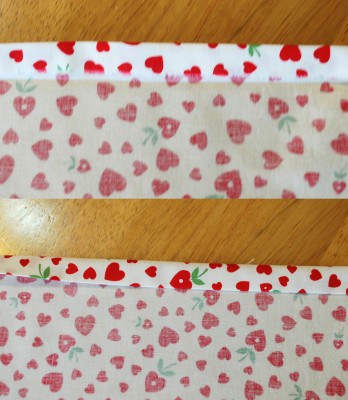
tutorial-onesie dressNow you need to make the top and bottom hem. Fold the long side of the fabric down 1/2″ and iron it well. No you don’t need new glasses. It’s possible that there may have been a bit of photographer error in this shot.
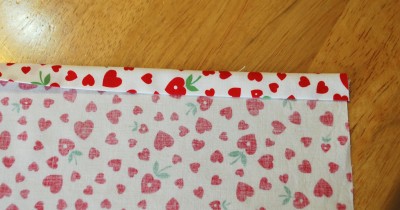
tutorial-onesie dressNow fold it down 1/2″ again, and iron that crease really well.
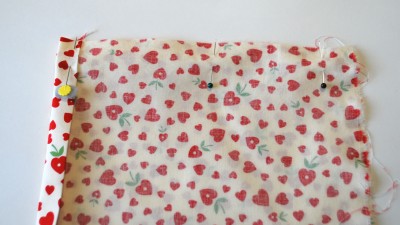
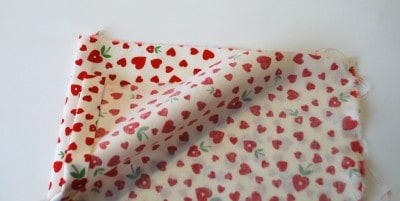
tutorial-onesie dressNow match up the side seams right side together, and pin them.
tutorial-onesie dressUsing a 1/2″ seam allowance, sew up the side; then press the seam open.
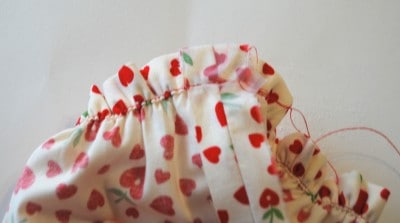
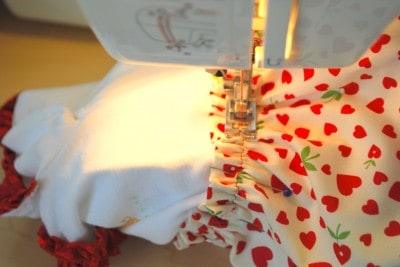
Now you need to gather the top of the skirt so that it will match up with the waist of the onsie. You can use your favorite method of gathering. I simply used my widest stitch length, then pulled on one of the threads. I started at the back seam. I used a piece of tape to hold my thread in place so it wouldn’t slip while I was taking pictures. You can obviously skip that step. I’m just telling you so I don’t get a bunch of e-mails asking me what the tape is for. 😉
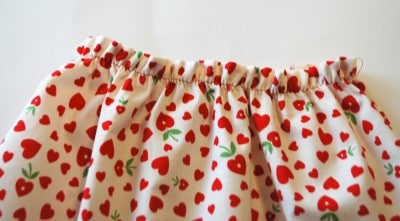
It will look something like this on the outside:
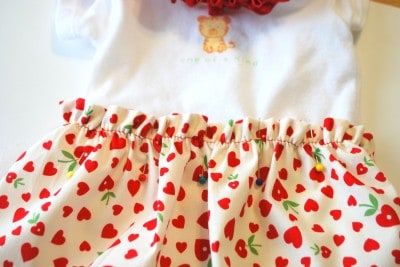
Make sure the gathers are spread evenly, and pin your skirt to the waist of the onesie. Don’t forget to put the seam in the back!
Now stitch all the way around, right on top of your gathering stitch. Be very careful not to catch the bottom of the onesie under the needle. I did that myself, and had to patch a little hole. Not fun.
Now all you have left is to hem up the bottom of the skirt. Use the same method as you did for the top of the skirt. Fold over 1/2″, iron, repeat.
Then stitch the hem. You want your stitches to be close to the inside fold. When you are finished, turn your skirt right side out and clip all your threads.
Learn how to make an adorable onesie dress with this step by step tutorial.
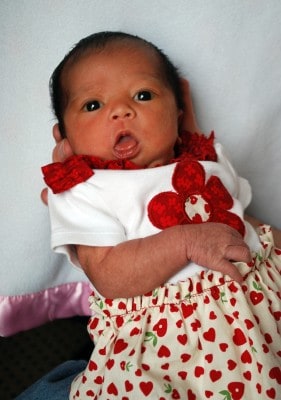
Then put it on the cutest baby girl you can find. 🙂

Filed Under: DIY & Tutorials, Sewing Tutorials Tagged With: fabric

Previous Post: « Homemade Oreo Cookies Recipe
Next Post: Peanut Butter Sauce {Ice Cream Topping} »

Reader Interactions

Comments

  1. Cute Baby Girl Outfits

    December 10, 2013 at 1:03 am

    A very creative idea that makes an one of a kind outfit for your adorable little girl. Thanks for sharing. Having cute baby girl outfits is so much fun.

    Reply
  2. Vicki Dudai

    August 4, 2012 at 11:28 pm

    I like this tutorial best because you aren’t cutting the onesie and that all the ruffling is on the outside as well. Quick, easy and just plain fun! Thanks for contributing!

    Reply
  3. Jody

    May 18, 2011 at 12:31 pm

    She is just beautiful!

    Reply
  4. Jennifer

    May 16, 2011 at 1:00 pm

    What a cute model! Congrats on your adoption!

    Reply

Leave a Reply Cancel reply

Your email address will not be published. Required fields are marked *

Primary Sidebar

Hi. I’m Kara, and I love to create! I share recipes, DIY tutorials, craft projects, and thrifty home decor. I hope that I can inspire you to create something!
MORE ABOUT ME

Categories

Footer

PRIVACY POLICY | ABOUT ME | DISCLOSURE

Copyright © 2023 Creations by Kara on the Foodie Pro Theme

118 shares