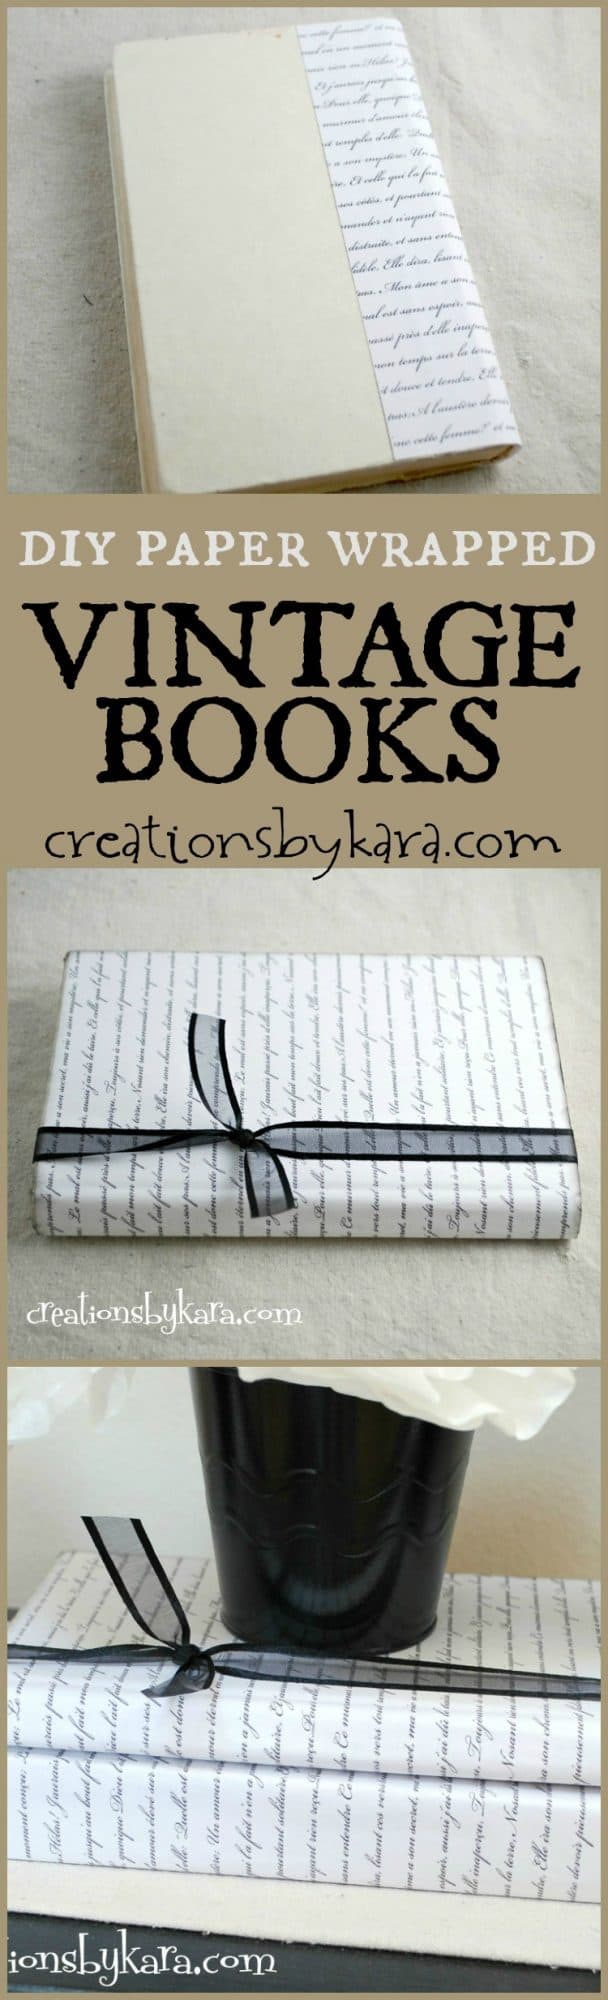
• Skip to primary navigation
  • Skip to main content
  • Skip to primary sidebar
  • Skip to footer

Creations by Kara

  • RECIPE INDEX
    • Appetizers and Snacks
    • All Bread Recipes
      • Bread- Muffins and Scones
      • Bread: Quick Breads
      • Bread: Yeast Bread
    • Breakfast
    • Crock Pot
    • All Dessert Recipes
      • Dessert: Brownies and Bars
      • Dessert: Cakes and Cupcakes
      • Dessert: Candy
      • Dessert: Cheesecake
      • Dessert: Cookies
      • Dessert: Frozen
      • Dessert: Misc.
      • Dessert: Pies and Crisps
    • Drinks
    • All Holiday Recipes
      • Christmas Recipes
      • Easter Recipes
      • Halloween Recipes
      • St. Patrick’s Day Recipes
      • Valentine’s Day Recipes
      • 4th of July Recipes
    • Instant Pot Recipes
    • All Main Dish Recipes
      • Main Dish- Beef
      • Main Dish: Chicken
      • Main Dish: Fish
      • Main Dish: Pork
      • Main Dish: Vegetarian
    • Low Carb Recipes
    • Restaurant Recipes
    • Salads
    • Side Dishes
    • Soups
    • Non-Food
  • DIY
    • Craft Tutorials
    • DIY Project Tutorials
    • Holiday Tutorials
    • Home Decor Ideas
    • Sewing Tutorials
    • Tips & Tricks
    • FREEBIES
      • Free Patterns
      • Printable Gifts
      • Holiday Printables
      • LDS Printables
      • Printable Home Decor
  • HOLIDAYS
    • 4th of July
    • Christmas
    • Easter
    • Halloween
    • St. Patrick’s Day
    • Thanksgiving
    • Valentine’s Day
  • SHOP
  • MEAL PLANS
  • Navigation Menu: Social Icons

    • Email
    • Facebook
    • Instagram
    • Pinterest
    • YouTube
This post may contain affiliate links. As an Amazon Influencer, I earn from qualifying purchases, (no cost to you).
Home » DIY & Tutorials » DIY » Paper Wrapped Vintage Books

Paper Wrapped Vintage Books

September 18, 2012 by Kara Cook 4 Comments

  • Share

Affiliate link disclosure for paper wrapped vintage booksPaper wrapped vintage books are an easy and inexpensive way to add a little charm to your home decor. You can customize them for any holiday or color scheme with a little ribbon!

diy-vintage-book-tutorial
I am a big fan of using old books in my decorating. Sometimes I use the book pages, but I also love using the actual books. They are a great way to add height and visual interest to displays. Every time I go to the library, I check the box of books that they are discarding because they are damaged. Sometimes they are a quarter, but sometimes I can get them for free. I pick out the ones that look vintage but are still sturdy, and add them to my stash for when I need them.

I saw a cute idea over at Decor Chick for DIY painted and stamped books. Emily (who I happen to adore) used a script stamp for her books. But I don’t have one, and the nearest craft store is 40 minutes away. So I did what any DIY-er would do. I improvised!

I found a french poem online, copied and pasted it over and over again, and printed out my own script paper. If you would like to use it, just click on the link below, then print it out.

Script Paper for Vintage Books

Paper Wrapped Vintage Books:

Supplies:
-an old book (I used a hardback book)
-downloadable script paper (Unless your book is very small, you will need at least two copies)
–glue stick or spray adhesive
-scissors
-ribbon
–black ink and sandpaper (optional)

Cut the borders around the paper that your printer didn’t print on. Then carefully measure the height of your book and cut the two pieces of script paper to fit from top to bottom. Place one piece of paper on the front cover of your book, making sure it is straight. Use your fingernail or a pen lid to follow the crease at the side of the book. Tip: It is best to use a book that is small enough for your paper to wrap around the back.

paper-wrapped-book-tutorial-001
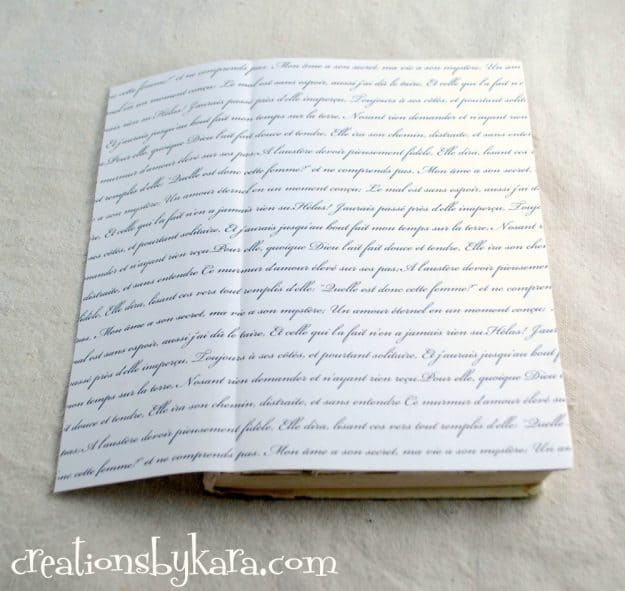
Use a glue stick or spray adhesive to attach the paper to the book. I glued the front first, then the binding, then flipped it over and glued the back. I used a glue stick and it worked just fine. You want your paper to wrap around the back by at least an inch, but more is OK.

Paper wrapped book tutorial
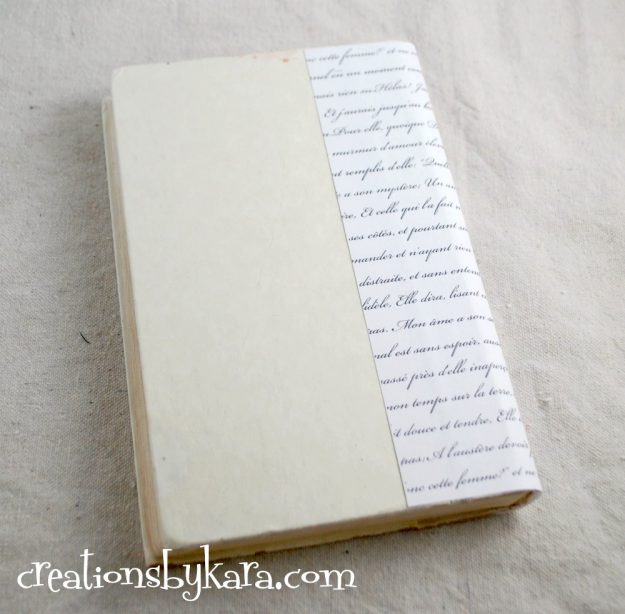
Now cut that second piece of script paper so that it is wide enough to cover from the edge of the book to about 1/2″ over the edge of the paper already attached. I’m OCD so I had to make sure my lines of script matched up, but no one will see it so it probably doesn’t matter that much. 🙂  Glue it on.

How to wrap a book with vintage paper
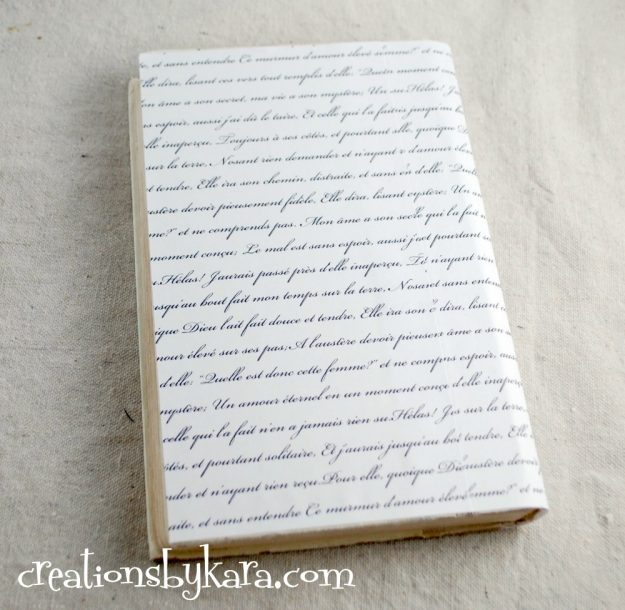
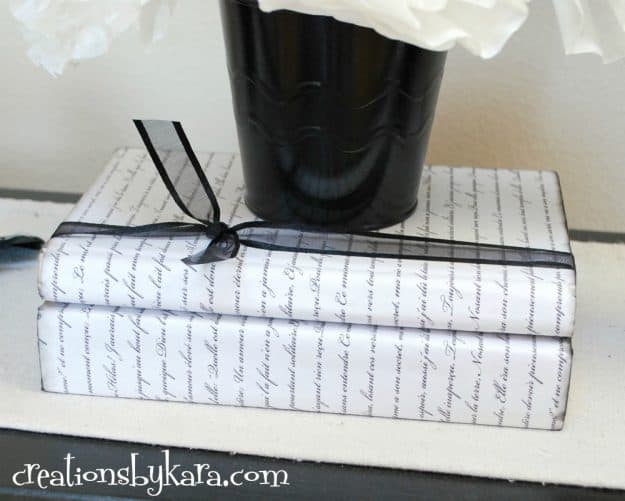
If you’d like, you can sand the edges a little. Then use some black ink to give it a more vintage, distressed look. To finish it off, wrap a ribbon around it and tie a knot. Easy peasy.

Vintage paper wrapped book tutorial
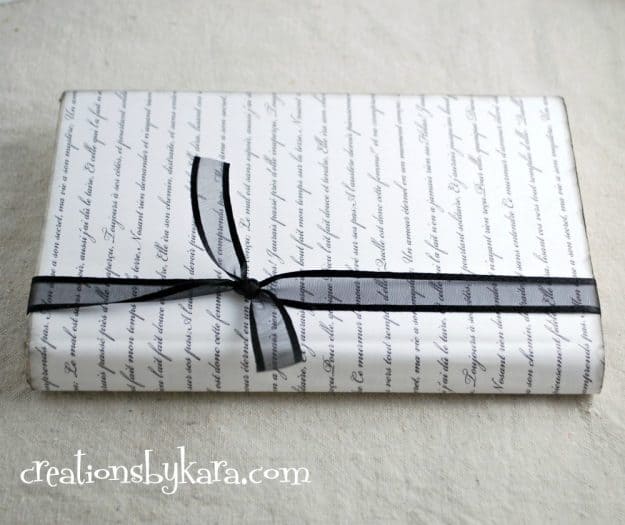
I stacked a set of two together and used them for my black and white Halloween entry table display.

Free vintage paper for wrapping books, and instructions for completing the project.
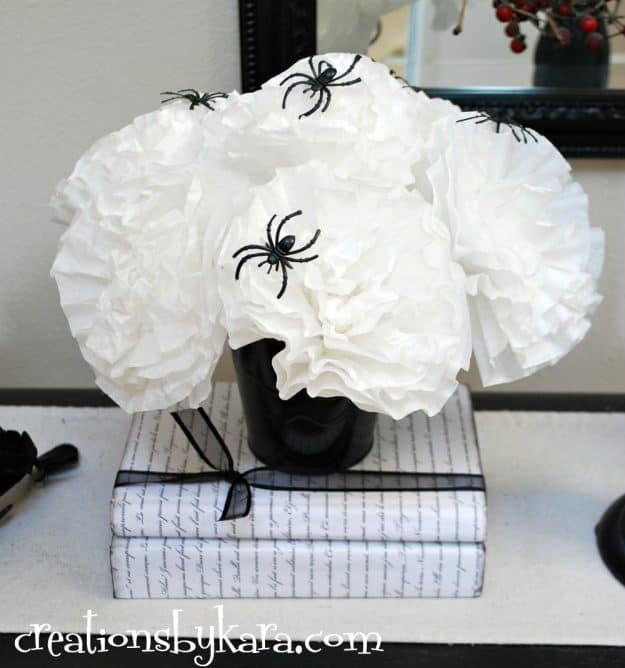
Here’s a little close up:

Vintage paper wrapped book tutorial - plus free printable vintage paper.
I am loving them with my Halloween display, but when the season is over, I’ll  just swap out the ribbon to match my decor. Don’t you just love it when your projects multi-task? 🙂

Paper wrapped vintage books - use this free printable script paper to add simple and inexpensive home decor to any room in your house.


WANT TO SAVE THIS RECIPE?

Just enter your email and get it sent right to your inbox! Plus you’ll get new recipes from me every week!

Filed Under: DIY, DIY & Tutorials, Free Printables, Home Decor, Printable Home Decor Tagged With: decorating, diy, tutorial

Previous Post: « Coconut Pumpkin Bread
Next Post: 30+ Fall Baking Recipes You Need To Try! »

Reader Interactions

Comments

  1. Taryn @ Design, Dining + Diapers

    September 18, 2012 at 6:34 pm

    These are too cute! I love how the books look. Great job Kara!

    Reply
    • Kara

      September 18, 2012 at 9:59 pm

      Thanks so much Taryn!

      Reply
  2. michelle@somedaycrafts

    September 18, 2012 at 8:06 am

    Cute!

    Reply
    • Kara

      September 18, 2012 at 10:02 pm

      Thanks my friend!

      Reply

Leave a Reply Cancel reply

Your email address will not be published. Required fields are marked *

Primary Sidebar

Hi. I’m Kara, and I've loved cooking since I was about 10. Great food brings people together and can create some amazing memories. I hope you will use my family friendly recipes to make memories with your loved ones!
MORE ABOUT ME

Categories

Footer

PRIVACY POLICY | ABOUT ME | DISCLOSURE

Copyright © 2025 Creations by Kara on the Foodie Pro Theme

4 shares