Sorry I’ve been MIA for the last few days. It was my anniversary on Sunday, and my hubbie planned a little getaway for the two of us. I left on Thursday and didn’t have time to give ya all a heads up. It sure was nice to get away for awhile!
While we were gone we had some painters come to paint our two story foyer. Don’t be all panicking on me, they happen to be great friends of ours. No, I wouldn’t let complete strangers into my house while we were out of town. I may be crazy, but not that crazy. 😉 I will share the before and after later on this week.
But for today, I have a fun little spring project. DIY Cherry Blossoms. This project came about from necessity. I am in the process of doing a little spring and Easter decorating around my house. I wanted to purchase some faux cherry blossoms for my spring mantel, but I couldn’t find any. Anywhere. What’s a girl to do? Of course I had to make some of my own. I saw some on Pinterest that led me to these cherry blossoms at Good Housekeeping. But the instructions didn’t have photos, and I’m a visual girl. 🙁
It also called for floral wire, which I couldn’t find in my stash and I didn’t want to have to run to the store. So I came up with my own method. It was a super easy project, and I was actually kinda surprised at how beautiful the branches turned out. And I had all the supplies, so it cost me nadda. Always a good thing!
Aren’t they gorgeous? Now if I could just find a way to make them smell like a cherry orchard, I would be in heaven.
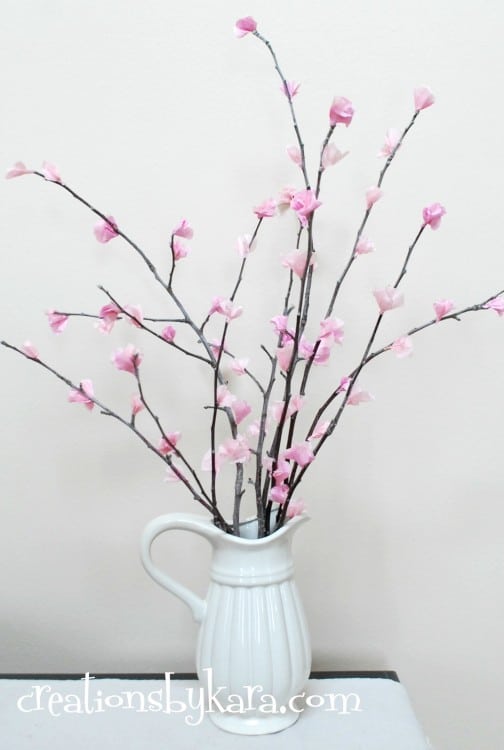
Are you decorating for spring? Want to make your own cherry blossoms? You do. It’s easy, promise.
DIY Cherry Blossoms Tutorial
Supplies:
-Tissue paper
-Scissors
-Hot glue gun
-Branches
Instructions:
1-Stack several pieces of tissue on top of each other and cut out a flower shape. It does not need to be perfect! Mine were about 2 1/2″ across and had five petals, but it doesn’t really matter that much. I wanted to do two colors, but you can just do one. And because I know a few of you are bound to notice. . . yes, my light pink paper has words on it. But it’s all I had and I knew once it was all scrunched up they wouldn’t show. Which they don’t. Thank goodness.
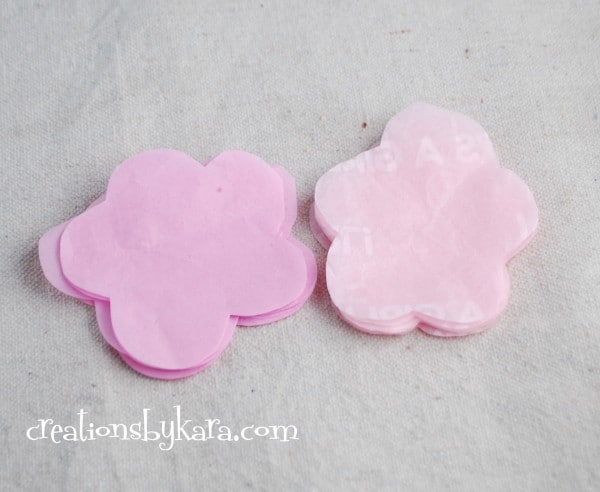 2-For two-toned cherry blossoms, stack two flowers on top of each other with the petals not matched up.
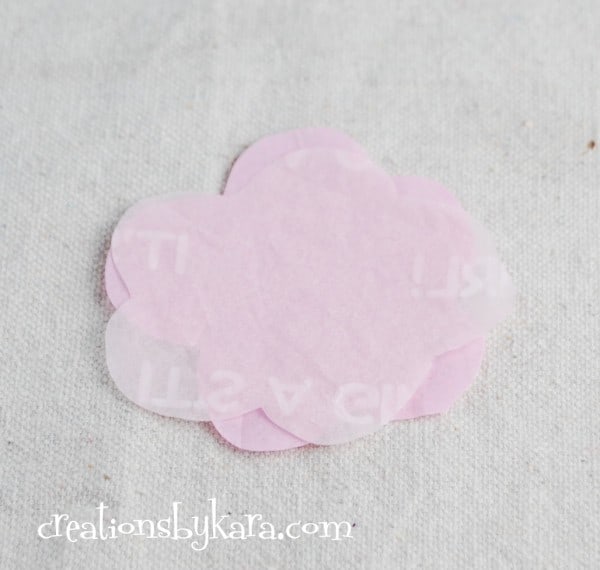 3-Now just scrunch the flower petals up and twist the whole thing together at the bottom.
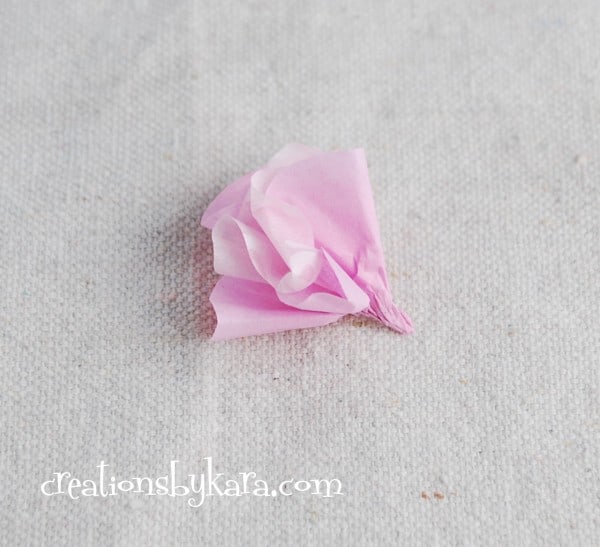 I thought it would be more realistic if there were variations in the blossoms, so I made some light pink, some dark pink, and some with the two colors together. To make smaller blossoms like the two on the left, just scrunch up one flower at a time.
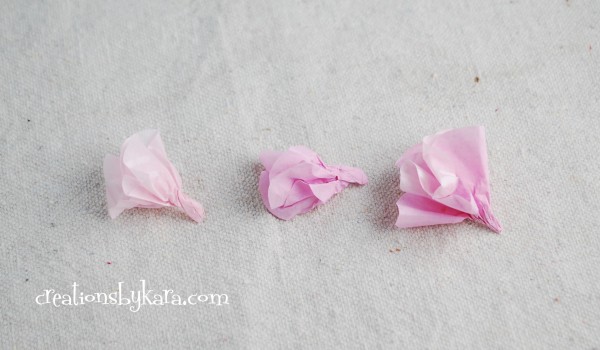 4-Now it’s time to glue them to your branches. I used branches that I pruned from our apple tree. If you don’t have your own tree, check with your neighbors. You should be able to find some unwanted branches this time of year.
I think it looks best to apply the blossoms to the natural buds of the branch. Just add a tiny dab of hot glue, and press your blossom on.
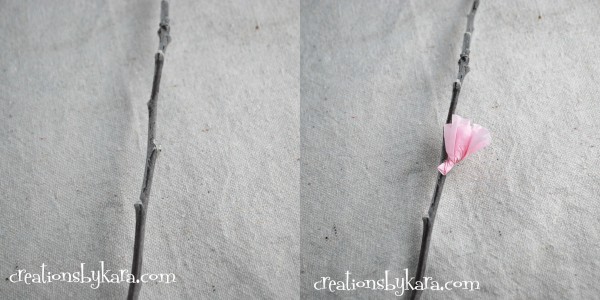 Continue adding blossoms to all sides of your branches.
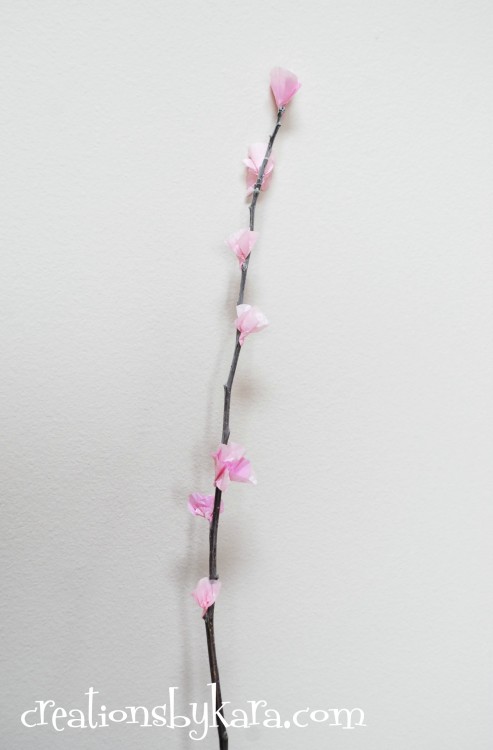 5-When you are all finished, just stick them in the container of your choice. I added some wheat at the bottom to hold them in place.
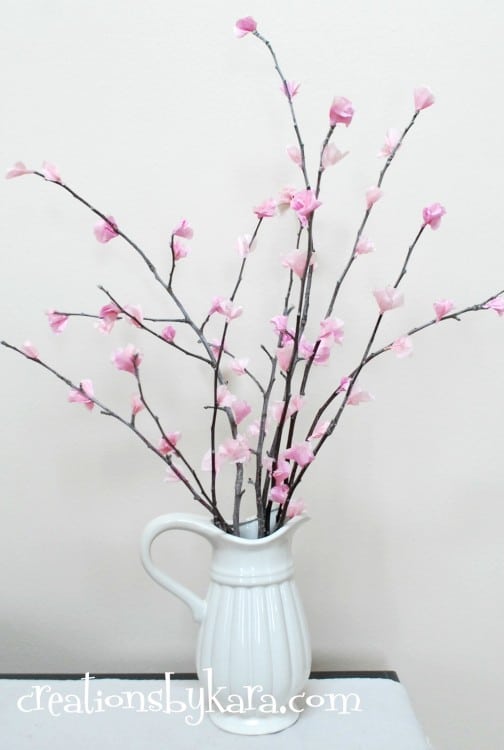
I picked up the white vase at Tai Pan Trading for five bucks. I adore it! So much that I actually bought 2 of them, plus 2 smaller ones. White vases are so versatile that they can be used almost anywhere, so I couldn’t pass them up!
I hope you have fun bringing a little bit of spring inside your home!
Looking for more Easter decorating ideas? Check these out:
- Easter Egg Banner
- Fabric Carrot Tutorial
- Yarn Wrapped Easter Candles
- He is Risen Printable
- Yarn Wrapped Eggs

Thank you for sharing this useful post.
I love cherry blossoms!
Just wanna comment that you have a very nice web site, I love these fake cherry blossoms. So pretty!
Very pretty! I love it!
Very easy to follow, I will be looking forward to more great ideas for Easter!
They look really realistic ????
Thanks!
These are getting made this weekend for sure! I am your newest follower.
I just made four of these for centerpieces for a church activity!! And they are beautiful!! My sister asked me if I had bought them when I sent her a picture….thanks so much for such a beautiful idea and easy to follow instructions!
I cannot tell you how much I love these!!! I am obsessed my cherry blossoms at the moment, and I have to try this out! I’m now following your blog… I found you at your linky party.
I wrote a post about my favourite Etsy cherry blossom items yesterday- you might like it! makethriftlovelife.blogspot.co.uk/2014/03/cherry-blossoms-my-favourite-uk-etsy.html
Lovely to have found you,
Gayle x
These look great and easy too! Mine aren’t coming out quite as neat, but I’ll keep trying. Thanks for the instructions, they’re easy to follow!
Hopefully it got a little easier as you went along. The good thing about them is that even if they aren’t perfect, they still look great! 🙂
This looks beautiful. So Cal doesn’t have a real “spring” so I make my own too. 🙂
these are so beautiful! I saw a picture on pinterest with no instructions, so I googled it and found your site. I am really excited about making these. I love the real thing, but these are perfect to add a little color and are so much cheaper to have than buying artificial flowers. This makes it easier to discard them at the end of the season and not have to worry about where to store them til next year.
Thanks for a tutorial I can actually follow and do!! These are getting made this weekend for sure! I am your newest follower.
Just picked up some branches in my yard so my daughter and I can give this a try.
Hope you had fun!
That is so cute! I was looking for something like this and yours is so easy and so pretty!
Found you through Mural Maker and More.
This is the cutest thing ever! I sooo wish I was as clever as you! I am going to try and make this today. SERIOUSLY! Thanks for sharing!!!! 🙂
These are beautiful! Cherry blossoms seem hard to come by here – at least when it’s still so cold out! Great “fake” blossoms!
Shannon
Who doesn’t LOVE cherry blossoms? These are beautiful {and so simple}!
This is just too cute! And so simple! I love how your blossoms turned out!
Thanks so much Katie!
Beautiful! I love cherry blossoms and have always wanted to make some for decoration but it seemed too complicated. Your tutorial is wonderful and makes it seem easy! Thank you!
I never knew how easy it was till I tried it. You should really make some! 🙂
Those are just gorgeous! And so real looking. I was just looking today at pictures of vases of cherry blossoms and wishing I could have some in my home…. but they don’t grow where I live.
I am so going to try to make these! We may not have the cherry blossom trees, but I have plenty of oak trees in my yard that are constantly dropping some great branches!
Thank you for the wonderful instructions.
Glad that you will be putting those oak branches to good use! If any of your friends see your faux cherry blossoms, hopefully they’ll want to help you get rid of even more of those branches. 🙂
You had me fooled! I seriously thought this was going to be about something you did to the vase when I first saw the picture. I am pinning and I need to make these stat!
Aw, thanks so much Brandi! You have got to make them, they are so easy but oh so pretty!
Wow, these are great! They look really realistic 🙂
Wow I love these! They are so beautiful. I have light pink in my living room (my couches are pink!!) so I might have to try
I’m temporarily living at boyfriend’s house, so I’m going to miss the beautiful spring bloom of my cherry tree at mine! I’m so going to be a crafty girl and try your project this weekend…it’ll be just like being at home. 🙂 Thanks bunches!
Very Cute! I love cherry blossoms!!
I am visiting via Centsational Girl. I adore your project. So clever!
Happy day, happy spring, happy happy everything!
Thanks so much Laura!
I love cherry blossoms. These are so pretty!
I’m sure hoping that a late frost won’t kill the blossoms on our actual tree this year. 😉
Very pretty! Nothing says spring like cherry blossoms! Love it!
Jo-Anna
I know. There are a few orchards near our house, and when the blossoms are out it is simply stunning!
This turned out so cute and just screams spring. I love it. I would love it if you could link this up to our linky party going on right now. junkintheirtrunk.blogspot.com/2012/03/link-it-up-wednesday-21.html
Love this! What a cute idea, I am going to have to try it! So pretty!!!
That is just too darn cute! I LOVE it!! What a bright update to any vase!!
Jen
athomeinthenorthwestblog.com
These are SO lovely Kara! Just pinned them. I love cherry blossoms!
Wow, they look great! Good job, will have to try these. Thanks!
Those really are gorgeous! I’m impressed. Can’t wait to see you next week!
I can’t wait to see you, and especially to meet my cute new niece!
So pretty! I wanted to do this last spring but never got to it. Your way of making these tiny flower buds is so easy! Thanks a ‘bunch’ for sharing 🙂
I was actually surprised at how easy it was. Usually my projects end up taking longer than I think they will. LOL!
i love cherry blossoms! thanks for sharing. totally just pinned this to try soon!
Aren’t they just so pretty? Thanks for pinning-that is always appreciated!