I mentioned last week that I made a couple of new pillows for our master bed. I got my inspiration from the quilt shop where I bought the quilt. They had some of the most beautiful decorative pillows! Dozens and dozens of pillows in all shapes, sizes, and patterns. I totally fell in love with some gorgeous gathered pillows. The sales clerk called them “ruched pillows”, and I had no idea what that meant. I had to google it. 🙂 Apparently ruched pillows and gathered pillows are the same thing. Who knew?
I digress. Anyway. . .


I found out that just for the gathered pillow slipcovers it was going to cost me over $100. Ouch. I decided to make my own. I searched for a tutorial, but couldn’t find one that matched exactly the gathered pillows I loved. So with the help of my expert seamstress mom, we came up with our own tutorial. I made my pillow slipcovers to fit a 24″ pillow form.
Gathered Decorative Pillow Tutorial
Supplies:
1 2/3 yards of fabric
Thread
Measuring tape
Pencil
Fabric scissors
Iron
24″ pillow form
Instructions:
Gathered Pillow Front:
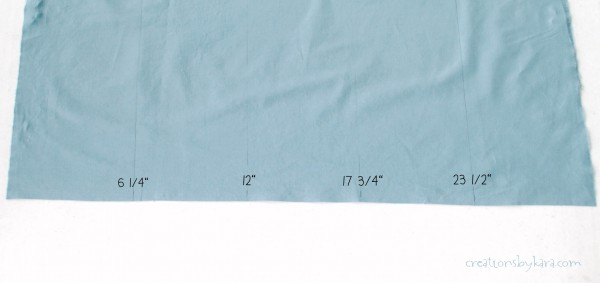
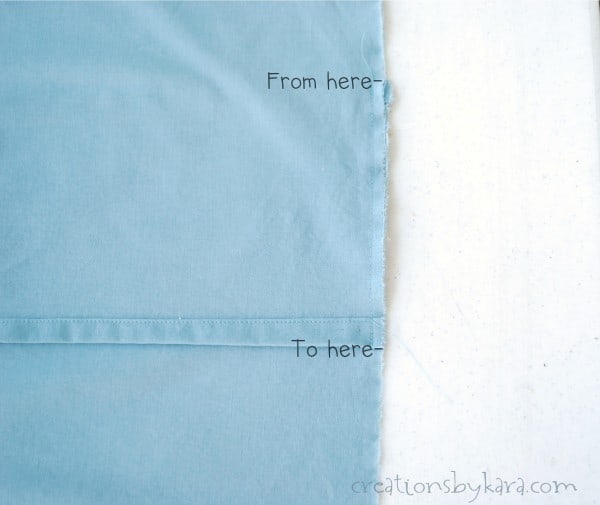
Cut a piece of fabric 30 inches wide by about 44″ long. (My fabric was 43″ after being washed and dried.) You need to draw the lines where you are going to fold and then stitch. Measuring from the left side of the 30″ edge, make marks at 6 1/4″, 12″, 17 3/4″, and 23 1/2″. Do the same thing on the other 30″ end, then draw lines with a pencil down the whole length of the fabric, connecting the dots.
Tip: Use a measuring tape, because a yardstick won’t reach 44″.
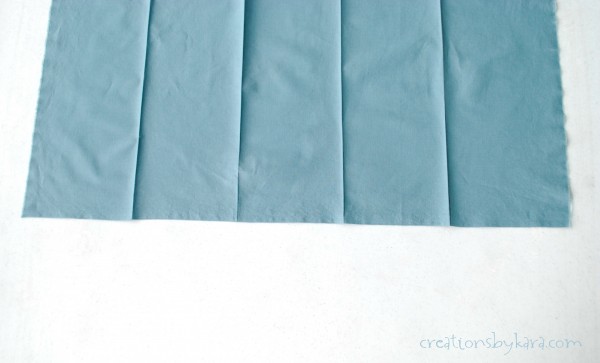
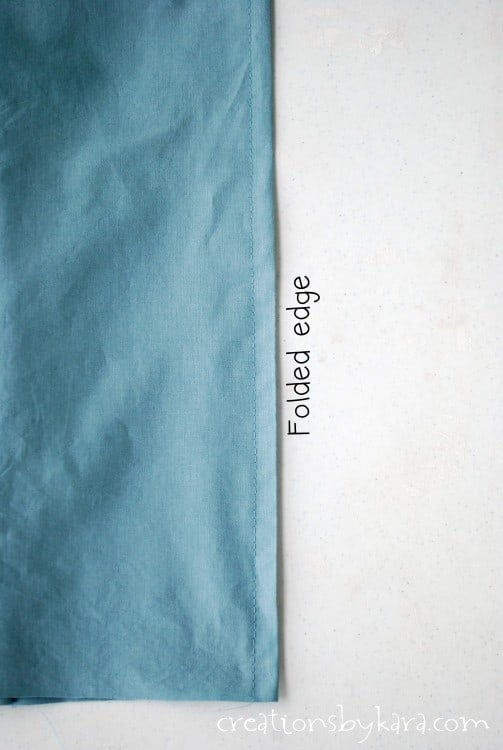
 Fold along the pencil lines and iron each one.
When you are done, it should look like this:
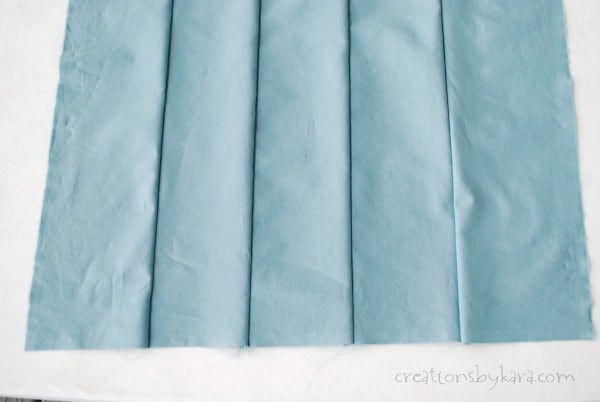
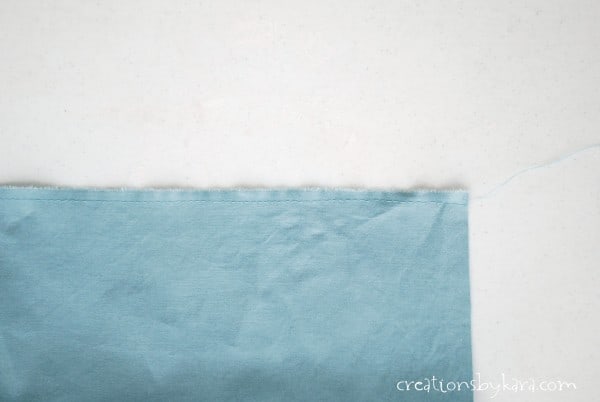
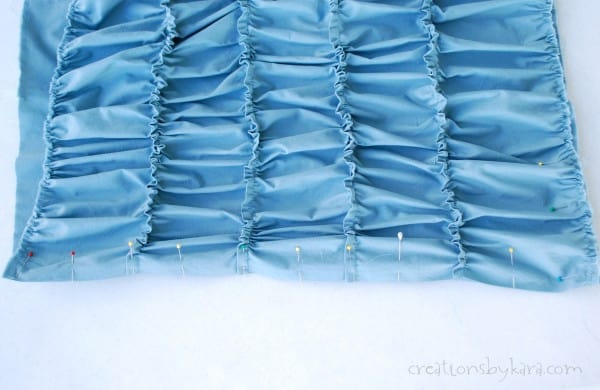
 Now it’s time to sew a gathering stitch down each of those folds. Using the longest stitch on your sewing machine, sew a running stitch down the length of each fold, using a 1/2″ seam. Make sure you leave the threads at least 3″ long on the end.
 After you have sewed all all the gathers down the fold lines, your pillow top should be 26″ across, and look like this:
 Sew a gathering stitch down both sides of the pillow top, using your longest stitch and a 1/4″ seam.
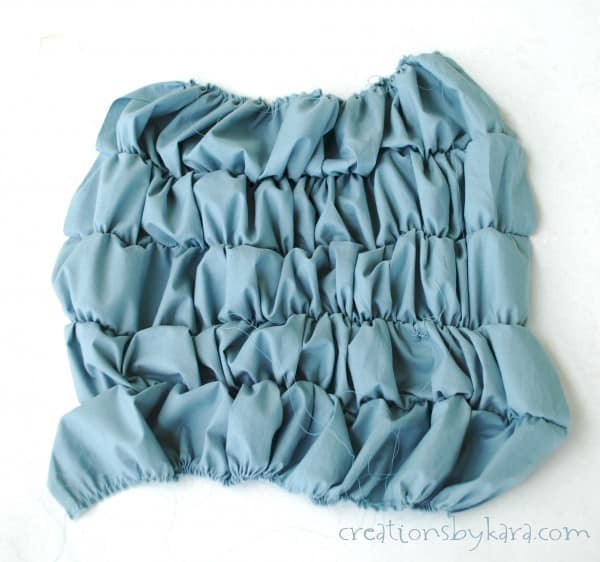
 Next up is the fun part, making all the ruffle-y gathers! For each of the 6 gathering stitches, pull one of the threads and gather the fabric evenly down the line. Gather it enough that it measures close to 26″ across. Leave the threads long, don’t cut yet!
 Your top is now finished! Set it aside while you work on the back of the pillow.
Pillow back:
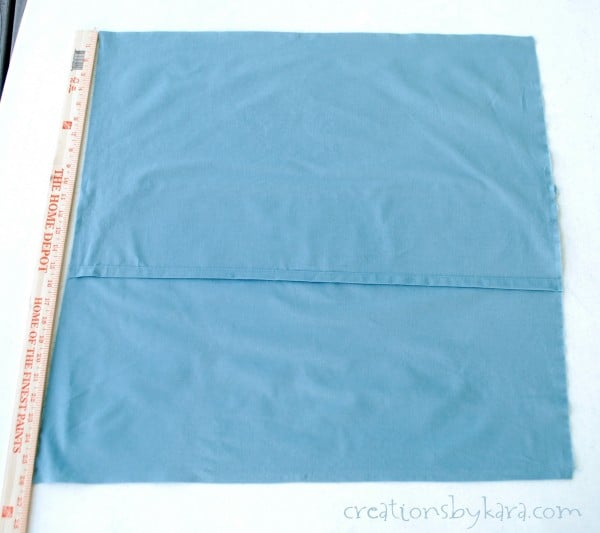
Cut two pieces of fabric 26″ x 16″. On the long side, fold over 1/4 inch and iron, then fold over another 1/4″ and iron again. Sew along the inside edge. Repeat for the other piece of fabric.
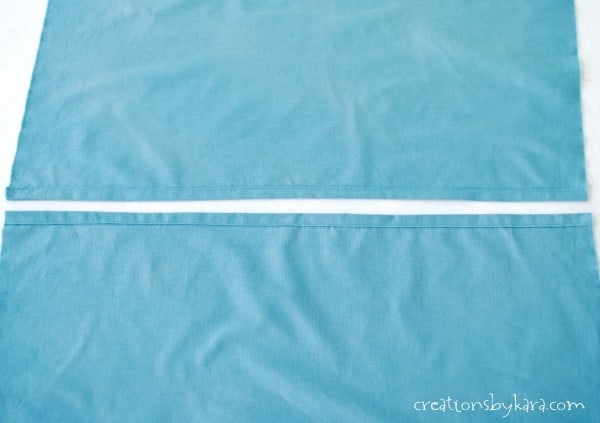
Now take the two pieces and overlap with the hemmed edges in the middle. Arrange them so that together they measure 26″ from top to bottom. Make sure you measure both sides!
 After you have the sides aligned, sew a running stitch just along the section where the fabric overlaps.
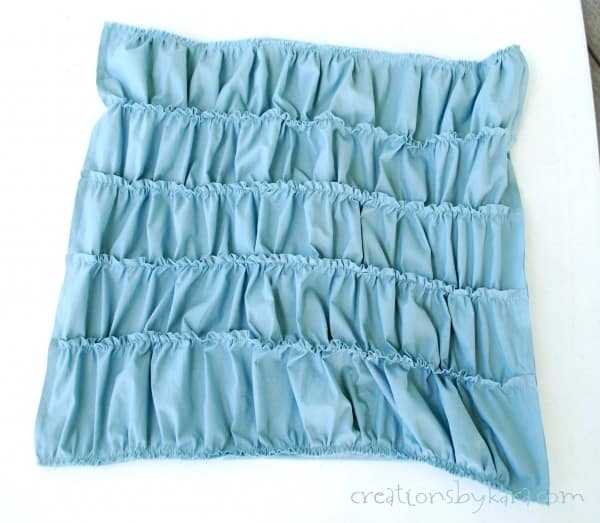
 OK, now it’s time to sew the back to the front. Place your hemmed pieces on the bottom, then place your gathered pillow front on top, right side down. Pin one of the straight edges down first. I had to pull my gathered fabric pretty tight to get it to line up with the pillow back.
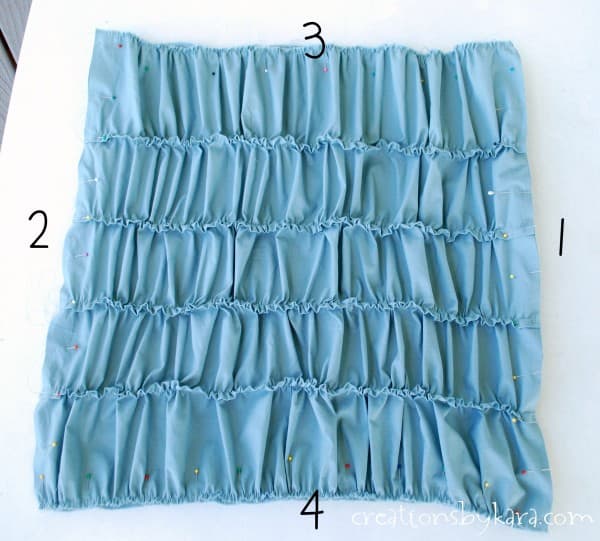
 Next, use your long gathering threads to adjust the tightness of your gathers so that the opposite straight edge of the pillow top lines up with the pillow back. After you have that side pinned down, you can pin the two gathered edges. I’ve numbered the photo below in the order I pinned mine.
 Now sew a running stitch all the way around your pillow using a 1/2″ seam allowance.
Woohoo, you did it! Now all you have to do is clip your threads and turn your pillow slipcover right side out!
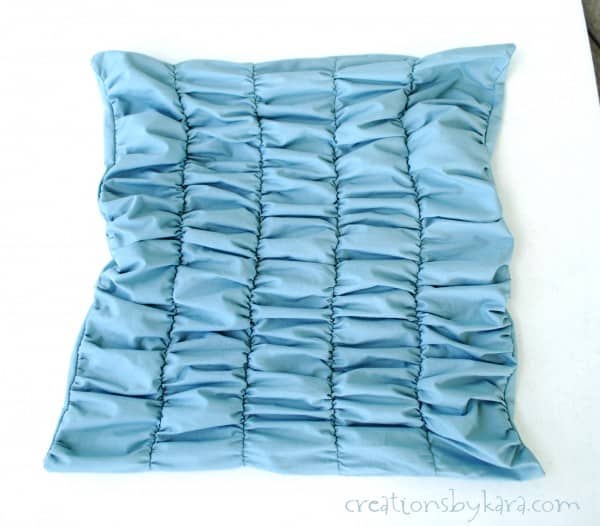 Now stuff a 24″ pillow form inside.
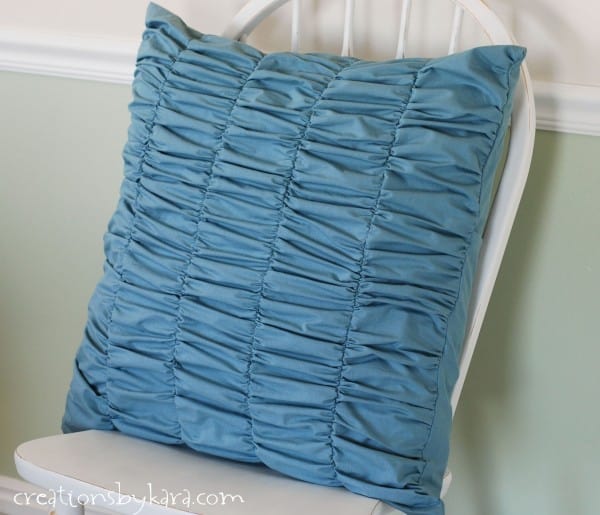 You can call it gathered or you can call it ruched, but isn’t it pretty? I can’t wait to make the rest of the decorative pillows! The hard part is deciding which ones I want. Have you seen all the pretty bed pillows on Pinterest? I swoon.
Linking up with: If It’s Not Baroque, The Shabby Nest, 504 Main, My Repurposed Life, Design, Dining, and Diapers, Mom on Timeout, The Shabby Creek Cottage, Pink Recipe Box,
Wow….this tutorial is just great. Will try to make this. Thanks a lot for sharing.
Wow….this is amazing. The tutorial is really very easy. Looking forward to making this. Thanks a lot for sharing this.
Thanks for the great directions! I love my pillow, made out of some window scarves a friend gave me after she redecorated. I might use the same method for a throw to go at the foot of the bed.
I love how simple your tutorial is to follow and the final product is so much cheaper than found in the shops. I’d be thrilled if you’d come on over to Pink Recipe Box and link up at Creative Wednesdays:
Thanks for the invite Nicky, I just linked up! 🙂
Its beautiful and I love the color! xo
Your pillow is beautiful! Thanks for the tutorial – I may try this out for some new pillows in my master bedroom!