If you’ve followed my blog for long, you know that one of my favorite things to pick up at thrift stores is picture frames. I always have a bunch in my stash. With a touch of paint, they can be made to match any decor. I love that!
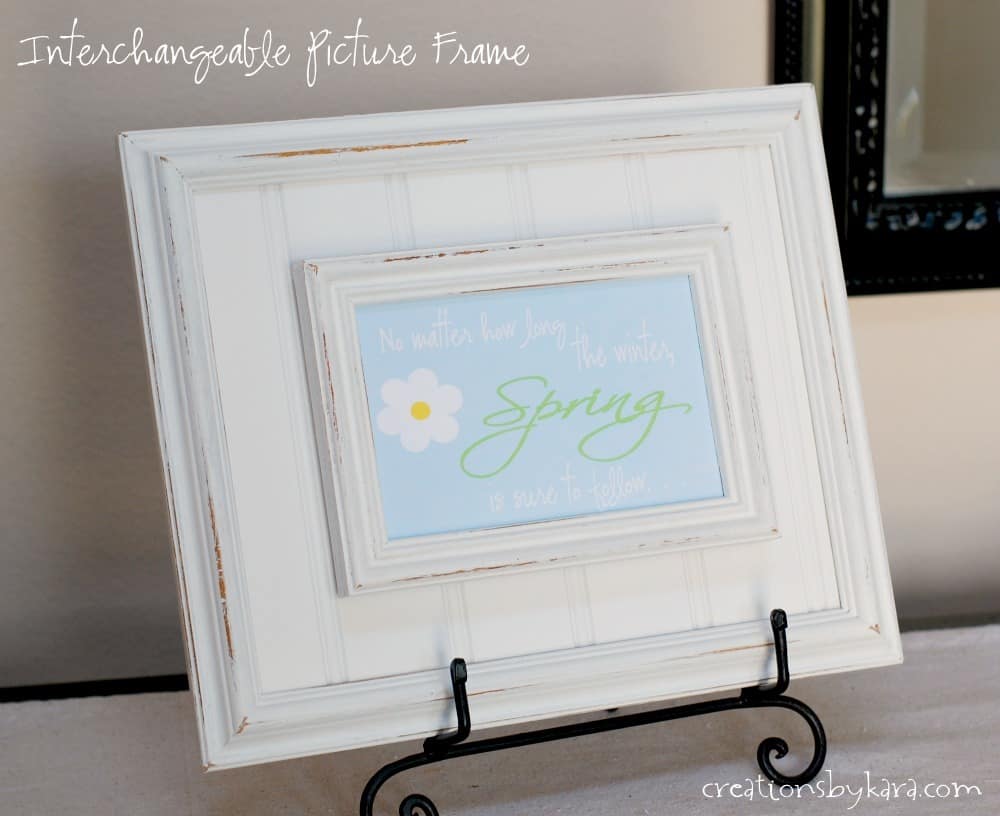
Today’s project is an interchangeable picture frame. I needed something to fill my bookcase shelf, but I wanted something with a little more pizazz than a plain picture frame. I came up with a double frame that is backed with beadboard. It’s simple, but I love the dimension and texture that it adds! And when I want to swap out the printable for something new, it’s easy peasy.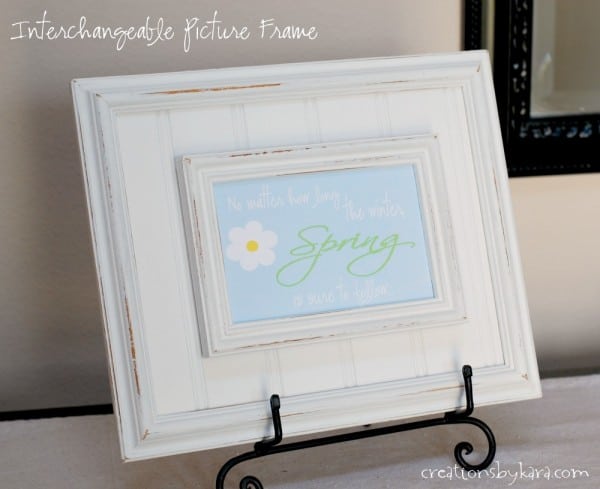

Interchangeable Picture Frame Tutorial
Supplies:
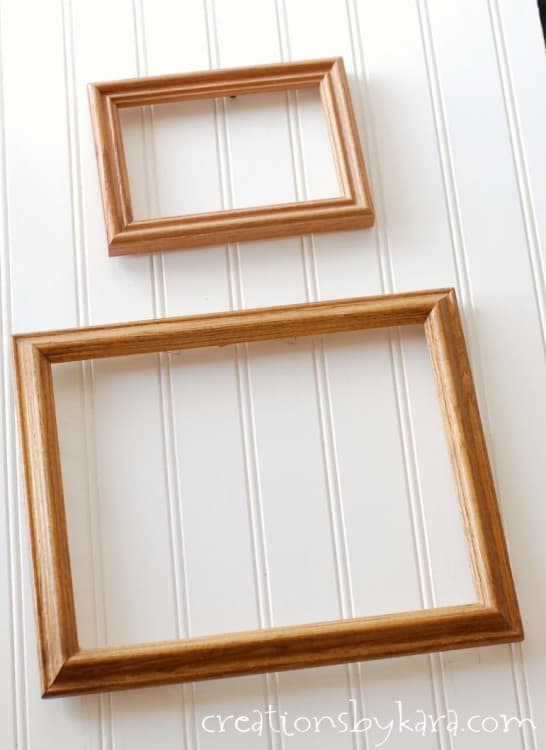
-Two frames of different sizes (I used an 8×10″ frame and a 4×6″ frame.)
-Paint and paint brush
-Sandpaper for distressing (0ptional)
-Beadboard or paper for the backing
-Velcro
-Strong glue (I used E-6000)
Instructions:
Take your two picture frames and remove the glass from both of them.
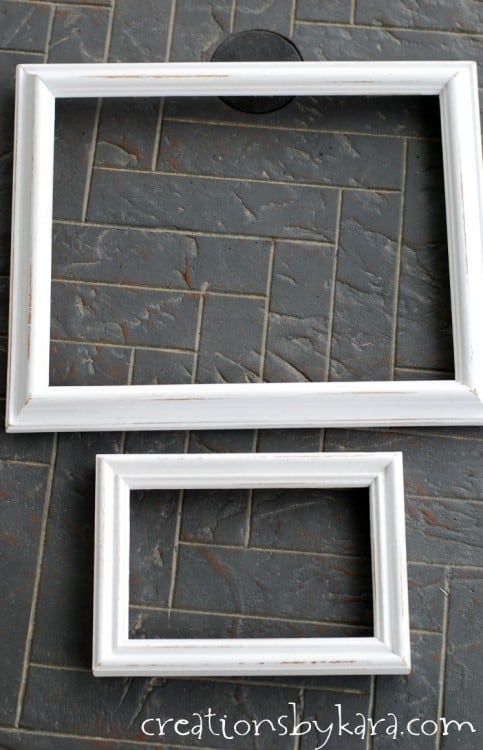
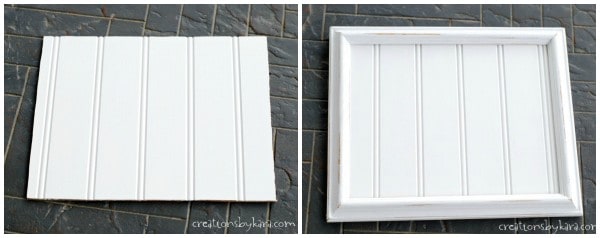
Paint both of the picture frames. I painted both of mine white using white latex paint, but you can use any paint you like. You could even paint each picture frame a different color if you want! After they were dry, I used sandpaper to distress them a bit.
 Now cut out a piece of beadboard (or paper if you’re going that route), and place it in the larger frame.
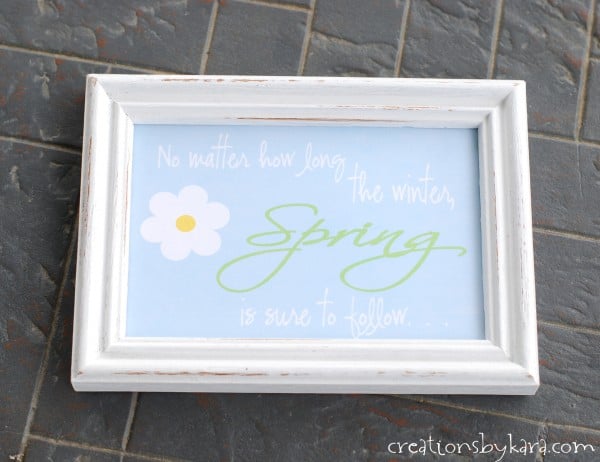
 In the smaller picture frame, place your photo (or printable).
 Now it’s time for the “interchangeable” part. Flip the small frame over and attach two strips of velcro down the sides with a strong glue. I used E-6000. Hot glue won’t do the job. Trust me, I tried.
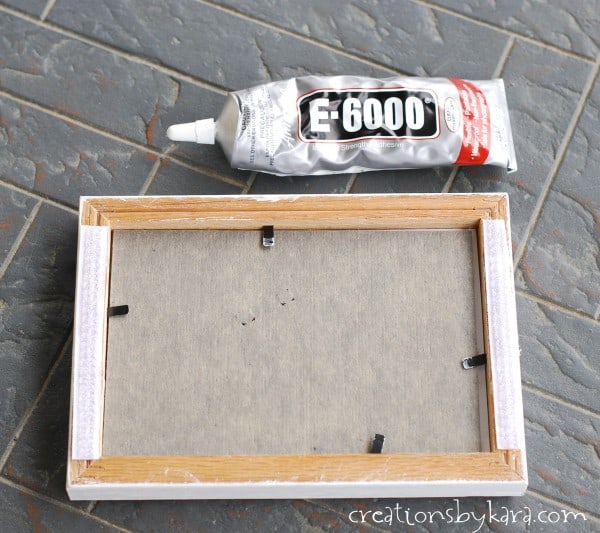 After it dries, flip it over and line it up carefully on top of your larger frame. Make pencil marks where the velcro is, and attach the other side of the velcro to the beadboard.
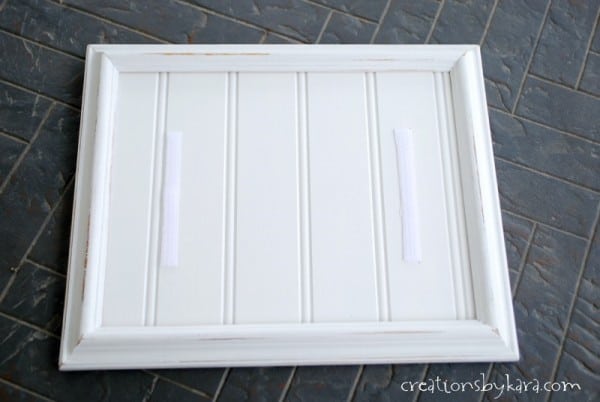 After the glue is completely dry, all you have to do is attach your small picture frame to the beadboard, lining up the velcro strips. Voila. . .
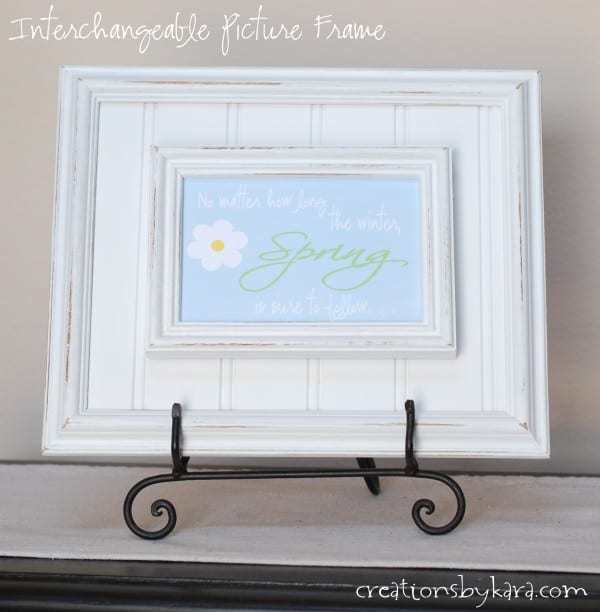
When you want to display a different photo or printable, all you have to do is pull off the small frame, swap out the picture, and place it back on the velcro strips. I made mine small to sit on a shelf, but wouldn’t a really large one be awesome hanging on the wall? I think I might need to try that!
Very cute! An easier way to attach the Velcro to the bigger frame would be to glue one side of the Velcro to the smaller frame, connect the two sides together, apply glue to the back of the Velcro, and then put the small frame onto the big frame and leave it alone until it dries. Then you don’t need to worry about marking and hiding or getting rid of the marks.
Reply