• Skip to primary navigation
  • Skip to main content
  • Skip to primary sidebar
  • Skip to footer

Creations by Kara

  • RECIPE INDEX
    • Appetizers and Snacks
    • All Bread Recipes
      • Bread- Muffins and Scones
      • Bread: Quick Breads
      • Bread: Yeast Bread
    • Breakfast
    • Crock Pot
    • All Dessert Recipes
      • Dessert: Brownies and Bars
      • Dessert: Cakes and Cupcakes
      • Dessert: Candy
      • Dessert: Cheesecake
      • Dessert: Cookies
      • Dessert: Frozen
      • Dessert: Misc.
      • Dessert: Pies and Crisps
    • Drinks
    • All Holiday Recipes
      • Christmas Recipes
      • Easter Recipes
      • Halloween Recipes
      • St. Patrick’s Day Recipes
      • Valentine’s Day Recipes
      • 4th of July Recipes
    • Instant Pot Recipes
    • All Main Dish Recipes
      • Main Dish- Beef
      • Main Dish: Chicken
      • Main Dish: Fish
      • Main Dish: Pork
      • Main Dish: Vegetarian
    • Low Carb Recipes
    • Restaurant Recipes
    • Salads
    • Side Dishes
    • Soups
    • Non-Food
  • TUTORIALS
    • Craft Tutorials
    • DIY Project Tutorials
    • Holiday Tutorials
    • Home Decor Ideas
    • Sewing Tutorials
  • FREEBIES
    • Free Patterns
    • Printable Gifts
    • Holiday Printables
    • LDS Printables
    • Printable Home Decor
  • HOLIDAYS
    • 4th of July
    • Christmas
    • Easter
    • Halloween
    • St. Patrick’s Day
    • Thanksgiving
    • Valentine’s Day
  • TIPS & TRICKS
  • Navigation Menu: Social Icons

    • Email
    • Facebook
    • Instagram
    • Pinterest
    • YouTube
This post may contain affiliate links, which gives me a small percentage of the sale, at no cost to you.
Home » Tips & Tricks » Cleaning and Organizing » Tutorial: Dollar Store Hair Bow Holder

Tutorial: Dollar Store Hair Bow Holder

March 4, 2010 by Kara Cook 2 Comments

  • Share
  • Tweet

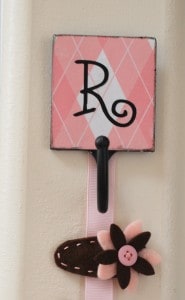
OK, here is the promised tutorial for the hair clip holder I showed you yesterday. No more drawers full of disorganized hair bows. No more searching for the favorite clip that has been misplaced. Now not only will your bows be organized, but you will have a cute wall display too. Is that not perfect?!?

Here it is again in case you missed it:
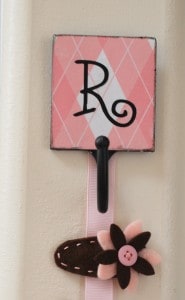
dollar store craft-hair bow holder Now I will show you how to make one. I apologize ahead of time that I forgot to take photos of some of the steps. Sometimes I get a little excited to finish and move on without pulling out the camera. Ooops!

Dollar Store Hair Bow Holder Tutorial

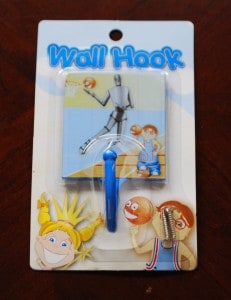
I started with this wall hook that I bought at the dollar store. Yep, that’s right, it was $1.
dollar store craft-hair bow holder

I sprayed it with a coat of spray paint primer just to be sure. That would be the first step that I forgot to photograph. Sorry.

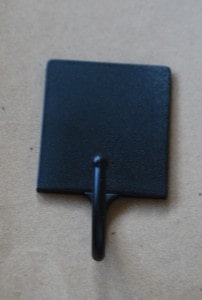
After the primer was dry, I sprayed it with a couple light coats of black spray paint. Pay attention to the sides and the hook; the front will be covered with paper.
dollar store craft-hair bow holder

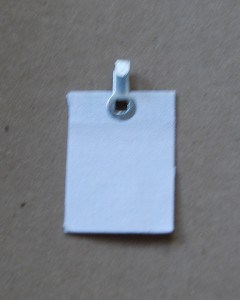
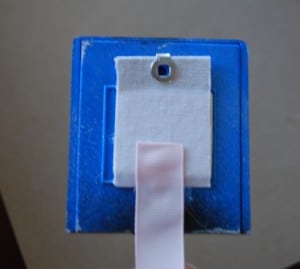
It had a sticky back, but I was afraid it would damage the wall, so I opted for another hanging method. I used one of these fabric hangers. Also from the dollar store. They come in a pack.
dollar store craft-hair bow holder

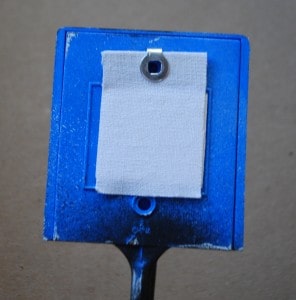
I didn’t need the hook part, so I cut it off. That was actually the hardest part about this whole process. Then I pulled of the tape on the back of the hanger, and the back of the wall hook, and pressed the sticky sides together.
dollar store craft-hair bow holder

Next I cut a piece of ribbon about a yard long. I used grosgrain, but you can use any kind you like. I heat sealed the ends with a candle, then hot glued the top to the back of the wall hook.
dollar store craft-hair bow holder

From here on out, you can decorate the front however you want. I cut a piece of scrapbook paper and mod podged it to the front. Then I used black ink to distress the edges. After that I cut a vinyl monogram and stuck it on the front. You could also use a sticker, a wooden letter, a foam shape, or a stencil. I think a fabric flower would even be cute.
dollar store craft-hair bow holder

After you are all done, just hang it up and clip the bows to the ribbon. I plan on hanging headbands from the hook.
Have fun organizing your bows!!!


Filed Under: Cleaning and Organizing, Craft Tutorials, DIY & Tutorials, Dollar store projects, Hair Accessories Tagged With: paper, spray paint

Previous Post: « Pumpkin Cranberry Nut Bread
Next Post: Quick and Easy Toffee Bars Recipe »

Reader Interactions

Comments

  1. Bridal Designer Islamabad

    October 13, 2016 at 6:08 am

    It’s truly a nice and useful piece of information. I’m satisfied that you simply shared this useful info with us.
    Please keep us up to date like this. Thanks for sharing.

    Reply

Leave a Reply Cancel reply

Your email address will not be published. Required fields are marked *

Primary Sidebar

Hi. I’m Kara, and I love to create! I share recipes, DIY tutorials, craft projects, and thrifty home decor. I hope that I can inspire you to create something!
MORE ABOUT ME

Categories

Footer

PRIVACY POLICY | ABOUT ME | DISCLOSURE

Copyright © 2023 Creations by Kara on the Foodie Pro Theme

6 shares