
Thinking of doing an oak banister makeover? Updating an oak banister can be a time consuming project, but it is such a great way to update your home. These tips will help you save time and get professional results!

 Hello peeps! I’m sure you noticed that I haven’t posted many projects lately. I am hoping to change that up this year by actually finishing the things I started in 2014. First up is my uber fabulous staircase makeover. So much work, but so much fabulousness after that I am soooo glad I did it.
When we built our home back in 1996, oak was the big thing. And we used a ton of it. Like everywhere. For reals. Ten years later, I felt like I was drowning in oak. I painted our cabinets, got rid of our oak furniture, and had our oak floor replaced. I wanted to re-stain our oak banister, but I was dreading it because I knew it would be a ton of work.
When we decided to replace our upstairs carpet, I knew it was time. Luckily I saw a post from my friend Brooke on a fabulous DIY Staircase Makeover. She recommended General Finishes stain, and oh my gosh do I love that stuff now! It made this project much more doable!
Brook outlined all the steps she went through, so you should check out her post. I had to do a few things differently because where her spindles were already white, I had to paint mine. So I’m sharing some tips and tricks I learned along the way.
DIY Staircase Makeover with Stain and Paint
Supplies: (contains affiliate links)
-Fine grit sandpaper/ sanding sponges (I used 150 and 220 grit)
–Tack Cloth
–Painters Tape
-Latex gloves (several pairs)
–General Finishes Java Gel Stain
–General Finishes Gel Topcoat
-Old t-shirts, rags, or socks
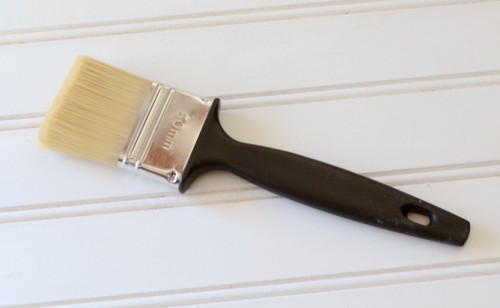
-A few cheap paintbrushes for stain
-Primer
-White paint (I used Behr paint and primer in one)
-High quality brush for paint (I love Purdy Brushes)
Instructions:
-First you want to sand the entire banister. You don’t have to take off all the finish, but you want to remove any glossy parts, or places where the finish is thick. You want the new stain to be able to get into the wood.
-After you are finished sanding, you need to wipe off ALL of the dust. I like to suck it up with a vacuum first, then use tack cloth to get every particle of dust. That stuff works like a charm!
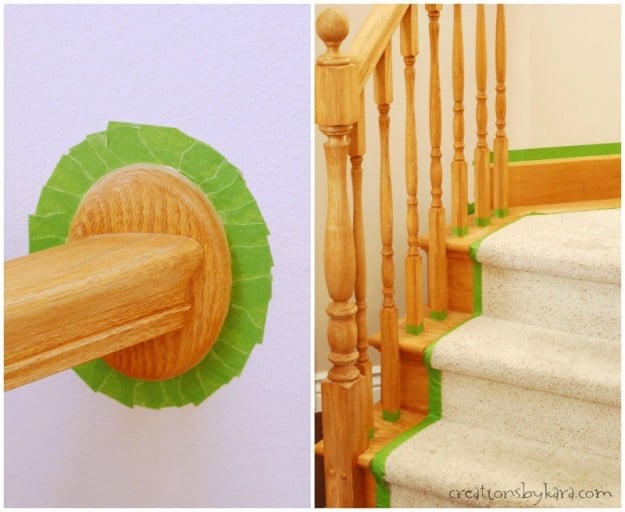
 You are going to stain first, so you need to tape off everything you don’t want to get stain on.
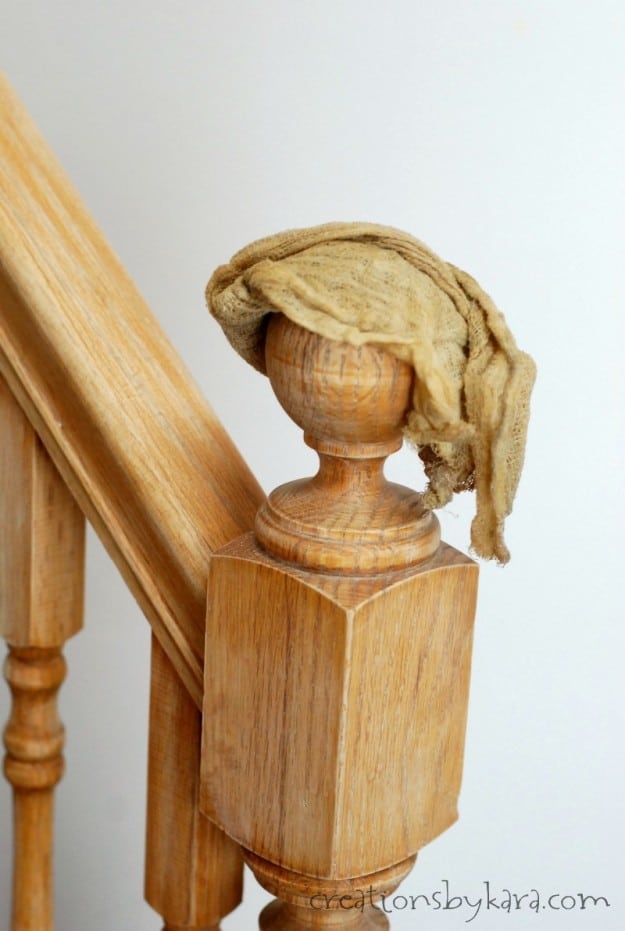
 Now it’s time to apply the General Finishes Java Gel Stain. You are going to want to wear gloves, trust me!
I started out using just old t-shirts, but I was having a hard time getting stain into all those cracks and crevices. I started using cheap paint brushes I had on hand, and it went much faster!!
Just use the tip of the brush to get the stain into the cracks, then use the old shirt to wipe the excess into the wood around the crack. Saved me so much time!! Make sure you get the really cheap ones so you can just throw them away when you are done.
I am not going to lie, this process takes forever. I did three coats on mine. After the first coat it looks pretty crappy, but don’t get discouraged. It takes at least two coats to get good coverage. And remember that this is stain, not paint. You do not want to glop it on. Make sure you wipe off the excess as you are going, before it has a chance to dry!
After your final coat of stain is dry, it’s time to apply the topcoat. I did two coats on most of the areas, but three coats on the top of the railing that I knew would get more wear. Again, this process takes a long time because you have to wait for each coat to dry.
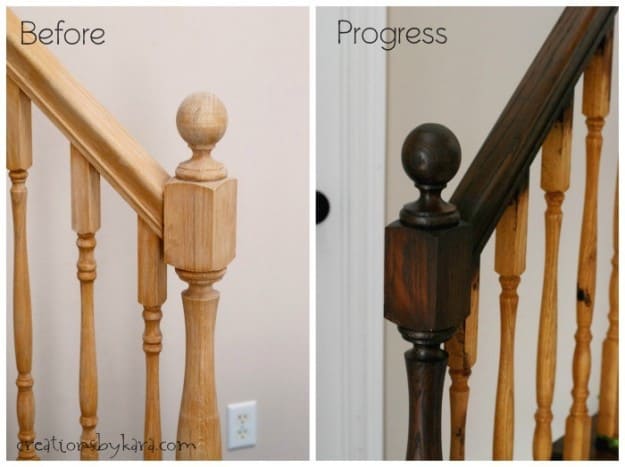
I want to point out that even though I taped off my spindles, they still got stain on them. But I didn’t worry too much, because I know I would be priming and painting them. This is what it looked like when I was done staining but hadn’t painted yet.
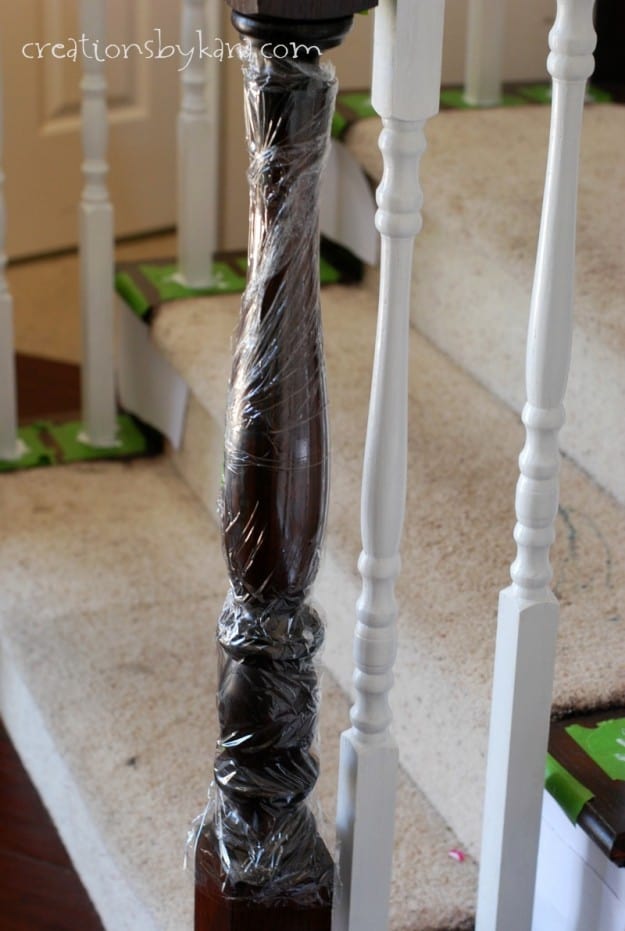
 OK, now you’re ready to paint the spindles. You want to cover all the parts that you have just stained. It’s harder to get paint off of stain than the other way around. I wrapped my newel posts with plastic wrap.
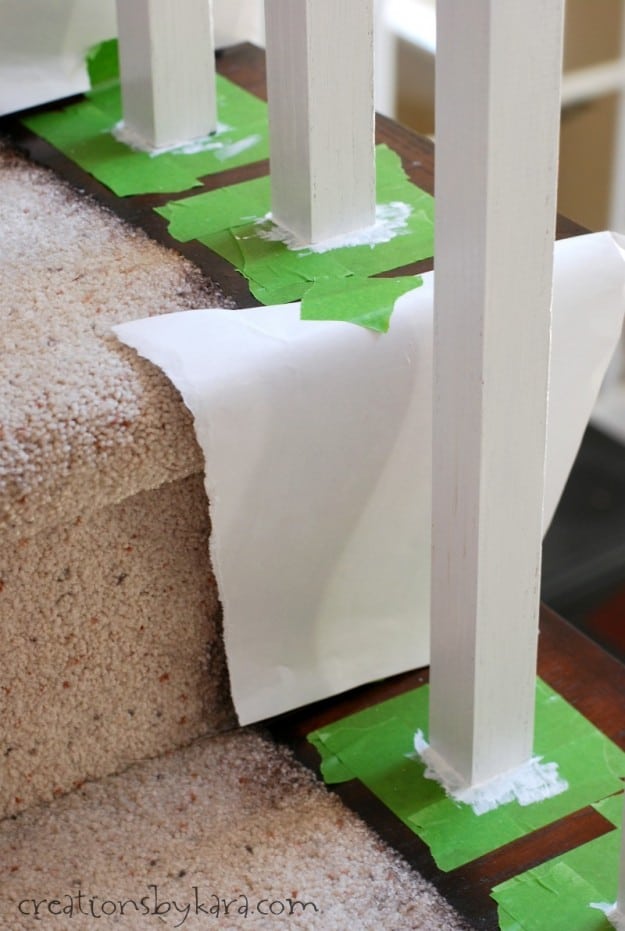
There was a lot of wood to cover, so I used tape around the spindles and all the places where the stain and white parts would touch. For everything else (like the stair treads), I taped paper over them. Because you are working in such tight quarters, it’s best to cover everything so you don’t get any splatters. I did two coats of primer and two coats of white paint.
After many, many, many hours of work (and stiff shoulders), you will have a gorgeous new banister!! This is the most time consuming DIY project I have ever tackled, but the results are so amazing. The whole space looks so much richer and more beautiful. I love the contrast of the dark and white, but you could just stain everything. That would be faster. But I think the two-tone is worth it!
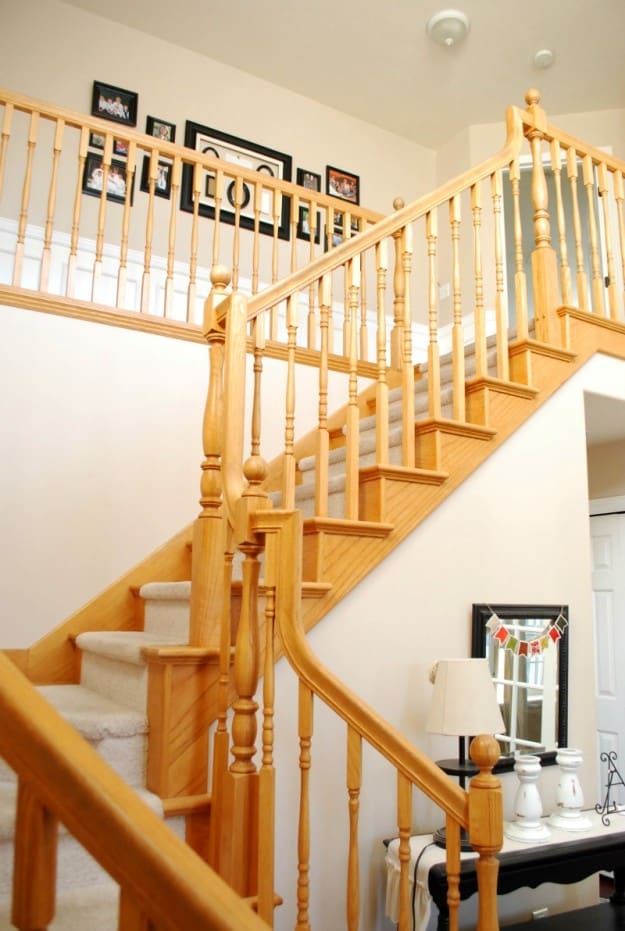
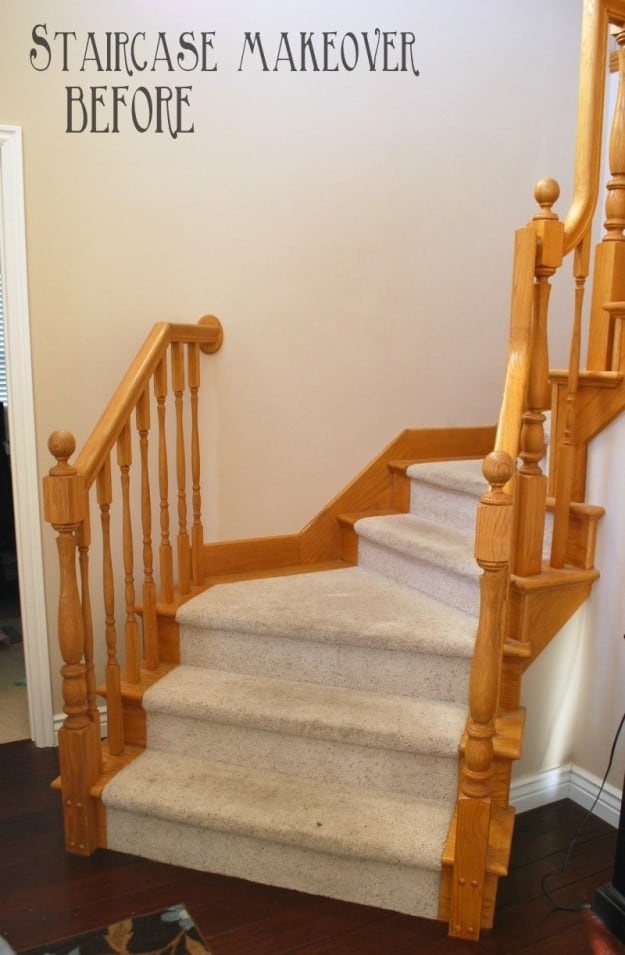
Here are a few before and after shots of my DIY staircase makeover:
Before:
 After:

And and a couple more:
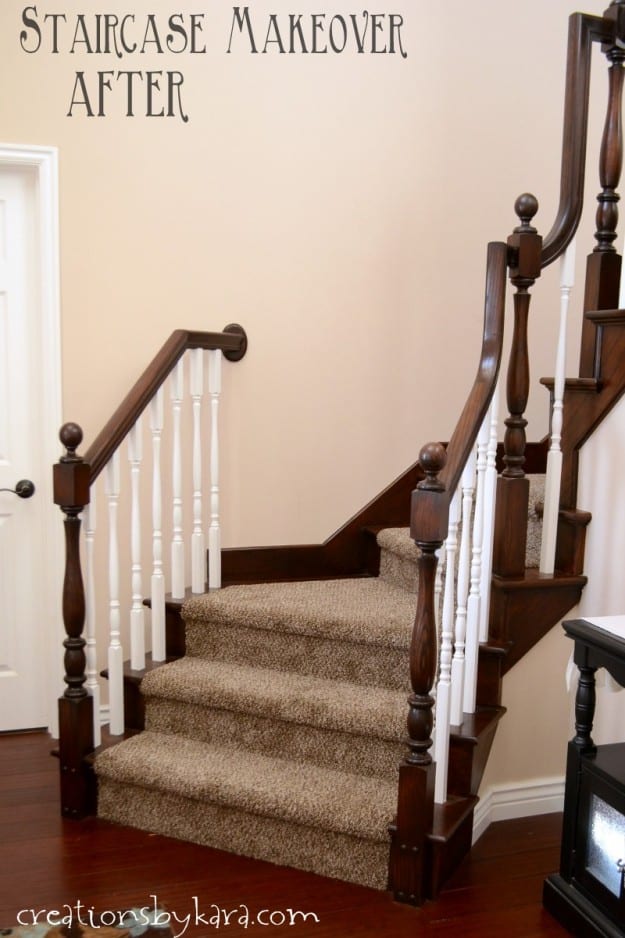
I totally adore the contrast between the dark wood and the white spindles. And I am so happy to be rid of that ugly worn oak!
 This photo was taken before we replaced the carpet, but I’m sharing it anyway. 🙂
 I could not be more thrilled with the results!!
MORE DIY PROJECTS TO CHECK OUT:
- Mudroom Cubbies
- Corner Bench
- Picket Fence Sign
- DIY Key Holder
- Installing Molding
- DIY Shutters
- Tips for Staining Wood
- Repose Gray (best paint!)
Where are you? Do you want to refinish my bannister?
I don’t think you could pay me enough – haha! It’s a rewarding project, but it takes so much time! 🙂
I just came across your DIY stair makeover project. It turned out beautifully….I am going to do the same thing, but I’m practicing on my Oak mantels and everything else that is oak. I’ve decided to brush on the GF stain instead of wiping it off. The first coat is the UGLY coat but it looks nice already. Thank you for your thorough explanation of the HOW TO. Hope mine looks at good as your when I’m done.
Good luck! Yes, it doesn’t look great after the first coat, but hang in there, it does turn out. I hope you love it when you are finished!
Hello! Do you know if the railings are white oak or red oak? I’m attempting to refinish mine but I’m not sure how to stain will come out if they are red oak. They look just like your before pic!
I’m not entirely sure because they were installed over 20 years ago, but I’m guessing they were red oak.
I live alone and now with the carona virus precautions upon us I have all the time in the world. And I am the type of person that likes things done yesterday. So with that being said how long do you think (if I am being patient ) it will take?
Did you seal the stained wood before you primed and painted the spindles?
Its amazing you also try this
Hi Kara,
Was the odor from the stain and paint bad? Im trying to figure out if I should wait till Spring so the windows can be opened.
Thanks !
I didn’t think the smell was too overpowering with the paint and stain that I used. But if you are really sensitive to chemicals, you could wait till spring.
Hi,
Im thinking about starting this long project. Was the odor from the staining and the paint really bad? Im trying to figure out if I should wait till sprint so I could open the windows. Thank !!
Did you stain the floor on the top landing also to match the staircase?
I didn’t have a top landing, the hallway is carpet. But if I would have had a wood landing, I definitely would have stained it to match. 🙂
did you have to remove the painters tape between coats and put all new tape?
No, I left the tape on till I had all the coats done.
Hi I’m so excited and amazed at the result of your kitchen worktop I’m Savin up to have my cupboards done in a lovely grey colour and as I’m terminally ill I’m fed by a tube so I can live out my dream of havin lots of unicorns in my kitchen now first I bought the bright blue chalk paint spray (. No mask no windows open ) I sprayed all my kitchen cupboards what a mess so as I’m poorly I always seem to have workmen see how poorly I am and do bad jobs but I’v found this fab guy through my son and he has suggested grey cupboards and as I’v bn buying ,mending,shabby chiming,driving miles to pick up cabinets and making them shabby chic and I’v got white lovely blind and some expensive shabby chic curtain from America I want it done like a little house on the parietals home so my kitchen worktops are old and s rather and thought dam it won’t be able to buy new worktops UNTIL I SAW WHAT YOU DONE !!! THANK U SO MUCH THATS WHAT IM HAVING XXX????????☺️????????????????????????????????
It’s a lot of work, but sounds like it will be beautiful when you are done! I love a good grey and white combo. 🙂
What color Behr paint did you use? Most importantly what finish? I can never figure out what types of finish to use. Did you calk the sides and back? How did you get a straight line on the sides?
I use Bright White in satin finish, straight off the shelf. I didn’t use caulk on the sides, just tape and some very careful brushing. 🙂
Thanks for sharing your DIY staircase makeover, I’m inspired to try it at my house. Love it!
This turned out fantastic, I love the contrast of paint and stain!
This came out great and inspired me to do the same to my staircase. We stained everything first like you did but forgot to cover everything before painting the spindles white and got some splatter on the already stained parts. What is the best way to remove paint from stain? We tried to sand it off but it doesn’t seem to be working that well…
This has a lot of work but look at that stunning and amazing DIY staircase makeover this is amazing I should take note of this. Thank you for sharing this one.
Looks beautiful. I’m in the middle of the same project. I taped my balusters so carefully but when I removed the tape aster the first coat of white, quite a bit of white paint had leaked through! I’m beside myself. I should have checked while I was painting! Now I have to fix it. Did this happen at all in your protect? Any ideas would be so appreciated.
So sorry I didn’t see your comment till now. 🙁
That is such a bummer! That only happened in one spot on this project, and I was able to just scrape off the paint with my fingernail. I hope you were able to get your paint off.
What is the wall color ? I really like it
It is called Hayseed from Kwall Howells. I think they have been bought out by Sherwin Williams, so I don’t know if you can get it anymore. But it was a nice cream color.
I am mostly done with this look on my steps, but I’m not sure what to do about the stringers. I am actually thinking about painting them white instead of staining them. Thoughts??
nope !
not white
It’s Susan again. I meant to ask everyone’s opinion on what you think I should do for the stringers on the side of the stairs. Because they’re just plain Construction wood they now look really bad. So that’s why I said I should probably paint them but if anyone has any other suggestions I would greatly appreciate it.
Susan,
How long did the staining of the banister take you?
It took me several weeks for prep work, painting, staining, and sealing. I did have a lot of interruptions, but you also have to wait for everything to dry in between coats, so there is some waiting time. It’s a pretty time consuming project, but so worth it!
Sorry I didn’t see your comment earlier Susan. It’s really a matter of preference, but if the wood is in bad shape, I’d paint it. That way you can fill in any dings with spackling and sand them till smooth. Just make sure you use primer first. Good luck!
susan i think white is good. i hope this link goes thru, but google “Images for stained stairs, stringers white”.
So I removed my carpet from my stairs and had red Oak unstained stairs installed. When he was done he installed Rozen paper down the middle of the stairs to protect them till I stained them. Silly me thought it would be best to wipe down the stairs with a damp cloth before I stain them the next day. Mind you I wiped them with the Rozen paper still in place on the stairs so that part did not get damp. I used antique cherry stain for the first coat. When I stained the wood the part on the sides that got damp was much darker than the rest of the stair. I looked online and found out that applying any kind of water to bare wood is called popping and open up the grain. So I had to resand them lightly and Restain. I then decided to use a gel stain, brown mahogany. So it looks OK now. I’m going to use a satin finish on the stairs. The side of the staircase, the stringers, we’re plain construction wood and look terrible as I tried to stain them the same Color as the stairs. So now I want to paint those stringers and will find a paint in a brown mahogany. Any ideas for the stringers would be great. I am hoping the paint will be OK on the sides
I love it. I’m planning on doing this as well. It will take me a few days to get it all done. My question is, approximately how long did each coat of stainless and poly take to dry? Both of my girls bedrooms are upstairs so they’ll need to use the stairs on a daily basis. Thanks for any help or advice you could give.
My banister has been painted and would love to remove the paint and stain it. Could I use the same process? Yours looks amazing ❤️
Thank you SO much for your post – really helpful to have a tutorial as I’m trying to do the same thing! One question – did you do any kind of sanding/scuffing in between coats, for either the gel stain or the topcoat? Or just put the next coat on as soon as the previous is dry?
Many thanks extremely helpful. Will certainly share website with my buddies
I am really loving the theme/design of your site. Do you ever run into
any web browser compatibility problems? A handful of
my blog readers have complained about my blog not operating correctly in Explorer but looks great in Chrome.
Do you have any ideas to help fix this issue?
Kara, I am thinking of doing my banister. How long did it actually take you to complete the project?
It’s been almost two years, so I can’t remember exactly, but I know it took a lot of hours. I think it probably took me about a month from start to finish, but I had a lot of interruptions. 🙂
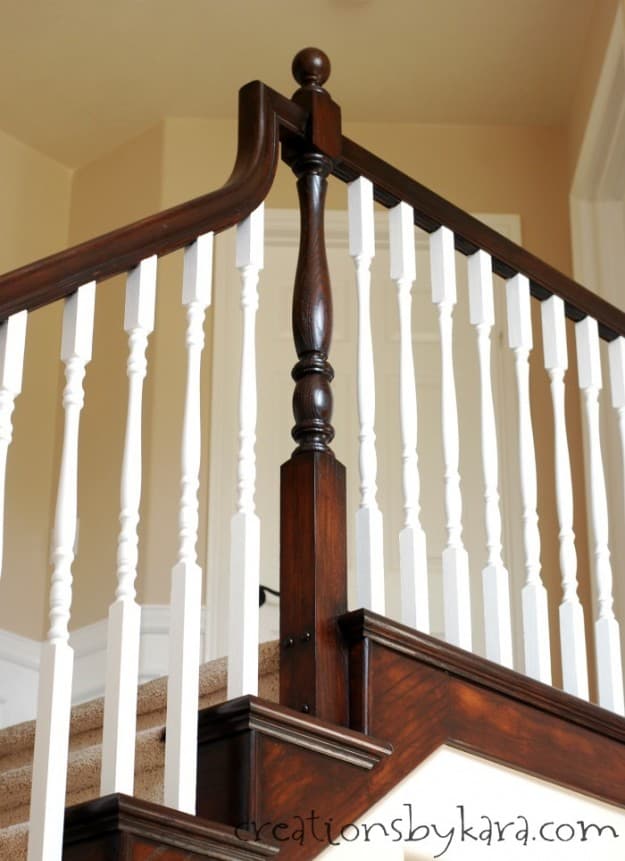
It looks beautiful, but I’m very confused why there are so many different types of spindles. The photographs appear to show a single ring under the square top on the left side of the bottom of the stairs. On the opposite side there two rings under the square top with the exception of one spindle on the second stair. The spindles going up the length of the stairway have two rings but the railing on top only has one. I only noticed this because of the difference in the “before” and “progress” photo. Was this a design choice? Or replacement of broken spindles with the closest match?
The installer used two types of railings, one for the straight rails, and a different one for the risers. But on the landing, he installed a few of them in the wrong places. I didn’t notice till months later, and didn’t think it was worth it to have him come back and tear out the staircase. We’ve lived here almost 20 years, and you are the first one to notice! 🙂
You did a beautiful job! I am starting a similar project soon and am a little “stair crazy” right now. I think I’ve read every blog on the topic! Hope mine turn out as well as yours did.
Gorgeous! I’m in the middle of purchasing things to do this to my stair case, I’m very tired of the yellow oak. The thing I’m stessing over the most is the spindles… If we are going to paint them white, rather than stain them, is there really a need to sand them then? Or just do it enough to remove a little gloss so the pain sticks better? Would really love to hear your input.
Your staircase makeover looks flawless. I would love to renovate my staircase, giving it a new feel and is modern and clean. Staircases seem to really give your home a pleasant feel that creates and comfortable and together setting.
Thanks for all the tips. I am thinking of doing my honey oak spindles and banister but wanted to know if you used Behr Oil paint and primer for the spindles or was it water based ? I assume that the gel stain is an oil based product ,( I’m in Canada so am using a different product but oil based as well) so if I got some on the spindles I thought a water based paint wouldn’t cover. If the gel stain is water based that would be great, but I can’t seem to find that info….and so far haven’t found a water based gel that goes over previously finished wood.
Absolutely amazing. It looks beautiful. Well worth all the work!!
I have a very similar set up and want to produce the same results. I was going to the java part of the railing just as you mentioned. However, I was thinking about trying to use spray paint for the spindles. I would have to tape off really, really good. And then I was thinking that I could have my husband hold a piece of cardboard behind the spindles as I sprayed.
I spray paint everything! 🙂 But I was thinking that spindles don’t get a lot of wear or tear, so the product used didn’t have to be too durable. And it may be easier to get in all the crannies?
I’ve never seen a blogger try this. What do you think?
Again, just beautiful!
Kara! It looks AMAZING! the color combination so perfect, Dark brown and white color paired with dark brown stairs and coffee rug,, awesome.
Thank you so much! I am really thrilled with how the whole space turned out, especially after all that hard work. 🙂
I see you used Java for your gel stain. As did another user on her bathroom vanity. Is there a particular reason for Java as opposed to say Walnut or another stain color? Looks? It’s ability to hide/cover over old stain? Appreciate any feedback. Your project turned out great.
The brand of gel stain is actually more important. I used the General Finishes Java color because I knew it was a dark, rich color. But you could of course try another color if you are going for a different look!
I’m currently using the General Finishes Georgian Cherry, and had the same concern – everyone else was using Java! I’m only one coat in but the cherry looks beautiful and I’m so happy I went with it. Hope that helps!
We are currently refinishing our staircase. I started out sanding and then decided to try a stripper, we used the green safe stuff its a citrus stripper, it wasn’t working very well. I switched to the hard stuff and boy am I glad I did!! This job is so much easier using the stripper. I applied three coats of stripper, the first two I scraped the stripper off on the last lighter coating I used sanding sponges to scrape off the remaining stripper. I love these pads because I could cut them into strips and use a saw motion to sand in between the groves. I posted a link below of the pads I used. We are also using the java and painting the spindles white, although im considering a light grey for the spindles not sure yet.
Did you add the gel stain gloss over the top of the dark wood too? would you recommend?
Not quite sure what you mean. I stained the oak wood dark with the gel stain, then used the satin topcoat after the stain dried.
Hi. It looks like there is different carpeting in the post picture. What is the brand/color? The remodel looks great.
We did get new carpet, and it is so much better at hiding dirt! We bought it at a local mom and pop store, so I don’t know the brand. We saw similar carpet at all the big name stores though, it’s pretty popular right now. Different shades of brown with flecks of black. Basically the color of dirt. Haha!
Wow! Your beautiful work has inspired me! Our stairway is almost identical to yours. We added dark wood floors a few months ago and I started to notice that everything surrounding the floors needs a facelift! this is on my to-do list for sure!!
It’s a lot of work, but I promise you will love it! Makes a huge difference!
My mom has a ton of oak in her house, and I think I’ve finally convinced her to start changing it just a bit! Thank you for showing how you did everything in detail. I’m going to show her this article and see if she’ll let me do this on her stairs over the holidays!
I like the contrast between the white paint and the dark finish. I have been thinking about painting our railing for some time now. It would take a lot of work but, I think it is worth it. It makes sense that this would be a very time consuming project. Thanks for sharing.
Is Java the name of the stain color?
Yes it is.
Looks great! I’m just working on my staircase right now to. The worst part is sanding the newel posts. Did you discover any tricks for that in the process?
Sanding blogs help with the flat parts, but for the round parts it just takes lots of elbow grease. If you can find it and you aren’t opposed to chemicals, Liquid Sandpaper works well. I’ve used it in the past, but I’m out and my local store doesn’t carry it anymore. 🙁
Wow this is amazing!! I LOVE it and pinned it!
That looks so beautiful! I need to come to your house sometime soon and see all your projects. It has been way too long since we saw eachother.
It has been ages. Sad that we don’t venture out more. Hopefully after the sick season is over!
I would love to do this but not sure I would have the patience! Great job it look fabulous!
Wow! Kara, it is beautiful! Hard work paid off for sure! I also LOVE the contrast of the dark and white. 🙂
This looks great! We are gearing up to redo the railings on our stairway as part of our front entry remodel and this gives me some ideas! 🙂
Wow Kara! It looks AMAZING! I also love the contrast of the dark stain and white-stunning!
This looks so great! You really are one very patient woman to do so much detail! It’s worth it though, looks amazing! Love the two-toned look!
Haha! Patience is not usually one of my strong suits, but this project did help me develop some!
This looks like a lot of work but OMG, it’s worth it. Your home looks so much more luxurious now.
Wow! This looks amazing!! You did a great job. Sharing with the hubby and see if I can get him on board doing this too!
Good luck! Hopefully he’ll change his mind. It really does make a huge difference!
Kara, it might have been a lot of work but your staircase looks amazing. I’ve painted spindles before and I know that is NOT a fun job. But, the beauty in the end is well worth it.
Oh my gosh Kara!! That is absolutely stunning!! Soooo gorgeous!!!! Great job!! What a transformation!!!
Wow, Kara – you did such an amazing job. It really changes the look of the entire space, not just the staircase. We have zero oak in our house – I’m not a fan – but this is going to be someone’s life-saver post!
Thanks so much Sarah! I sure wish I had an oak free house- but I’m getting there!
I absolutely love how this turned out! It seems like it took a lot of patience, but sometimes those are the projects that we end up admiring the most in the long run 🙂 The two-tone look is stunning!
Thanks Angela! The two-tone did make it take longer, but I love it so much it was worth it! 🙂
I seriously LOVE the way this turned out! It looks beautiful!
Thanks Amy! It was a ton of work, but it’s one of my favorite makeovers ever!!
WOW. This adds so much character to your home! It is just perfect! I had done my steps this way a couple years back (we don’t have a banister, just walls) and everyone swore that it wouldn’t get scratched up with our dogs and stuff. Well, it did and now I want to figure out if I can do this again because these colors are perfect. Thanks for sharing!
You should try it Sharon! It’s amazing what a difference it makes. 🙂