• Skip to primary navigation
  • Skip to main content
  • Skip to primary sidebar
  • Skip to footer

Creations by Kara

  • RECIPE INDEX
    • Appetizers and Snacks
    • All Bread Recipes
      • Bread- Muffins and Scones
      • Bread: Quick Breads
      • Bread: Yeast Bread
    • Breakfast
    • Crock Pot
    • All Dessert Recipes
      • Dessert: Brownies and Bars
      • Dessert: Cakes and Cupcakes
      • Dessert: Candy
      • Dessert: Cheesecake
      • Dessert: Cookies
      • Dessert: Frozen
      • Dessert: Misc.
      • Dessert: Pies and Crisps
    • Drinks
    • All Holiday Recipes
      • Christmas Recipes
      • Easter Recipes
      • Halloween Recipes
      • St. Patrick’s Day Recipes
      • Valentine’s Day Recipes
      • 4th of July Recipes
    • Instant Pot Recipes
    • All Main Dish Recipes
      • Main Dish- Beef
      • Main Dish: Chicken
      • Main Dish: Fish
      • Main Dish: Pork
      • Main Dish: Vegetarian
    • Restaurant Recipes
    • Salads
    • Side Dishes
    • Soups
    • Non-Food
  • TUTORIALS
    • Craft Tutorials
    • DIY Project Tutorials
    • Holiday Tutorials
    • Home Decor Ideas
    • Sewing Tutorials
  • FREEBIES
    • Free Patterns
    • Printable Gifts
    • Holiday Printables
    • LDS Printables
    • Printable Home Decor
  • HOLIDAYS
    • 4th of July
    • Christmas
    • Easter
    • Halloween
    • St. Patrick’s Day
    • Thanksgiving
    • Valentine’s Day
  • TIPS & TRICKS
  • Navigation Menu: Social Icons

This post may contain affiliate links, which gives me a small percentage of the sale, at no cost to you.
Home » Recipe Index » Dessert: Cookies » Candy Bar Stuffed Chocolate Chip Cookie Cups

Candy Bar Stuffed Chocolate Chip Cookie Cups

March 17, 2014 by Kara Cook 3 Comments

  • Share
  • Tweet

Chocolate chip cookies are pretty much a staple dessert, right? They are easy to make, and everyone loves them. But take some basic chocolate chip cookie dough, bake it in a muffin cup, and fill it with a mini candy bar, and now you have an over the top awesome dessert! I actually came up with the idea for Candy Bar Stiffed Chocolate Chip Cookie Cups a few months ago when I was trying to get rid of the last of Rachel’s Halloween candy.

chocolate-chip-cookie-cups


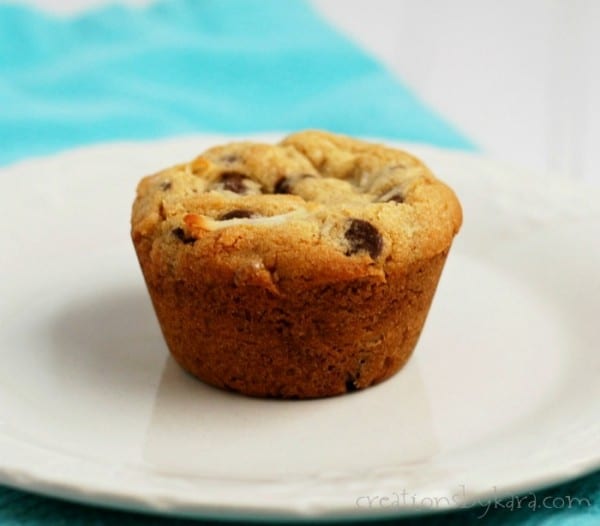
You can let them cool and just eat them plain. They are still very tasty.
recipe-chocolate-chip-cookie-cupsBut they are oh so good served warm with a scoop of ice cream and some chocolate sauce. Oh my, would you look at that? Everyone in my family was grinning from ear to ear when I served these. And licking the melted chocolate off their lips.

stuffed-chocolate-chip-cookie-cups-recipe
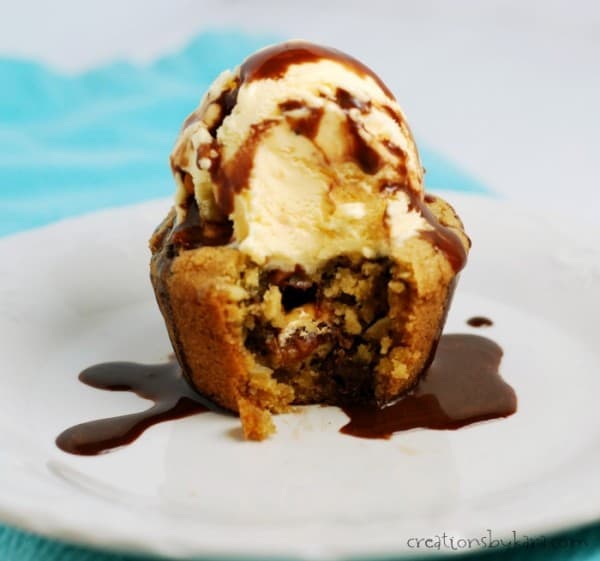
Pure chocolate chip cookie joy right there.

TASTY DESSERTS USING CHOCOLATE CANDY:

  • Symphony Brownies
  • Macaroon Kiss Cookies
  • Rolo Cookies
  • Reese’s Oat Bars
  • Butterfinger Cake
  • Milky Way Ice Cream
  • Reese’s Chocolate Cake

MORE CHOCOLATE CHIP COOKIES:

  • Chewy Chocolate Chip Cookies
  • Pumpkin Chocolate Chip Cookies
  • Oatmeal Chocolate Chip Cookies
  • Coconut Oil Chocolate Chip Cookies
  • Pudding Chocolate Chip Cookies


Candy Bar Stuffed Chocolate Chip Cookie Cups

Yield: 1 dozen

Stuffed Chocolate Chip Cookie Cups

Stuffed Chocolate Chip Cookie Cups

Top these stuffed chocolate chip cookie cups with vanilla ice cream for an extra special treat!

Prep Time 25 minutes
Cook Time 18 minutes
Total Time 43 minutes

Ingredients

  • 1/2 cup butter, softened
  • 1/4 cup sugar
  • 3/4 cup brown sugar
  • 1 egg
  • 1/2 tsp vanilla
  • 1/2 tsp lemon juice
  • 1 3/4 cups flour
  • 1/2 tsp baking soda
  • 1/2 tsp baking powder
  • 1/2 tsp salt
  • 1 cup chocolate chips
  • 1/2 cup coconut, optional
  • 1/2 cup chopped pecans or walnuts, optional
  • 12 mini candy bars (we've tried Snickers, Reese's PB cups, and Almond Joys)

Instructions

  1. Cream butter and sugars in a mixing bowl. Beat in egg, vanilla, and lemon juice.
  2. Stir in dry ingredients, then chips, coconut, and nuts. 
  3. Place a heaping tablespoon of dough in the bottom of a greased muffin tin. Press into the bottom and slightly up the sides. Place a mini  candy bar in the middle.
  4. Take another tablespoon of dough and flatten it in your palm. Press it around the candy bar, doing your best to seal the sides.
  5. Repeat with remaining dough and candy bars.
  6. Bake at 350° for about 15-20 minutes, or until golden brown around the edges.
  7. Run a knife around the edge to loosen, then let cool in the pan for about 10 minutes.
  8. For over the top happy guests, serve with vanilla ice cream and chocolate sauce.

Recommended Products

As an Amazon Associate and member of other affiliate programs, I earn a small amount from your purchase, no cost to you.

  • Wilton 12-Cup Non-Stick Muffin Pan
    Wilton 12-Cup Non-Stick Muffin Pan

Nutrition Information:

Yield:

12

Serving Size:

1

Amount Per Serving: Calories: 598Total Fat: 31gSaturated Fat: 14gTrans Fat: 1gUnsaturated Fat: 13gCholesterol: 43mgSodium: 388mgCarbohydrates: 76gFiber: 3gSugar: 54gProtein: 8g
© Kara
Cuisine: American / Category: Dessert: Cookies

Filed Under: Dessert: Cookies, Recipe Index Tagged With: candy bars, chocolate chips

Previous Post: « Spring Sign with Book Page Banner
Next Post: Tip for Making Thumbprint Cookies »

Reader Interactions

Comments

  1. Renee @ Two in the Kitchen

    March 22, 2014 at 10:01 am

    Um, yes please!! I’ll take the one with the ice cream on top, thank you very much!!!!! 🙂

    Reply
  2. KC @ The Real Thing with the Coake Family

    March 17, 2014 at 8:17 am

    These look simply amazing! Yummy treat that my whole family will enjoy.
    KC

    Reply
    • Kara

      March 17, 2014 at 2:51 pm

      Thanks KC! I know they made my family very happy! 🙂

      Reply

Leave a Reply Cancel reply

Your email address will not be published. Required fields are marked *

Primary Sidebar

Hi. I’m Kara, and I love to create! I share recipes, DIY tutorials, craft projects, and thrifty home decor. I hope that I can inspire you to create something! Read More…

Categories

Footer

PRIVACY POLICY | ABOUT ME | DISCLOSURE

Copyright © 2021 Creations by Kara on the Foodie Pro Theme