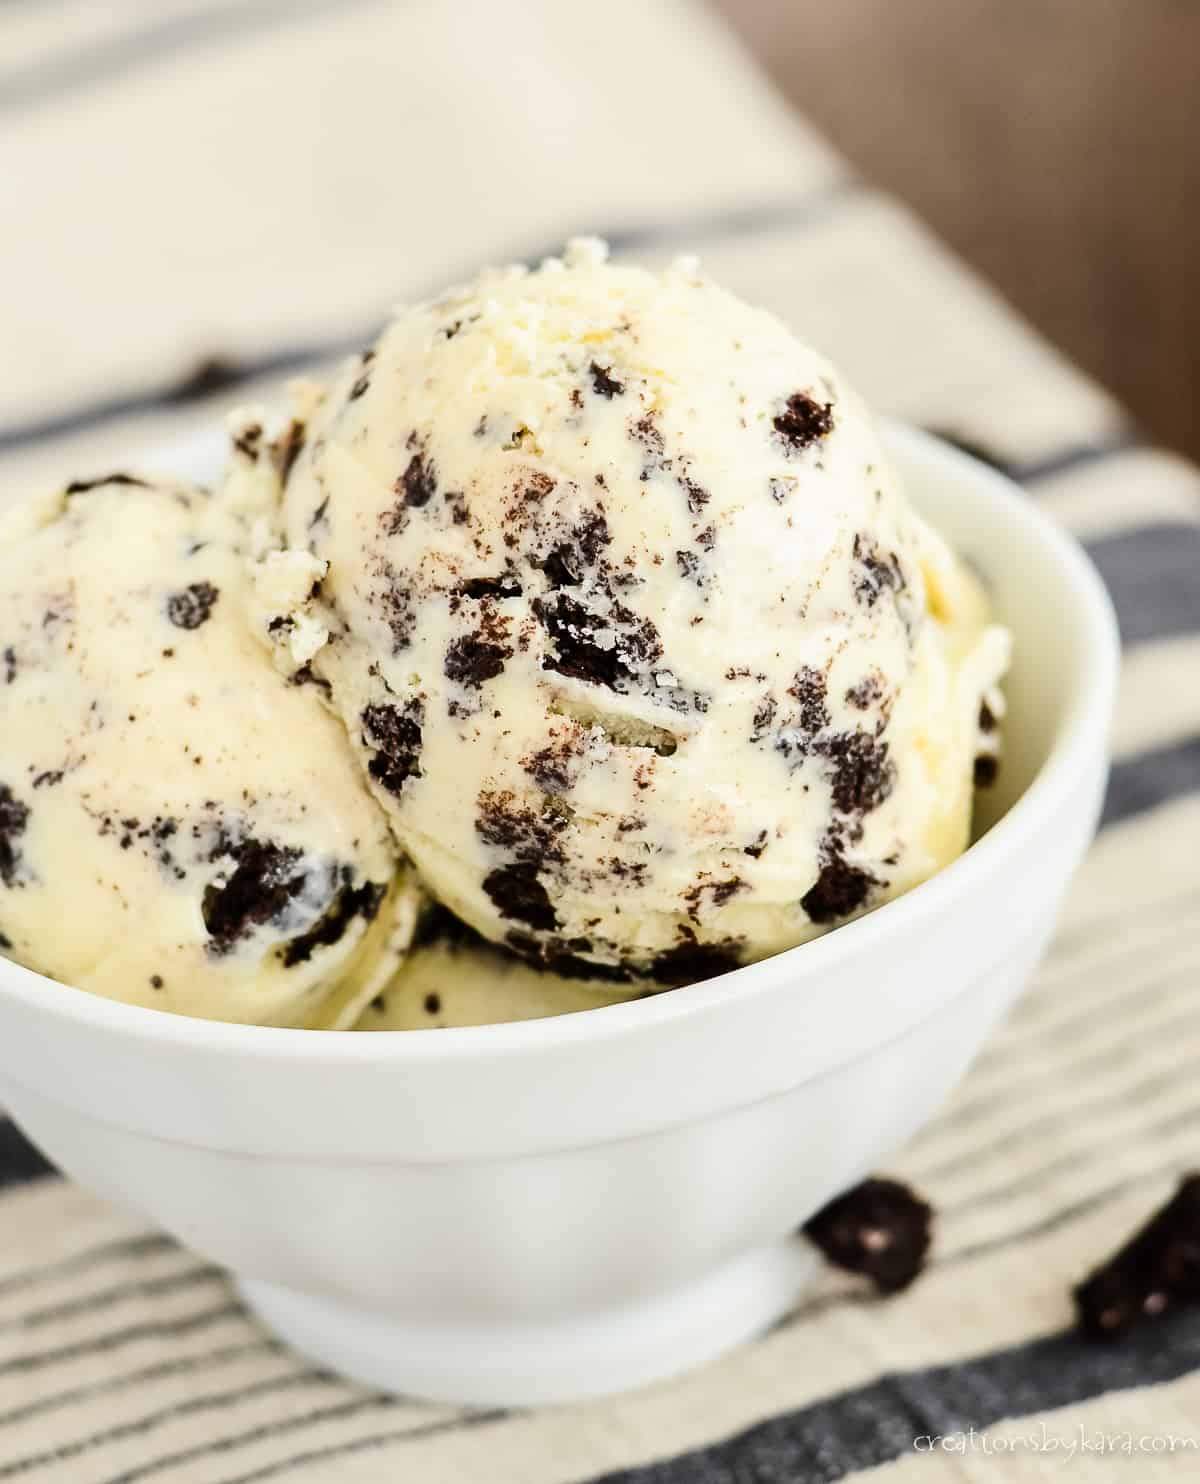
Creations by Kara

Creating a home. . . with a can of spray paint in one hand and a measuring cup in the other.

Feeding my Plants with Whitney Farms Plant Food

| 0 comments

This is a Sponsored post written by me on behalf of Whitney Farms for SocialSpark. All opinions are 100% mine.

If you've been reading my blog for long, you know that I have somewhat of a black thumb. Yes, I can even manage to kill zucchini plants. And my house plants always look pathetic. I need all the help I can get in the gardening department.  So when I got the chance to try out some Whitney Farms® organic plant food, I was thrilled. (So were my plants.)

Whitney-Farms-Logo_Banner_New_C.jpg (6 documents, 6 total pages)

Whitney Farms® sent me a bag of all purpose organic plant food, as well as a bag that is specially formulated for  vegetables.

organic plant food

I will be using  the vegetable variety as soon as the weather cooperates and we can plant tomatoes. But for today I am trying out the all purpose variety on my sickly house plants in hopes of giving them a boost.

Whitney Farms has been in the gardening business for over 25 years, so they know a little about growing plants (unlike myself).  They have a full line of 100% natural plant foods and organic soil with no additives, nothing artificial, just ingredients from the Earth. As a bonus, they have little or no dust, no stinky manure smell (hooray!), and are very easy to apply.

My sad little houseplants are just screaming for some nourishment.

Here is specimen #1. Don't laugh, I know it looks like a hot mess.

whitney farms organic plant food

And specimen #2. Not quite as bad, but still nothing to brag about.

whitney farms organic plant food

After following the instructions on the bag, I sprinkled a couple of tablespoons of plant food on the soil around my plants, then gave them a good watering.

whitney farms organic plant food

That's it! I love it that the plant food doesn't need to be mixed with water first! I need things to be quick and easy in the plant department.

I am excited to try the organic fruit and vegetable food in my garden because I know it is so much healthier for my family than conventional fertilizers.

If you'd like to try some, visit Whitney Farms® for a $3 coupon!

Visit Sponsor's Site

Share this:
Share this page via Email Share this page via Stumble Upon Share this page via Digg this Share this page via Facebook Share this page via Twitter

Look What I Made! Linky Party 5-2-2012

| 17 Comments

linky-party

Welcome back ladies! Thanks to everyone who links back. The more people who join the party, the more exposure your projects will get. So PLEASE link back to the party! It helps all of us!

Here are the rules for playing nice:

1-Add a link to your specific post, not the main page of your blog. Please don't link the same project week after week. Everyone wants to see new stuff!
2-Add a short description of your project Ex: (table makeover)
3-Link back to this party from your post. It's the nice thing to do.
4-Visit some of the other links and make sure to leave nice comments. You know we all love them. :)

You know the drill. Link up your latest projects and recipes. No more than 2 link-ups per person please.

The most viewed link last week was:
Dollar Store Frames from Today's Fabulous Finds
diy-decorating-link party

Here are a few other highlights from the party:

Strawberry Trifle from Woven Home
decorating-linky partyFirst Quilt from Scattered Thoughts of a Crafty Mom
craft-linky partyWoven Word Bracelets at Happy Hour Projects
decorating-linky partyWatermelon Shark Bites from Lifestyles of the Stay at home mom
linky party-recipeMelt in Your Mouth Baked Chicken from Feeding My Temple
recipe-linky party

Congrats ladies! Feel free to grab a "featured" button. :)

Thanks to my fabulous sponsors!!:

The Plaid Barn: amazing daily deals on craft supplies and DIY kits
Scrap 4 Hire: digital scrapbook kits, classes, and retreats
Peek a Boo Patterns: cute sewing patterns for little ones
My Memories Suite: digital scrapbooking software (use code STMMMS96603 for $10 off)

Share this:
Share this page via Email Share this page via Stumble Upon Share this page via Digg this Share this page via Facebook Share this page via Twitter

Flower Lampshade {Thrifty Decorating}

| 12 Comments

diy-flower-lampshade
I mentioned last week that none of the rooms in my house are 100% finished. I am trying to remedy that. My living room is almost completely decorated. I just need to put together some vignettes on my tables, and put actual pictures in the frames hanging on the wall. (Don't laugh. Empty frames are all the rage right now anyway, right?)

I've had a lamp on my side table for months that I bought at a yard sale last year for $5. I spray painted it, but it's been needing a lampshade facelift for ages. I am happy to say that I finally got it finished. Woot woot!

This is what it looked like before:
diy-lampshade-makeoverAnd now, after a few coats of spray paint and what seemed like a gazillion flowers, here she is now:
diy-project-lampshadeQuite an improvement, wouldn't you say? (How did I not notice that pillow form stuck behind the couch when I snapped this photo? Sheesh.) Although I do have to admit that when I see it on the black table, I'm kinda thinking I might like it white. But I'm not sure. Any thoughts?

If any of you want to make a similar lampshade, I'm going to share a few tips with you. I'm not going to do a full tutorial for the singed flowers, because there's already dozens out there and I don't wanna re-invent the wheel. Basically you cut decreasing sizes of circles, singe the edges, and sew them together with a bead.
But when you are making them in mass amounts like you need for this lampshade, there are a few things you need to do differently to save yourself some time.

Before you decide to take this on, you might wanna know that my lampshade has about 200 flowers on it. All five layers. That's 1,000 circles that you have to cut out and singe. So yes, it's gonna take awhile. But on the plus side, you can sit and watch tv while doing it. :)

Flower Lampshade Tips

-Decide the size you want your flower, and cut 5 paper circles in decreasing size. Put each circle in a ziplock bag. When you cut your fabric, cut one size at a time, and put all the circles in the bag with the pattern. Singe one bag at a time and put them all back in the back when you are done. If you don't keep the circles separated, you will have a ginormous mess of slippery fabric taking over your life. Trust me.

-Cutting multiple circles at once saves a bucketload of time! I discovered that the organza fabric rips just great, so I used that to my advantage. Just take one of your circles and lay it on the edge of your fabric. Use your scissors to make a snip in the edge of the fabric slightly wider than your circle.
diy project-flower lampshade
-Now pull the fabric apart at the snip and rip a strip of fabric. Fold it over and over on itself, making sure you make the folds spaced far enough apart to fit the circle. When you are all done, you can cut out a bunch of circles all at once.
diy project-flower lampshade-When you get done, check the edges of the circles to make sure they all got cut. Sometimes you will end up with edges that are still folded and need to be snipped apart. No biggie. When you have the folded edges snipped, your stack  will lay nice and flat like the photo below. Stuff them into your ziplock bag.
diy project-flower lampshade-Some people use a lighter to singe the edge of their circles. I always use a candle, I think it is much easier. With this amount of flowers, your hand would totally cramp up holding a lighter. No good!

-I was originally going to glue my flowers on in straight rows, but that left little gaps in the corners where the dirty shade showed through. So if you want straight rows, you need to cover your lampshade with fabric first. I decided to just overlap my flowers to hide the gaps. This method does use more flowers though. So choose the option that you like the best, and just start hot gluing them on.
diy project-flower lampshadeAnd because I just can't resist a good before and after shot, here ya go:
lamp before and afterI know some of you will ask how much fabric you need for this project. I'm not exactly sure how much because I started with a bunch of  scrap fabric, but ended up buying two more yards. So maybe three yards?

Share this:
Share this page via Email Share this page via Stumble Upon Share this page via Digg this Share this page via Facebook Share this page via Twitter

Snickerdoodles {Cookie Recipe}

| 1 Comment

There are a few cookie recipes that we make over and over at our house. Chocolate chip, peanut butter, chocolate mint, and snickerdoodles. I was stunned to look in my archives and see that I have never posted a recipe for Snickerdoodles. What the? How did that happen? I blame mom brain. ;)

Snickerdoodles are basically a sugar cookie rolled in yummy cinnamon sugar goodness. With one exception–the addition of cream of tartar. It acts as a leavening, but it also gives them the signature tang that makes snickerdoodles, well, snickerdoodles. So don't try leaving it out or subbing in another ingredient like baking powder. Your cookies will no longer be Snickerdoodles, they'll just be cinnamon sugar cookies. Which is totally fine, just don't be calling them something they're not or I'll have too send the cookie police to your house to confiscate them. (If they happen to look exactly  like my profile picture, it is purely coincidence.) snickerdoodles-cookie-recipe
Snickerdoodles
1 cup butter or margarine, softened
1 1/2 cups sugar
2 large eggs
3 1/4 cups flour
2 tsp cream of tartar
1 tsp baking soda
1/4 tsp salt
1/4 cup sugar + 1 Tbsp cinnamon
Cream butter and sugar till light and fluffy, about 3 minutes. Beat in eggs till well combined. Combine flour, cream of tartar, soda, and salt. Stir into butter mixture till dough is well combined. Mix together cinnamon and sugar in a small bowl. Roll dought  into balls and roll in the cinnamon/sugar mixture. Place on lightly greased baking sheets about 2" apart. Bake at 375° for about 10 minutes. Let cool for a couple of minutes on the pan before removing to cooling racks.

-Makes about 2 1/2 dozen cookies

Share this:
Share this page via Email Share this page via Stumble Upon Share this page via Digg this Share this page via Facebook Share this page via Twitter